background image

3. OPERATION: 

1

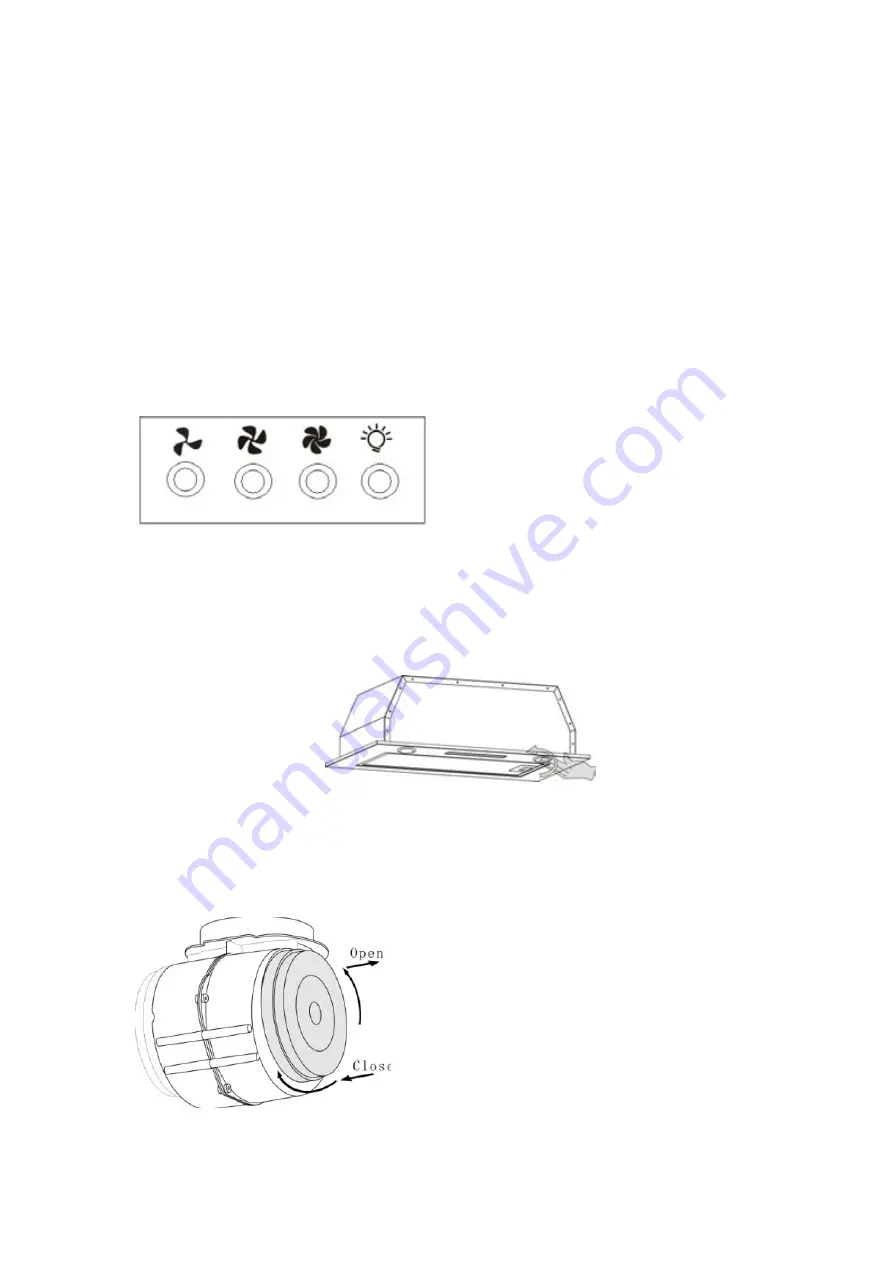
Push the low button, indicated by a fan with 3 blades, and the motor will run 

at  a  low  speed.  An  indicator  light  will  also  illuminate. Push  it  again  and  the 

motor will stop. 

2

Push the medium button, indicated by a fan with 4 blades and the motor will 

run at a medium speed. An indicator light will also illuminate. Push it again and 

the motor will stop. 

3

  Push the high button, indicated by a fan with 5 blades and the motor will 

run at a high speed. An indicator light will also illuminate. Push it again and the 

motor will stop. 

4) Push the light button; the indicating light on, and the two lighting lamps will 

come on. Push it again and the lamps will turn off. 


4. LIGHT REPLACEMENT 

To change the light, press the lamp cup, take out the bulb counter-clockwise. 

And then Insert a new lamp. 


5. CHARCOAL FILTER INSTALLATION 

To remove or install the charcoal filter, twist the charcoal filter in the direction 

shown below: 


Summary of Contents for SPUM60X

Page 1: ...User Instruction Manual SPUM60X SPUM90X ...

Page 2: ...CONTENTS 1 WARNING 2 INSTALLATION INSTRUCTIONS 3 OPERATION 4 LIGHT REPLACEMENT 5 CHARCOAL FILTER INSTALLATION 6 MAINTENANCE 7 ATTENTION 8 TROUBLESHOOTING 1 ...

Page 3: ...ave switched your cooker hood off Do not flambé under the range hood Clean the cooker hood according to the instruction manual and keep the cooker hood away from the danger of flames If there is any fault with your cooker hood please call the customer service number in the Warranty Card Please keep the room adequately ventilated when your cooker hood and gas hob are working Do not exhaust the gas ...

Page 4: ...e between the edge of the hole and the edge of the cupboard edge is at least 35mm 3 Take off the filter and the two lamps Remove the two screws on the panel And then take off the panel Installation Method 1 1 Use four ST4 8mm screws to fix the mounting bracket onto the hood Then put two ST4 30mm screws into the wall Hang the hood onto the wall 2 Use ST4 14mm screws to tighten the hood to the cabin...

Page 5: ...the hood onto the cabinet from the sides Method 3 1 Use four ST4 8mm screws to fix the mounting bracket onto the hood Then put two ST4 30mm screws into the wall Hang the hood onto the wall 2 Use four M4 35mm screws eight washers and four nuts to fix the hood onto the cabinet from the top And then connect the ducting pipes to the outlet Install the lamps and filter back to the hood 4 ...

Page 6: ...top 3 Push the high button indicated by a fan with 5 blades and the motor will run at a high speed An indicator light will also illuminate Push it again and the motor will stop 4 Push the light button the indicating light on and the two lighting lamps will come on Push it again and the lamps will turn off 4 LIGHT REPLACEMENT To change the light press the lamp cup take out the bulb counter clockwis...

Page 7: ...od two You can also put the filter into the dishwasher with detergent for cleaning Set the temperature at around 60 2 To protect the main body from corrosion over a long period of time the rangehood should be cleaned with hot water plus soap or non corrosive detergent once a week Do not use grinding detergent or it will damage the body 3 Keep the motor and other spare parts free from water as this...

Page 8: ...SPUM60X Dimensional Drawing SPUM90X Dimensional Drawing ...

Page 9: ...tly sealed Take down the one way valve and seal with glue Leakage from the connection of U shaped section and cover Take U shaped section down and seal with soap or paint Shake of the body The leaf damaged and causes shaking Replace the leaf The motor is not tightly hanged Lock the motor tightly The body is not tightly hanged Fixed the body tightly Insufficient suction The distance between the bod...

Page 10: ...ginal purchaser h damage caused by power outages or surges i damage caused by pests eg rats cockroaches etc 7 The following products unless stated otherwise have warranty periods as follows Microwave ovens 12 month replacement warranty with 24 months on the microwave magnetron Kettles toasters and other small appliances not stated below 12 month replacement warranty Waste disposers 12 month parts ...

Reviews: