15
smithandnoble.com
16
800 .248 .8888
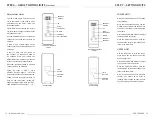
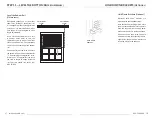
14 CHANNEL REMOTE
FRONT
CHANNEL
DISPLAY
UP
STOP/
FAVORITES
DOWN
C
CHANNEL –
REMOTE BACK
LIMIT
BUTTON
CONFIRM
BUTTON
STEP 9 — ADVANCED PROGRAMMING
Replace Original Remote, Add
Additional Remote or Add Shade
to an Additional Channel
1. Select the channel that you want to
program using the CHANNEL selector
button.
2. Press the SETTING button on the
motor until the motor starts to beep.
Release the button immediately after the
beeps start. The motor will make 4 fast
beeps followed by 5 long beeps. Press
the CONFIRM button on the remote
anytime during the series of long beeps.
It must be pressed before the last long
beep. The motor will respond with 3 fast
beeps confirming that the shade has
been linked.
3. Repeat steps 1-2 to program the rest of
the channels on a multi-channel remote.
(It is recommended to only link one
shade per channel unless it is absolutely
necessary to group shades other than
the “all” channel. This simplifies adjusting
limits and setting favorites.)
4. All shades linked to a remote will
also automatically be programmed to the
“ALL” channel.
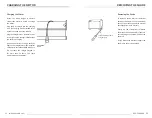
P
Remove shade
from the window to
access the settings
button.
SETTINGS
(black button)
REMOTE BACKS
LIMIT
BUTTON
CONFIRM
BUTTON
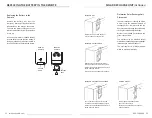
14 CHANNEL REMOTE
FRONT
CHANNEL
DISPLAY
UP
STOP/
FAVORITES
DOWN
CHANNEL
RAIL
SELECTOR
STEP 9 — ADVANCED PROGRAMMING
Remove a Shade from a Remote
or Channel and Link it to a
Different Remote or Channel
1. Select the channel that you want
to unlink using the CHANNEL selector
button.
2. Press and release the CONFIRM
button. Continue to press and release
until the motor beeps 8 times.
Link the motor to the new remote or
channel
1. Follow the steps for replacing the
remote on the previous page.

