3
4
smithandnoble.com
800.248.8888
First, make sure you have all the parts and tools required to install your shades.
ALL THE HARDWARE YOU’LL NEED:
Pencil, screw-driver, ¼” nut driver, level, and a drill with a
1
⁄
16
” drill bit.
Then find wooden studs where you’ll want to attach the brackets; if you need to mount your
shades to wallboard or plaster, use a secure fastener designed for hollow wall applications. For
metal surfaces, pre-drill holes and use the included screws. For concrete, stone, brick, or tile
surfaces, use a masonry drill and appropriate plugs, anchors, or screws.
It’s important when selecting a fastener to make sure it’s designed to support the weight of the
shade . Follow the fastener manufacturer’s instruction from there on out .
Getting Started
Step 1 — Parts & Tools
Overview
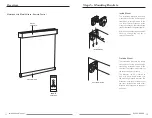
Motorization with No Headrail -
Remote Control
ROLLER
SHADE
BRACKET
BRACKET
1 2 3 4 5
REMOTE
CONTROL
BOTTOM BAR
BRACKETS FOR SHADES
WITH METAL VALANCE
HOLD DOWN
BRACKET
(OPTIONAL)
EXTENSION &
SIDE BRACKET
(OPTIONAL)
SCREWS
PENCIL & SCREWDRIVER
(NOT INCLUDED)
POWER DRILL & LEVEL
(NOT INCLUDED)
CHARGER
CASSETTE
MOUNTING
BRACKET
SPACER
BLOCK
(OPTIONAL)
BRACKET
FOR SHADES
WITHOUT
HEADRAIL
METAL VALANCE
BRACKET COVER
(OUTSIDE MOUNT ONLY)
NO HEADRAIL BRACKET
COVERS OUTSIDE MOUNT
(OPTIONAL FOR INSIDE MT)
METAL
VALANCE
CLIP
BRACKETS FOR
DUAL ROLLER SHADES
BRACKET COVERS
(OUTSIDE MOUNT)


