Page 7
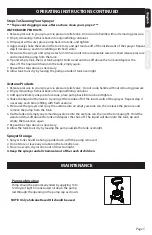
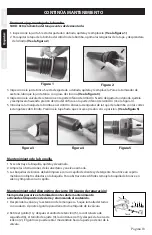
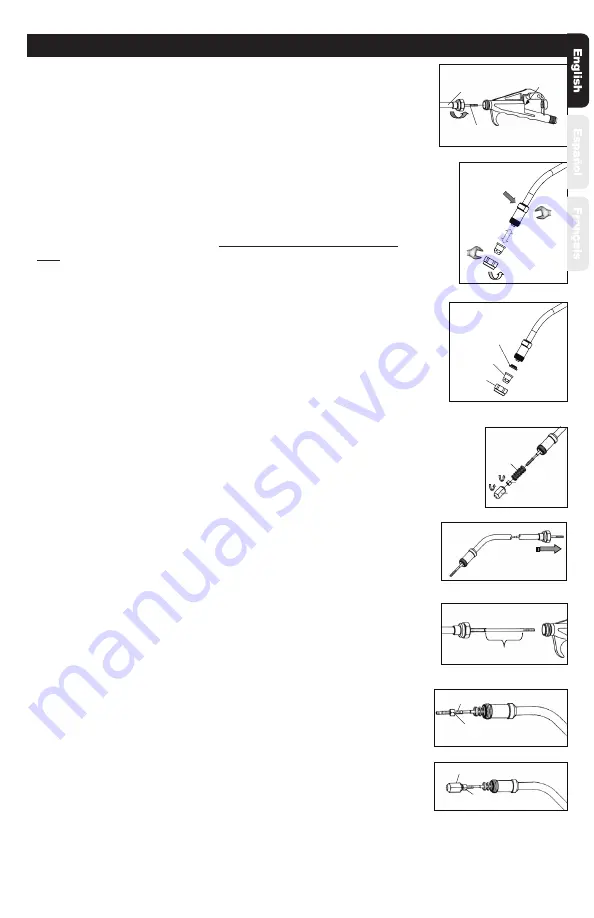
3. Unscrew the extension at the front of the valve. The extension can be pulled
away from the valve along with the interior steel cable.
4. Packing washers (white) that were at the end of the cable will remain inside
the valve. Carefully dislodge and remove these washers.
5. Remove the Cap Nut and Nozzle Tip from the end of the extension, be
careful to keep the Soft Seat Gasket.
Use 2 wrenches to loosen the Cap
Nut:
one (9/16”) to hold the extension, and a second to loosen the Nut.
Note: The extension may become twisted and unusable unless 2
wrenches are used to remove the nut. Inspect the soft seat
gasket, replace if damaged or worn. Replace the nozzle tip,
if necessary.
Cable
Extension
Packing
Washers
9/16 Wrench
Soft Seat
Gasket
Nozzle Tip
Cap Nut
MAINTENANCE CONTINUED
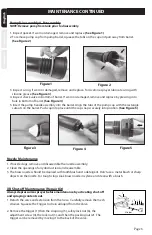
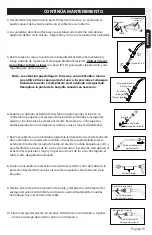
6. Push the cable out the front of the Extension to expose the Spring, the small
Lock nut and the Seat Stem. Unscrew the Seat stem and Lock nut, and slide off
the Spring. Place these small pieces in a closed container (they are easily
misplaced).
7. Remove the stainless steel cable by pulling it slowly through the back end of
the Extension – you cannot pull the cable through the front of the Extension.
The threaded end of the cable at the nozzle end is short and easily passes
through the curve in the extension. The end of the cable at the valve end is
long and will not pass through the curve. Replace the cable if it is worn or
damaged.
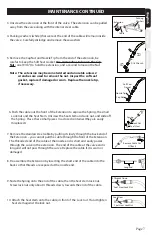
8. Re-assemble the Extension by inserting the short end of the cable into the
back so that threads are exposed at the nozzle end.
Remove Cable Out
Of Back.
Spring
Lock Nut
Seat Stem
Long End
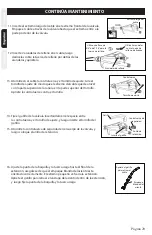
9. Slide the Spring onto the end of the cable, then the Seat stem lock nut.
Screw lock nut only about 4 threads down, towards the end of the cable.
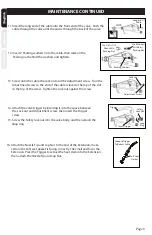
10. Attach the Seat stem onto the cable, in front of the Lock nut. Hand tighten
Seat stem against the lock nut.
4 Threads Down
Seat Stem Lock Nut
Seat Stem
Seat Stem Lock Nut

