Page 6
Pump Disassembly & Reassembly
NOTE: Remove pump from tank prior to disassembly.
Nozzle Maintenance
1. If nozzle clogs, remove and disassemble the nozzle assembly.
2. Clean the openings of any obstructions and reassemble.
3. The brass nozzles should be cleaned with toothbrush and detergent. Don’t use metal brush or sharp
objects on the nozzle. For tough clogs soak brass nozzle in xylene and clean with a brush.
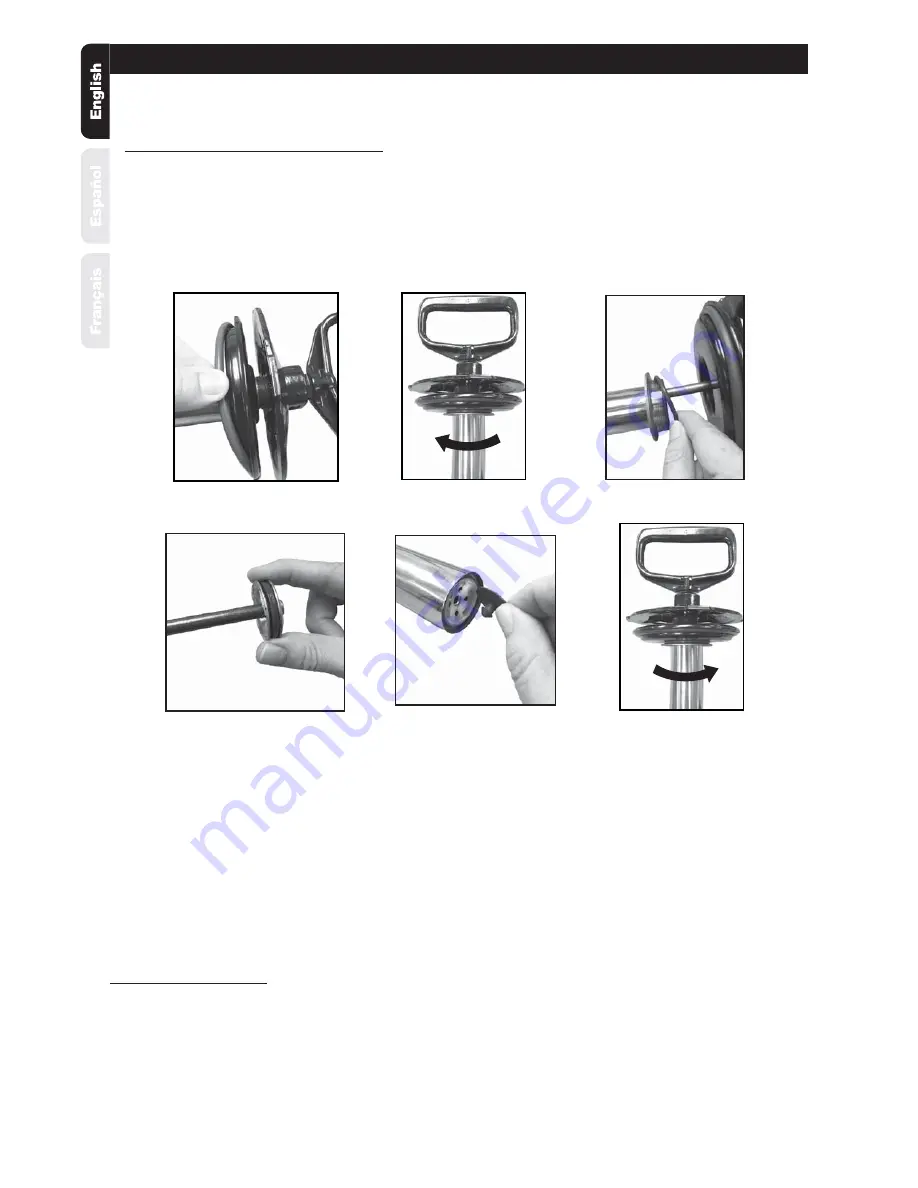
1. Inspect tank cover o-ring. If worn or damaged, remove and replace.
(See Figure J)
2. To remove tank cover from pump barrel, while fi rmly gripping tank cover, grasp pump barrel and
unscrew by turning counterclockwise as shown.
(See Figure K)
A strap wrench may be required to
loosen barrel.
3. Inspect barrel o-ring. If worn or damaged, remove and replace. Lubricate o-ring with petroleum jelly.
(See Figure L)
4. Inspect piston o-ring. If worn or damaged, remove and replace. Lubricate o-ring with petroleum jelly.
(See Figure M)
5. Inspect check valve in bottom of barrel. If worn or damaged, remove and replace by pressing into
hole in bottom of barrel.
(See Figure N)
6. Insert the pump handle/piston assembly into the barrel. While fi rmly gripping the tank cover, thread
the pump barrel into the cover and tighten by turning clockwise.
(See Figure P)
A strap wrench may be
required to tighten barrel.
Figure K
Figure J
Figure L
Figure M
Figure N
MAINTENANCE CONTINUED
Figure P


