90
Accessories
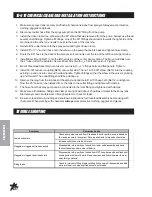
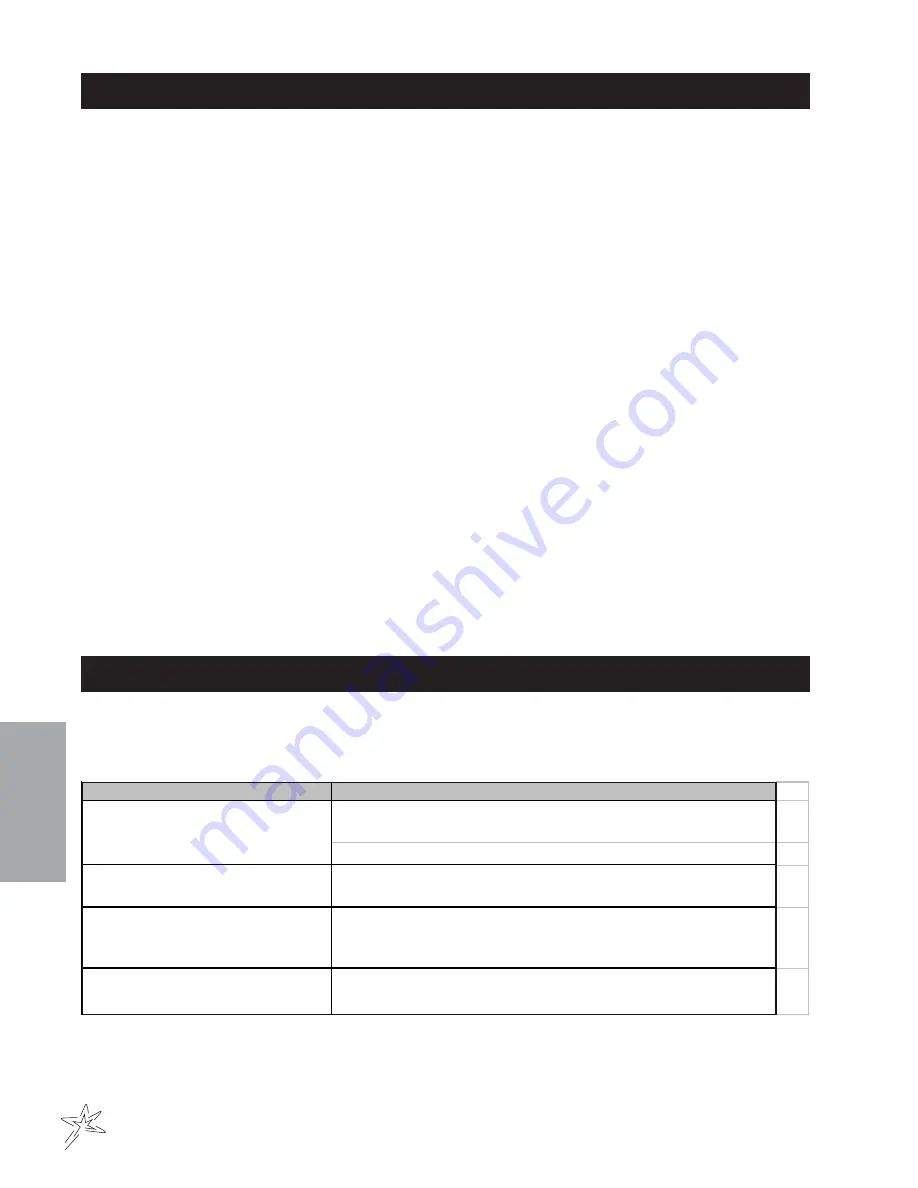
Symptom
Corrective Action
Check pump pressure and flow. Cleanload Eductor performance is based on
flow and pressure to the system. Note requirements for high eduction rates.
Increase outlet hose size back to tank.
Plugged or clogged bottle rinse nozzle
Disassemble rotary portion of nozzle from lower valve assembly and back
flush until nozzle ports are clear of debris.
Plugged or clogged tank rinse nozzle
Disassemble rotary portion of nozzle from NPT hose barb and back flush until
nozzle ports are clear of debris. Remove screen and flush with water to clear
away foreign material.
Fitting leaks
Check for cracks in fitting. Replace fitting if necessary. Disassemble and add
more joint seal in compound if leak occurs on threads.
Low eduction rate
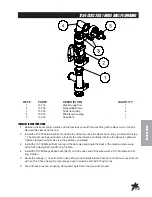
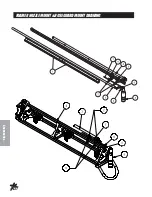
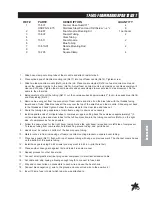
15-619 CHEMICAL CLEANLOAD INSTALLATION INSTRUCTIONS
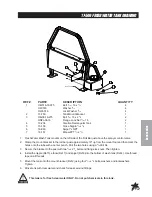
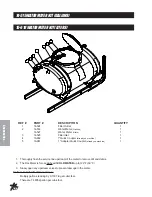
1. Make sure sprayer tank is empty and flush all chemical residue from sprayer. Always wear protective
clothing, goggles and gloves.
2. Disconnect outlet hose from the spray pump then the 90° fitting from the pump.
3. Install the close nipple, tee, elbow and the 90° elbow that was removed from the pump. Always use thread
sealant on all fittings. Tighten all Fittings. One of the 90° fittings should point towards the right side of the
machine and the other one needs to point to the back of the machine.
4. Reinstall the outlet hose onto the spray pump and tighten hose clamp.
5. Install 88" of 1
1
/
4
" suction hose onto the elbow on the pump that points back and tighten hose clamp.
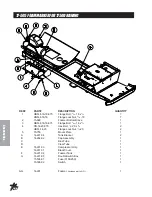
6. Route the 88" hose to the back of the sprayer so it connects over the top of the left boom support tube.
7. Install Mixer Mount (Ref 7) onto the left hand side of the center boom section. The Mount will slide over
the 2" tube under the actuator. Secure Mixer Mount with
3
/
8
x 3 bolt and lock nut. Tighten.
8. Mount Cleanload Assembly onto mixer mount using
5
/
16
x
3
/
4
flange bolts and flange nuts. Tighten.
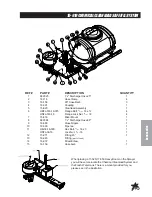
9. Install 18-391 reducer coupling (Ref 4) onto outlet side. Then a 16-156 90° elbow (Ref 3) into the coupling
pointing up and one into valve with yellow handle. Tighten fittings so that the elbow in the valve is pointing
up and forward. The outlet fitting should be pointing up.
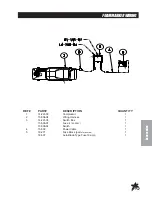
10. Remove the plug from the top back of the spray tank and install 16-159 hose barb (Ref 12) and tighten.
Now the 25" hose can be installed from the tank to the outlet fitting and tighten with clamps.
11. The hose from the spray pump can be connected to the inlet fitting and tightened with clamps.
12. Make sure all hardware, fittings and clamps are tight. Add about 25 gallons of water to the spray tank.
Start sprayer and circulate water through system to check for leaks.
13. Be sure to read start up, loading and shutdown instructions for Cleanload Assembly before using with
chemicals. When working with chemicals Always wear protective clothing, goggles and gloves.
TROUBLE SHOOTING
Summary of Contents for 17-500
Page 14: ...12 Diagrams HYDRAULICDIAGRAM ...
Page 16: ...14 Parts BODY FRAMEDRAWING ...
Page 18: ...16 Parts NOSE CONE DRAWING ...
Page 20: ...18 Parts NOSE CONE DRAWING ...
Page 22: ...20 Parts FRONT AXLE DRAWING ...
Page 24: ...22 Parts OILANDFUELTANKDRAWING ...
Page 26: ...24 Parts SEATPANEL DRAWING ...
Page 28: ...26 Parts ENGINE PUMPSANDEXHAUSTDRAWING ...
Page 30: ...28 Parts ENGINE PUMPSANDEXHAUSTDRAWING ...
Page 32: ...30 Parts SPRAYPUMPDRAWING ...
Page 34: ...32 Parts TANKDRAWING TURBO QUADAGITATORDRAWING ...
Page 36: ...34 Parts PARKBRAKEANDREARAXLEDRAWING ...
Page 38: ...36 Parts 15 301 ORBITROL DRAWING ...
Page 40: ...38 Parts 77 239 EATON HYDROSTATIC PUMP DRAWING DIESEL ...
Page 42: ...40 Parts 16 998 HYPRO PUMP DRAWING ...
Page 44: ...42 Accessories 1752D PLUMBING DRAWING RAVEN 440 ...
Page 46: ...44 Accessories 1754D PLUMBING DRAWING RAVEN 203 ...
Page 53: ...51 Accessories NOTES ...
Page 54: ...52 Accessories 17 503 20 SPRAY BOOM DRAWING ...
Page 56: ...54 Accessories 17 503 20 SPRAY BOOM DRAWING ...
Page 60: ...58 Accessories 15 493STAINLESSSTEEL18 AUTOBOOMDRAWING ...
Page 64: ...62 Accessories 17 525 HEAVYBOOM ...
Page 66: ...64 Accessories 17 55015 SMITHCOSUPERBOOM ...
Page 70: ...68 Accessories 16 906ELECTRICHOSEREELDRAWING ...
Page 74: ...72 Accessories 16 129MANUALHOSEREELDRAWING ...
Page 82: ...80 Accessories 17 505FOAMMARKERFOR1750DRAWING ...
Page 84: ...82 Accessories FOAMER NOZZLEMOUNT HOSEGUARDMOUNTDRAWING ...
Page 94: ...92 Accessories NOTES ...


