12
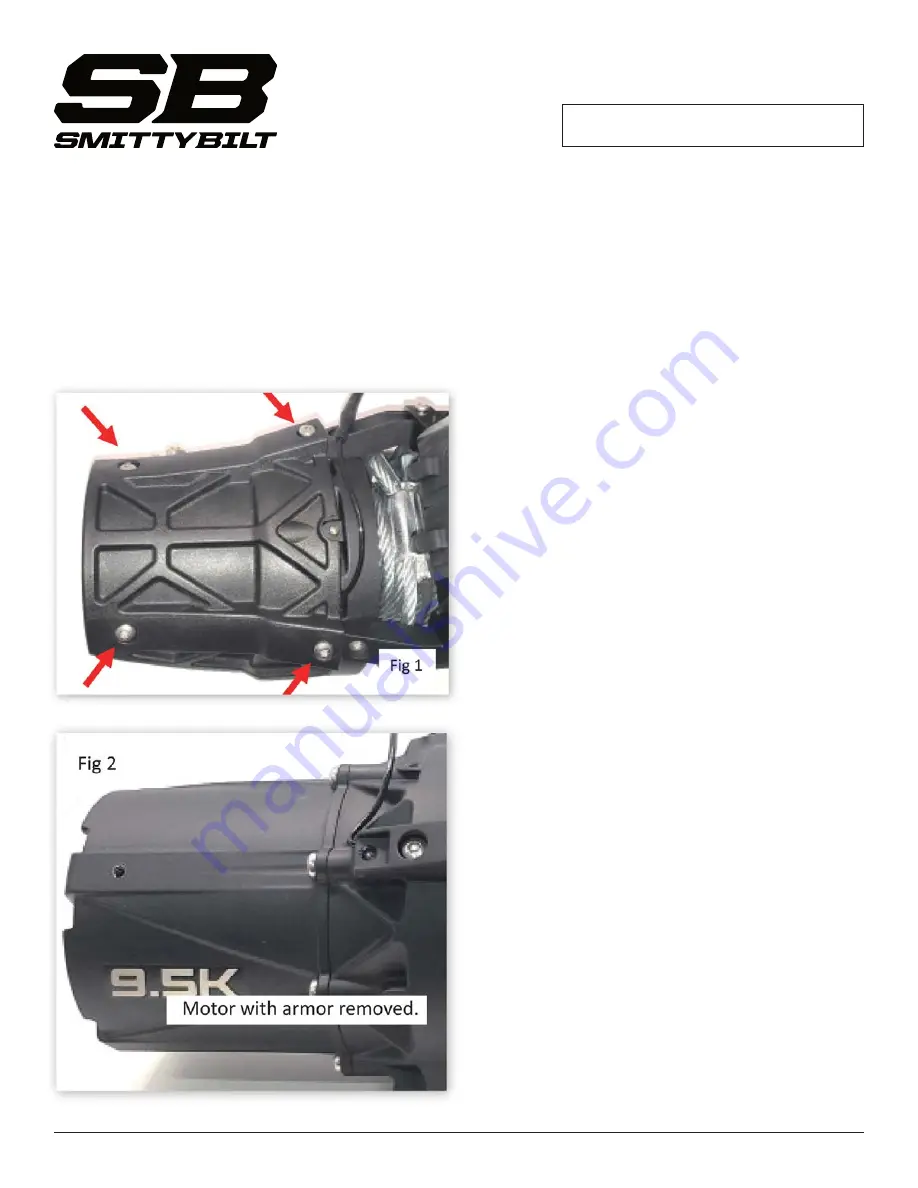
XRC Gen3 winches feature removable high-impact plastic armor to protect the motor and gear box.
They can be permanently removed to better winch clearance, or they can be temporally removed so
they can be custom painted to add some contrasting color to the front of your vehicle. T-30 torx bit and
4mm Allen wrench are needed to remove the armor plates.
Note: Painting HDPE requires prep work for proper paint adhesion. Contact your local paint supplier
for the recommended adhesion promotors, primers and paint.
Armor Plate Removal
STEP 1: Remove button head bolts, holding down
the armor plates on to the motor (Fig. 1), then gently
slide the plate to the left to remove it (Fig 2).
Photos on following page...
STEP 2: Remove button head bolts, holding down
the armor plates on to the gear box (Fig. 3), remove
the Allen head bolt holding the gear lever in place
(Fig 4).
Use a 4mm Allen wrench and completely remove
screw. Not orientation of lever so it can be installed
in the same position, then pull straight up on the
gear lever. Gently slide the plate to the right to
remove it (Fig 5/6).
STEP 3: If you are planning on running no armor,
it is crucial to reinstall four of the short bolts you
removed in order to properly secure the tie bar/
rod. Re-install one button head bolt into each of the
empty tie rod mounting holes. Take care that you do
not over-tighten the bolts
(Fig 7).
STEP 4: To re-install, simply slide the plate back on
to the winch and secure with the button head bolts
you removed in prior steps. Do not over-tighten
bolts.
Summary of Contents for 97612
Page 1: ...1 XRC GEN3 INSTRUCTION MANUAL ...
Page 9: ...9 INSTALLATION INSTRUCTIONS ...
Page 13: ...13 Armor Plate Removal ...
Page 24: ......


