background image


19


4.25 MOTORIZED TREADMILL 


Visit us at: 

www.smoothfitness.com


COMPUTER INSTRUCTIONS 

Buttons Function 

START button


Press the button to start the computer or start the program. 
The initial speed of 0.8 km/h / 0.5 mph 
 

STOP / ENTER button  

Press to confirm a program and preset function values under setting mode. 
Press to quit preset program and function values after completing a single program. 
Setting procedure: returns to beginning of setting mode before pressing the START key. 
Press to stop exercise during workout time. 


SPEED Up button 

Press the button to increase the speed or set the program. 


SPEED Down button


Press the button to decrease the speed or set the program. 


POWER ON  

After connecting the power cord switch the power button on. The LCD screen will light up.  


SAFETY KEY 

The safety key must be inserted into the slot on the console in order to operate the treadmill. Always insert the 
safety key and attach the clip to your clothing at your waist before beginning your workout. 
If you should encounter problems and need to stop the motor quickly, simply pull on the cord to disengage the 
safety key from the console. To continue set the speed controller to stop and then reinsert the safety key into the 
console, then press start. 
 

SLEEP MODE 

When the power is ON the computer will automatically enter POWER OFF MODE if it is left idle for 5 minutes, 
press any button to return to the power on status when the computer is in the POWER OFF MODE.  

 
COMPUTER OPERATION 

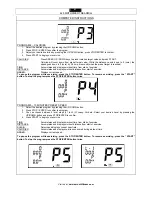
Power on – “P1” (manual) will flash in the LCD display. Press SPEED UP / DOWN keys for desired program. 
Please refer to the following instructions for different program options. 


Summary of Contents for 4.25

Page 1: ...OWNER S MANUAL 4 25 MOTORIZED TREADMILL USER WEIGHT LIMITATION 250lbs 110 kgs SERIAL NUMBER found on frame...

Page 2: ...away from the treadmill at all times The treadmill should not be used by persons weighing more than 250lbs 110 kgs Never allow more than one person on the treadmill at a time Wear appropriate exercis...

Page 3: ...t most hardware stores The manufacturer recommends a single outlet surge protector with a UL 1449 rating as a Transient Voltage Surge Suppressor TVSS with a UL suppressed voltage rating of 400V or les...

Page 4: ...free area around the unit for unobstructed operation Invite a friend Some of the assembly steps may require heavy lifting It is recommended that you obtain the assistance of another person when assem...

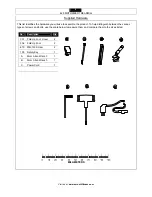
Page 5: ...assemble the product To help distinguish between the various types of screws and bolts use the scale below to measure them and compare them to the sizes listed No Description Qty 301 Fold Up Foot Cov...

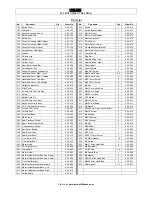
Page 6: ...15 Fold Up Grip Connect Rod 2 4 25 215 607 M4 40 mm Screw 2 4 25 607 216 Spring 2 4 25 216 608 M8 52 mm Bolt 4 4 25 608 217 Upright Lock Pin 2 4 25 217 609 10 Washer 5 4 25 609 218 Fold Up Grip Connec...

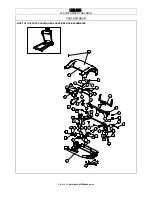
Page 7: ...7 4 25 MOTORIZED TREADMILL Visit us at www smoothfitness com PARTS DIAGRAM MOST OF THE PARTS SHOWN HERE HAVE BEEN PRE ASSEMBLED 110...

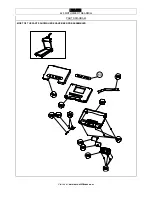
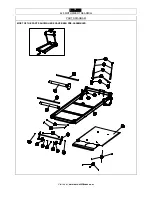
Page 8: ...itness com PARTS DIAGRAM MOST OF THE PARTS SHOWN HERE HAVE BEEN PRE ASSEMBLED 607 220 219 632 632 632 632 218 218 604 206 205 603 205 605 206 207 604 203 201 607 204 605 210 202 209 606 606 208 608 60...

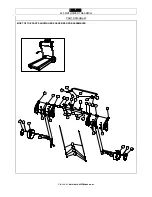
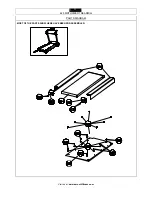
Page 9: ...HE PARTS SHOWN HERE HAVE BEEN PRE ASSEMBLED 616 401 418 602 602 602 623 413 412 411 630 627 623 410 631 307 614 406 405 407 405 403 402 609 621 618 619 617 417 618 404 629 624 625 622 406 307 618 628...

Page 10: ...10 4 25 MOTORIZED TREADMILL Visit us at www smoothfitness com PARTS DIAGRAM MOST OF THE PARTS SHOWN HERE HAVE BEEN PRE ASSEMBLED...

Page 11: ...11 4 25 MOTORIZED TREADMILL Visit us at www smoothfitness com PARTS DIAGRAM MOST OF THE PARTS SHOW HERE HAVE BEEN PRE ASSEMBLED...

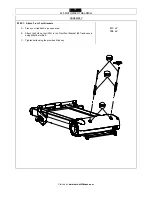
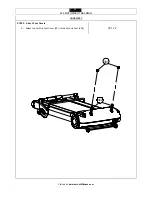
Page 12: ...othfitness com ASSEMBLY STEP 1 Attach Front Foot Brackets A Place your treadmill in an open area B Attach the Fold up foot 302 to the Front Foot Bracket 407 and secure using M8x30 mm Bolt C Tighten bo...

Page 13: ...13 4 25 MOTORIZED TREADMILL Visit us at www smoothfitness com ASSEMBLY STEP 2 Attach Foot Covers A Attach the Fold Up Foot Cover 301 to the Fold Up Foot 302 301 x 2 301 302...

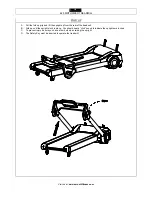
Page 14: ...nd lift the upright up from the rear of the treadmill B Fold up until the uprights lock in place You should hear a click sound to indicate the uprights are locked C To prevent injury be sure you have...

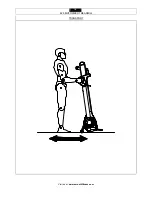
Page 15: ...15 4 25 MOTORIZED TREADMILL Visit us at www smoothfitness com TRANSPORT...

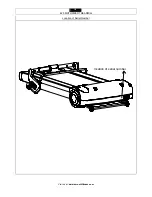
Page 16: ...16 4 25 MOTORIZED TREADMILL Visit us at www smoothfitness com Location of Serial Number location of serial number...

Page 17: ...ecked periodically for lubrication to ensure optimal treadmill performance Your treadmill should not have to be lubricated usually within the first 400 hours of use Every 2 months of operation lift th...

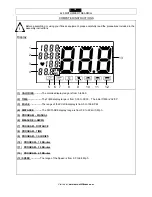
Page 18: ...The calories display range is from 0 to 999 2 TIME The TIME display range is from 0 00 to 99 00 The initial TIME is 32 00 3 PULSE The range of the PULSE display is from 0 to 199 BPM 4 DISTANCE The DI...

Page 19: ...the power button on The LCD screen will light up SAFETY KEY The safety key must be inserted into the slot on the console in order to operate the treadmill Always insert the safety key and attach the...

Page 20: ...get value While distance counts down to 0 zero speed goes down to 0 zero by 0 5 km per second when the preset target is reached TIME Accumulates and displays workout time from start of exercise CALORI...

Page 21: ...nt speed To pause the program while exercising press the STOP ENTER button To resume exercising press the START button To stop the program press the STOP ENTER button twice PROGRAM 5 15 MINUTES PRESET...

Page 22: ...To pause the program while exercising press the STOP ENTER button To resume exercising press the START button To stop the program press the STOP ENTER button twice PROGRAM 7 45 MINUTES PRESET SPEED 1...

Page 23: ...s Warranty shall be warranted for the unexpired portion of the Warranty applying to the original product Any technical advice furnished before or after delivery in regard to the use or application of...

Page 24: ...ou may be able to exercise only for a few minutes in your target zone However your aerobic fitness will improve over the next six to eight weeks Don t be discouraged if it takes longer It s important...

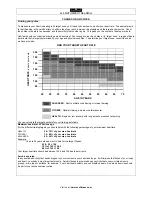
Page 25: ...etic conditioning or interval training FITNESS Optimal training aerobic or cardiovascular HEALTH Beginner low intensity with long duration produces fat burning You can calculate the target heartrate f...

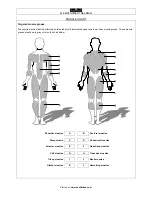
Page 26: ...s product will develop the upper and lower body muscle groups These muscle groups are shown in gray color on the chart below Shoulder muscles A B Pectoral muscles Bicep muscle C D Abdominal muscles Fo...

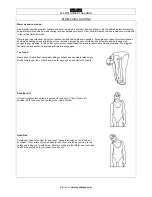
Page 27: ...more oxygen to your muscles At the end of your workout repeat these exercises to reduce sore muscle problems We suggest the warm up and cool down exercises on the following pages Toe Touch Slowly bend...

Page 28: ...ur groin as possible Gently push your knees towards the floor Hold for 15 counts Side Stretch Open your arms to the side and continue lifting them until they are over your head Reach your right arm as...

Page 29: ...Smooth Fitness 780 Fifth Avenue King of Prussia PA 19406 Toll Free Customer Service 1 888 800 1167 Website www smoothfitness com...

Reviews: