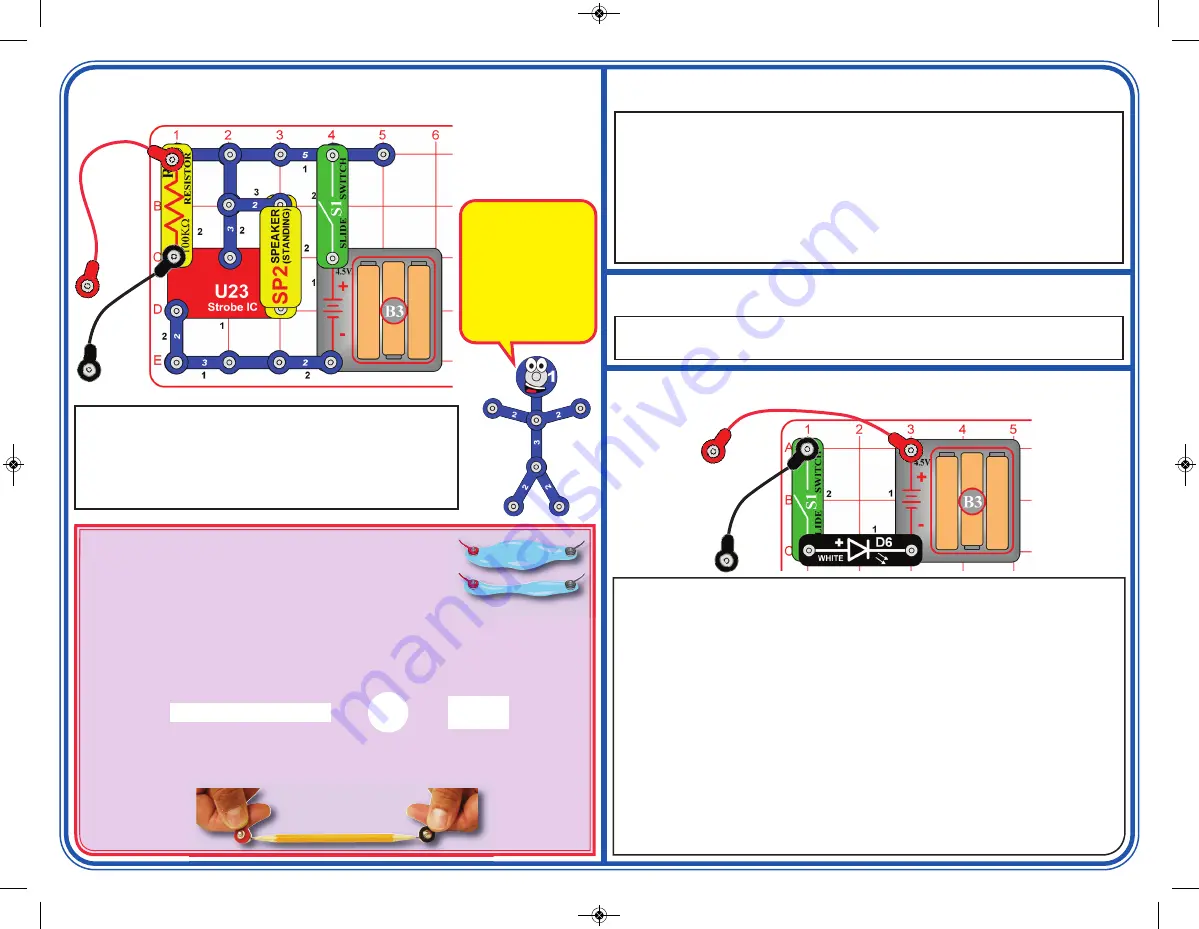
Build the circuit as shown; note that the speaker (SP2) is a tight fit
on the strobe IC (U23), but does fit. Turn on the switch (S1). Make
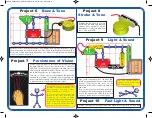
your parts using either the water puddles method (A), the drawn
parts method (B), or the pencil parts method (C). Touch the metal
in the jumper wires to your parts and hear the sound. See how the
sound changes for different shapes.
Project 11
Musical Shapes
Method A (easy):
Spread some water on the table into puddles
of different shapes, perhaps like the ones shown here. Touch the
jumper wires to points at the ends of the puddles.
Method B (challenging):
Use a SHARP pencil (No. 2 lead is best) and draw shapes,
such as the ones here. Draw them on a hard, flat surface. Press hard and fill in several
times until you have a thick, even layer of pencil lead. Touch the jumper wires to points
at the ends of the drawings. You may get better electrical contact if you wet the metal
with a few drops of water. Wash your hands when finished.
Method C (adult supervision and permission required):
Use some double-sided
pencils if available, or VERY CAREFULLY break a pencil in half. Touch the jumper wires
to the black core of the pencil at both ends.
Use the preceding circuit but touch the metal in the jumper wires snaps with your fingers.
Wet your fingers for best results. Your fingers will change the sound, because your body
resistance is less than the 100k
W
resistor (R5) in the circuit.
Next, place the loose ends of the jumper wires in a cup of water, make sure the metal
parts aren’t touching each other. The water should change the sound.
Now add salt to the water and stir to dissolve it. The sound should have higher pitch now,
since salt water has less resistance than plain water.
Don’t drink any water used here.
Project 12
Human & Liquid Sounds
Repeat projects 11 & 12 but replace the speaker (SP2) with the white LED (D6, “+” side
to the 2-snap wire).
Project 13
Liquid Strobe Light
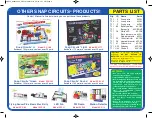
Build the circuit as shown, with the red &
black jumper wires initially hanging loose.
Turn on the switch (S1); the white LED
(D6) will be off, because the air separating
the ends of the jumper wires has very high
resistance to electricity. Touch the loose
ends of the jumper wires together and the
LED will be very bright. Next, connect the
loose ends of the jumper wires to the
resistors (RV & R5) and the speaker
(SP2), and see how bright the LED is.
Now make your parts using either the
water puddles method (A), the drawn parts
method (B), or the pencil parts method (C).
Touch the metal in the jumper wires to your
parts and see how bright the LED is.
Compare the LED brightness for different
shapes, and see how they compare to the
R5 and RV resistors.
Next, touch the metal in the jumper wires
snaps with your fingers. Wet your fingers
for best results. The LED should be dim,
because your body has moderate
resistance.
Next, place the loose ends of the jumper
wires in a cup of water, make sure the
metal parts aren’t touching each other. The
water should change the LED brightness.
Now add salt to the water and stir to
dissolve it. The LED should be brighter
now, since salt water has less resistance
than plain water.
Don’t drink any water used here.
Project 14
Make Your Own Parts
Long, narrow shapes
have more resistance
than short, wide ones,
so different sounds are
produced. The black
core of pencils is
graphite, the same
material used in your
resistors (R5 & RV).
SCP-14_022014.qxp_SCP-14 Instructions 3/7/14 2:37 PM Page 3


