background image


13

 of 

84


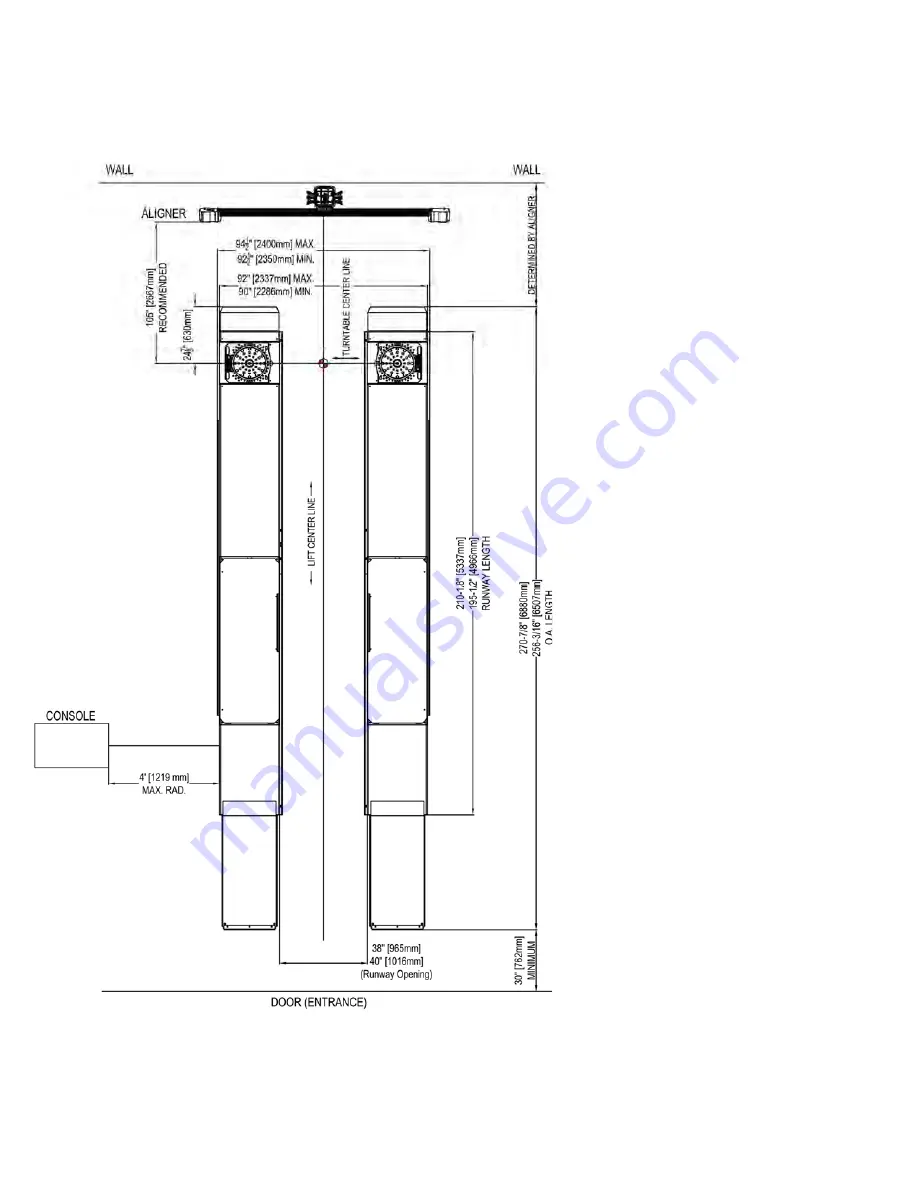
8.2 Surfacemount Bay Layout  


NOTE:

  Leave  any  additional  room  

for  any  desired  aisle  or  work  area.  
Recommended    clearance    around  
the  equipment  is  a  minimum  of 
three  (3)  feet.  Ensure  clearance 
conforms  to  local  building  and  fire 
codes.  
 
Recommended  overhead  clearance  
is  a  minimum  of  twelve  (12)  foot  
ceiling    providing  6    feet    for    the  
maximum  lift  height  and  6  feet  for  
the  supported  vehicle.    For  vehicles  
taller  than  6  feet  it  is  recommended  
that    the    user    provides    additional  
overhead  clearance  or  a  shut  off  
mechanism    to    stop    the    lift    from  
raising the vehicle too high.  
 

Please  contact  customer  service  
for  latest  installation  diagram  as  
it may change without notice.  


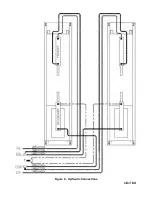
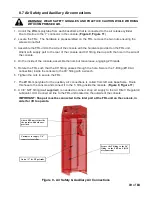
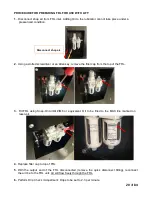
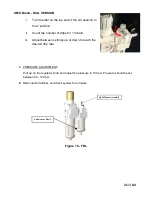
Figure 3 - Typical Bay Layout  
 

(Surface Mount)  


Summary of Contents for EELR587A

Page 1: ...IFT SAVE THIS MANUAL INSTALLATION and OPERATION MANUAL 14K SCISSOR LIFT Standard Models EELR591A EELR592A EELR593A EELR594A EELR787A EELR788A EELR789A EELR790A Short Models EELR587A EELR588A EELR589A...

Page 2: ...Check 28 8 12 Maximum Height Adjustment 29 8 13 Level and Support 30 8 14 Anchoring Procedure 31 8 15 Grouting Procedure Optional 32 9 0 ACCESSORY INSTALLATION 33 9 1 Installation of Line Covers 36 9...

Page 3: ...urnplate 64 20 2 Rear Slip Plate Locking Mechanism 66 20 3 Airline Routing for Locking Turnplates and Rear Slip Plates 67 20 4 Rear LED Light Assembly Exploded View 69 20 5 LED CONTROL BOX 71 21 0 CON...

Page 4: ...and maintenance records recommended by the lift manufacturer s instructions or ANSI ALI ALOIM 2008 American National Standard for Automotive Lifts Safety Requirements for Operation Inspection and Mai...

Page 5: ...ot permit employees or customers on lift when it is either being raised orlowered 14 Never raise a vehicle with passengers inside 15 Always stand clear of lift when raising or lowering and observe Pin...

Page 6: ...eneral requirements for lift operation please refer to Automotive Lift Safety Requirements For Operation Inspection and Maintenance ANSI ALI ALOIM Installation shall be performed in accordance with AN...

Page 7: ...7 of 84 3 0 SAFETY WARNING DECALS...

Page 8: ...Wheel Alignment All 88 Inches 2235 mm Max 2 Wheel Alignment Long 180 Inches 4572 mm Short 165 Inches 4191 mm Max General Service Long 194 Inches 4928 mm Short 179 Inches 4547 mm Lifting Time approx 7...

Page 9: ...9 of 84 Figure 1 Lift Dimensions Long Model Top Short Model Bottom 92 1 2 94 1 2 REF O A WIDTH 92 1 2 94 1 2 REF O A WIDTH...

Page 10: ...Scissors and Base Frame 1pc Console and Accessory box See accessory box list for contents 1pc Grout container 1pc Customer care kit including manuals 6 0 TOOLS REQUIRED FOR INSTALLATION OF LIFT Hammer...

Page 11: ...d before commencing with the installation IMPORTANT It is the user s responsibility to provide a satisfactory installation area for the lift Lifts should only be installed on level concrete floors wit...

Page 12: ...d clearance is a minimum of twelve 12 foot ceiling providing 6 feet for the maximum lift height and 6 feet for the supported vehicle For vehicles taller than 6 feet it is recommended that the user pro...

Page 13: ...ead clearance is a minimum of twelve 12 foot ceiling providing 6 feet for the maximum lift height and 6 feet for the supported vehicle For vehicles taller than 6 feet it is recommended that the user p...

Page 14: ...the dimensions necessary to provide the desired width between the two runways A distance of 36 914mm between the baseframes will provide the standard width of 38 965mm between the inside of the runway...

Page 15: ...er to the minimum requirements listed in the installation and operation manual of any alignment equipment as needed 8 4 Anchor Location Figure 5 Anchor Locations Do not install the anchors in the inne...

Page 16: ...ck of the baseframes as well as the diagonal distances are equal 4 Remove the remaining packing straps and remove the hydraulic hoses polytubes and proximity switch wires from under the deck Hoses and...

Page 17: ...s 3 The primary supply lines and equalizing lines from each runway are Left Side L Right Side R CL CR EQL 2 2718CN EQR 2 2719CN C for Cylinder and EQ for Equalize 4 The two 10 mm polytube return lines...

Page 18: ...18 of 84 Figure 8 Hydraulic Connections...

Page 19: ...such that the 90 fitting passes through the hole Secure the T fitting 10 Air connection inside the console to the 90 fitting with a wrench 6 Tighten the nuts to secure the FRL 7 The 10mm polytube for...

Page 20: ...the filler cap from the top of the FRL 3 Fill FRL using Snap On AirOil IM6 or equivalent Oil to be filled to the MAX line marked on reservoir 4 Replace filler cap to top of FRL 5 With the output end...

Page 21: ...drips for 1 minute iii Adjust between settings up or down to reach the desired drip rate 7 PRESSURE ADJUSTMENT Pull up on the regulator knob and adjust the pressure to 100 psi Pressure should be set...

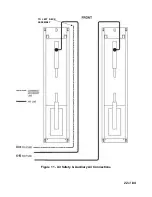
Page 22: ...22 of 84 TO LEFT DECK ASSEMBLY Figure 11 Air Safety Auxiliary Air Connections...

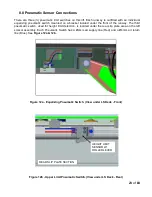
Page 23: ...nway The third pneumatic switch used for height limit detection is located under the rear slip plate area on the left scissor assembly Each Pneumatic Switch has a 4mm air supply line Red and a 4mm air...

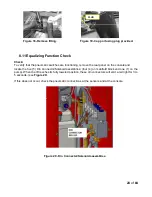
Page 24: ...ure 13 2 Route two blue 4mm air lines labeled with EQ RETURN from left side and right side baseframe to console and connect them to a union Y fitting in the console Figure 14 3 Route one blue 4mm air...

Page 25: ...trical shocks can cause serious injury or even death Figure 15a Console Circuit Connections Optional for locking and lights See next page for electrical diagram of LED driver box NOTE Overload fuse do...

Page 26: ...26 of 84 Figure 15b Optional LED Driver Box Circuit Connections...

Page 27: ...TANT The unit must be on the last locking position to bleed the lift Figure 16 Safety lock position for bleeding Figure 17 Location of bypass button 4 BLEED THE SYSTEM Once the lift is placed on the l...

Page 28: ...r panel on the console and locate the five 5 Din Connector Solenoid assemblies four 4 on manifold block and one 1 on the pump When the lift reaches its fully lowered position these din connectors will...

Page 29: ...d bracket assembly towards the scissor cross tube until the roller lever on the switch is fully depressed Hold in place and tighten M6 bolts NOTE Switch must be installed in front of the cross tube CH...

Page 30: ...baseframe as well as between the two baseframes Front to back level measurements should be taken on the runways 1 Press the up button and raise the lift to the fully extended operating position Check...

Page 31: ...nd rear of the lift 2 Raise the lift to full height and repeat the measurements and ensure there are no differences 3 Using a rotary hammer drill and a 1 2 concrete bit drill through the floor at each...

Page 32: ...the edges with a 45 degree chamfer Refer to specific grouting instructions on the package Leave a drain area to allow any liquids to escape 2 GROUTING MUST FULLY CURE BEFORE PROCEEDING Do not operate...

Page 33: ...The runway stops are designed as a secondary means to restrain a vehicle from inadvertently rolling off the runways Property damage and physical injuries may occur if this warning is not adhered to 2...

Page 34: ...WORKSTEPS WARNING WORKSTEP MAXIMUM CAPACITY IS 250 LBS WARNING FOR FLUSHMOUNT INSTALLATIONS ENSURE WORKSTEP IS REMOVED BEFORE RAISING OR LOWERING THE LIFT 4 Install Jackbeams with reference to the Jac...

Page 35: ...35 of 84 Figure 28 Filler Angle Installation...

Page 36: ...ose to the line cover B and lay the other line cover C close to the located line cover C as shown 5 The number along each side of the line covers represents the quantity of fasteners required to secur...

Page 37: ...ition 5 line covers C after line cover D as shown toward the console already in position 3 Position the line cover F close to the line cover C 4 The number along each side of the line covers represent...

Page 38: ...clear of these pinch points when lift air supply is connected No person shall operate console while maintenance or inspection of the slip plates is in process Figure 31 Pinch Points 1 Lower lift to a...

Page 39: ...front air lines to the turnplate locking cylinder blue air line to the cylinder port marked with a blue dot and red air line to the cylinder port marked with a red dot Figure 33 shown below 5 Plug th...

Page 40: ...l C 2 Connect the 4mm polytube labeled Return to pushlock fitting on the LED driver box Connect the other 4mm polytube labeled Supply to the pushlock Tee w reducer see Detail A 3 Connect the red blue...

Page 41: ...d on by a similar method This system will have its own Cam and Sensor located on the upper hinge at the front right side runway NOTE Unlike the Upper Limit System this system is not adjustable and is...

Page 42: ...ANSI ALI ALIS Safety Requirements for Installation ____ and Service of Automotive Lifts e ANSI ALI Quick Reference Guide ____ 8 Ensure Oil has been added to the Filter Regulator Lubricator Sect 8 7 _...

Page 43: ...ht until both mechanical safeties are heard engaging Press the down button to lower the lift down onto both of the mechanical safeties 8 Do not raise or lower the lift with the vehicle on the Jack Bea...

Page 44: ...eight hydraulic oil as needed Check Oil Level in Air Line Lubricator and refill if required See 13 1 Monthly Check anchor bolts for tightness Torque to 40 ft lbs if needed Inspect the electrical and m...

Page 45: ...hat some components of the front turnplate will need replacement due to normal wear Please ensure to re apply Loctite where needed as detailed in the exploded view of the front turnplate Section 20 1...

Page 46: ...the top safety rack in between the bottom safety rack Figure 38c 4 Tighten each bolt in sequence as shown in the figure below Check the alignment after tightening each bolt Figure 38d 5 Raise the lift...

Page 47: ...ardous energy control procedures will protect employees during machine and equipment servicing and maintenance where the unexpected energization start up or release of stored energy could occur and ca...

Page 48: ...NING THE MAIN HYDRAULIC FITTING AT THE POWER UNIT ONLY IF FLUID IS PRESENT UNDER PRESSURE IMMEDIATLY TIGHTEN AND REPEAT LOWER PROCESS ENSURE THAT BOTH STRUCTURES ARE SECURELY PLACED ON THE STANDS AND...

Page 49: ...urface of the ruways 1 Survey the area surrounding the lift remove any items and personnel from area before proceeding with this procedure 2 Perform the appropriate lockout tag out procedure on the el...

Page 50: ...humbscrew red on the top of the descent valve see Figure 39 7 Verbally indicate to all those involved that the lift will now be lowered NOTE There are 2 different variations of descent valves as shown...

Page 51: ...hat the rag is removed after the lift has been put back into operation 12 Once power is restored follow the lockout tag out procedure to return the lift back into service IF THE MECHANICAL LOCKS ARE E...

Page 52: ...tomer service Check power to hydraulic lines No power to solenoids Check power to solenoids Safety doesn t Lift not raised high enough for Press Up button for longer disengage disengagement period of...

Page 53: ...53 of 84 16 0 RECORD OF MAINTENANCE TRAINING Records of all lift maintenance and operator training should be recorded in the following table MAINTENANCE NOTES TRAINING DATE BY PERFORMED...

Page 54: ...SSOR LIFT Standard Models EELR591A EELR592A EELR593A EELR594A EELR787A EELR788A EELR789A EELR790A Short Models EELR587A EELR588A EELR589A EELR590A EELR783A EELR784A EELR785A EELR786A Nov 2019 REV I 30...

Page 55: ...55 of 84 17 0 LIFT ASSEMBLY REPLACE WORN DAMAGED OR BROKEN PARTS WITH PARTS APPROVED BY THE ORIGINAL EQUIPMENT MANUFACTURER ONLY 17 1 Lift Assembly Parts List...

Page 56: ...Slip Plate Weldment LS 1 1 4103CN Retaining Washer L L 2 1 01388A Lock Washer M10 2 6 0030CN Hex Bolt M10 x 20 2 EAK0336T11E Rear Slip Plate Kit w Hardware L L RS Optional Lights Locks 1 2 3033CN Rea...

Page 57: ...2 6 0978CN Cotter Pin 2 9 0160 Hex Nut M12 2 9 0162 Spring Washer 12mm ID 2 9 0161 Flat Washer 12mm ID 4 6 0291CN Hex Bolt M12 x 40 2 8 EAK0336T16A Upper Safety Rack Kit 2 EAM0113V18A Upper Safety Rac...

Page 58: ...M10 10 6 0034CN Hex Nut M10 10 15 EAK0336T23A Scissor Hinge Pin Kit 8 1 2788CN Scissor Hinge Pin 1 1 3256CN Hinge Spacer 3mm Thk 1 1 3255CN Hinge Spacer 1 5mm Thk 1 6 0340CN Snap Ring 38mm 2 16 EAK033...

Page 59: ...20 3 9 0130P4 Flat Washer 6mm 3 23 EAK0336V59A SCISSOR PIN KIT 4 EAM0113V92A SCISSOR LIFT SCISSOR PIN 1 1 26088A M36 HEX SLOTTED NUT GB T6179 1986 1 1 06187A COTTER PIN GB T 91 2000 1 9 0130P4 FLAT W...

Page 60: ...60 of 84 18 0 REAR SLIP PLATE TRANSFER BALL ARRANGEMENT Item Part Description Qty Deck 1 1 3762CN Plastic Insert 19 2 6 3974CN Transfer Ball 35...

Page 61: ...2 7 6 3058CN 90 DEG ELBOW 3 8 NPT M 3 8 POLYTUBE 2 8 EAK0336T21A AIR CYLINDER Complete w Fittings 2 9 EAH0069V32A POLYTUBE 6 4 BLACK L 14000m 2 10 6 3998CN SCREW MASONARY MOUNTS 22 11 EAK0336T24A BRAN...

Page 62: ...3 POLYTUBE PARTS LIST Item Part Description Qty 2 EAH0069V33A POLYTUBE 10 6 5 BLACK L 14000mm 1 3 EAH0069V29A POLYTUBE 4 2 5 BLUE L 13000mm 1 4 EAH0069V28A POLYTUBE 4 2 5 RED L 13000mm 1 5 EAH0069V31A...

Page 63: ...6 1792CN Shoulder Bolt M8 x 13 1 1 00688A Flat Washer 8mm 1 6 0340CN Snap Ring 35mm 1 2PL 07P4 Flat Washer D10 1 2 EAK0336T29B Cam Switch Kit v2 1 EAM0113V37A Sensor Bracket 1 EAA0441V10A Limit Switc...

Page 64: ...64 of 84 20 0 ACCESSORY ASSEMBLY 20 1 Front Turnplate...

Page 65: ...OFF 4 9 EAM0047J52A PAD TT 2 10 1 19488A HEX SCREWGB T 70 1 2008 M5X115 4 11 6 3955 PHIL SCREW M6 X 16mm 10 12 EAH0069V01A LOCKING CYLINDER ASSEMBLY 1 13 EAM0113V43A LOCKING MECHANISM CENTERING CONE...

Page 66: ...2 6 3929CN Cotter Pin 1 2 EAK0336T31A Primary Locking Cylinder Assembly 4 6 3900CN Cylinder Assembly w Tee Fittings 1 6 3882CN Nylon Thrust Washer 1 6 3907CN Shoulder Bolt 1 1 04488A Flat Washer 6mm...

Page 67: ...67 of 84 20 3 Airline Routing for Locking Turnplates and Rear Slip Plates...

Page 68: ...6mm On decks On decks at middle 8 7 EAH0069V41A POLYTUBE 6 4 RED L 960mm On decks from hinge to middle 2 8 EAH0069V45A POLYTUBE 6 4 BLUE L 960mm On decks from hinge to middle 2 9 EAH0069V46A POLYTUBE...

Page 69: ...69 of 84 20 4 Rear LED Light Assembly Exploded View Top of Deck Rear Slip Plate Underside of Deck Connection of LED Light Bar Note Objects in pictures may not be exactly as shown...

Page 70: ...3033CN Slip Plate Weldment RS 1 2 EAA0441V51A 10K 14K SCISSOR LED LIGHT BAR RS 1 EAA0441V52A 10K 14K SCISSOR LED LIGHT BAR LS 1 3 6 4215 Stainless Steel Rivet 1 4 x 5 8 4 4 6 3940CN Adhesive Back Clam...

Page 71: ...2 6 3957 CONSOLE DECAL 1 3 EAE0073V33A FUSE 250V 2AMP 6X32mm 2 4 EAE0073V32A PRESSURE SWITCH 1 5 EAA0441V48A 8 POLE CABLE ASSY 1 6 EAE0073V28A CABLE GLAND 3 7 EAA0441V50A LED POWER SUPPLY AND FRAME AS...

Page 72: ...rcuit Board 1 5 EAE0076V06A STRAIN RELIEF BUSHING 6 7 EAH0069V23A PRESSURE GAUGE WITH SWITCH 2 8 6 3067 Decal UPPER HEIGHT LIMIT 1 9 6 3068 Decal EQUALIZE 1 10 6 3595 FUSE HOLDER 2 POLE 20A 250V 1 11...

Page 73: ...tion Qty EAK0336V60A TERMINAL ASSEMBLY FOR 14K ALI CONSOLE 1 1 EAK0073V10A Terminal ZDU 4 2 4AN 4mm 2 2 EAK0073V12A Terminal Cover ZAP ZDU 4 2 4AN 1 3 EAK0073V13A Terminal marker 5x6 mm Print 1 2White...

Page 74: ...1 7 EAH0069V11A 5 PORTS MANIFOLD 1 8 EAH0069V07A Union M5 x 4mm Polytube 1 9 EAH0069V06A Branch Y M5 x 4mm Polytube 1 10 EAM0113V47A NUT NPT1 8 2 11 EAH0069V23A Pressure Gauge with Switch 2 12 9 0619...

Page 75: ...0069V07A Union M5 x 4mm Polytube 1 9 EAH0069V06A Branch Y M5 x 4mm Polytube 1 10 EAM0113V47A NUT NPT1 8 2 11 EAH0069V23A Pressure Gauge with Switch 2 12 EAH0069V24A 5 PORTS MECHANICAL VALVE 1 13 9 061...

Page 76: ...1 23 EAH0069V17A POLYTUBE RED OD 6MM 950MM 1 24 EAH0069V21A POLYTUBE BLUE OD 6MM 950MM 1 25 EAH0069V13A POLYTUBE OD 6MM 950MM 1 26 EAH0069V16A POLYTUBE OD 6MM 80MM 2 27 EAH0069V19A POLYTUBE OD 6MM 35...

Page 77: ...A Push Button Arrow 1 EAE0073V40A Push Button Contact NO 1 2 6 4275 SAFETY RELEASE PUSHBUTTON 1 3 EAE0073V04A EMERGENCY STOP BUTTON 1 EAE0073V41A Emergency Stop Push Button 1 EAE0073V42A Part of Emerg...

Page 78: ...V31A TOP COVER 1 5 EAS2215V03A DOOR WELDMENT 1 6 8 73637A FLAT LOCK MS730 1 includes EAM0113V36A U TYPE FASTENER 12 9 0659 FLAT WASHER n5 GB T95 2002 12 1 18588A SELF TAPPING SCREW GB T 845 1985 ST4 8...

Page 79: ...79 of 84 22 0 POWERPACK ASSEMBLY 22 1 Powerpack Assembly EAA0441V72A...

Page 80: ...2 2592CN HYDRAULIC HOSE ASSEMBLY 3 9 EAH0069V59A GAS CONNECTOR G1 4 D10 1 10 1 20988A HEX SBHS M10X45 2 11 1 01388A LOCK WASHER 10 2 12 1 05388A FLAT WASHER 10 2 13 EAM0113V46A STEEL TUBE D18X3MM 2 1...

Page 81: ...81 of 84 22 2 Powerpack Assembly EAA0441V72A Item Part Description Qty 1 EAA0441V63A Motor with flange 230V 1 PH 3 HP 1 2 EAA0441V68A Pump assembly 14K Scissor 1...

Page 82: ...NPT 1 2 6 2129CN Cartridge w Coil w Override 2 3 6 3403CN Cartridge w Coil 2 4 6 4315CN Pressure Switch w Cover 1 5 6 3001CN Adapter NPT 1 4 M 9 16 18 M 3 6 6 3888CN Adapter NPT 1 4 M 9 16 18 FM 1 No...

Page 83: ...83 of 84 APPENDIX Foundation Plan...

Page 84: ...74 76 17SEP2019 KW G DG07179 Update the console assembly in page19 24 28 39 49 77 27SEP2019 LM H DG07078 Update the line cover on page 60 Update the table on page 76 Correct the P N of hydraulic hose...

Reviews:

Related manuals for EELR587A