31
Scanner Operations
Operations
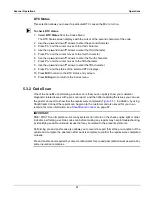
DTC Status
This selection allows you to see if a particular DTC caused the MIL to turn on.
z
To check DTC status
1. Select
DTC Status
from the Codes Menu.
The DTC Status screen displays with the cursor at the second character of the code.
2. Use the up
b
and down
d
arrows to enter the second character.
3. Press
Y/
a
and the cursor moves to the third character.
4. Use the up
b
and down
d
arrows to enter the third character.
5. Press
Y/
a
and the cursor moves to the fourth character.
6. Use the up
b
and down
d
arrows to enter the fourth character.
7. Press
Y/
a
and the cursor moves to the fifth character.
8. Use the up
b
and down
d
arrows to enter the fifth character.
9. Press
Y/
a
and the status of the selected DTC displays.
10. Press
N/X
to return to the DTC status entry screen.
11. Press
N/X
again to return to the Codes menu.
5.3.2 Code Scan
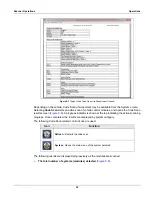
One of the benefits of performing a code scan is that you can quickly show your customer
diagnostic related issues with a pre scan report, and then after repairing the issues you can use
the post scan report to show that the repairs were completed (
). In addition, by using
ShopStream Connect the reports can be given to the customer and also saved for your own
records, for more information, see
IMPORTANT:
PRE / POST Scan Importance - As many systems do not turn on the check engine light or other
indicator, performing a vehicle code scan before making any repairs may help in troubleshooting,
by identifying possible unknown issues that may be related to the present symptoms.
Performing pre and post scans also allows you to record in report format the pre-condition of the
vehicle and compare the post scan after work is complete to confirm the repairs were completed
properly.
Pre and post scan is required by some manufacturers for pre and post collision work as well as by
some insurance companies.

