14
Getting Started
Connecting to Vehicle Power
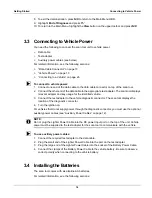
8.
To exit the demonstration, press
N/X
to return to the Main Menu OBD.
9.
Highlight
End of Diagnose
and press
Y/
a
10. To return to the Main Menu, highlight the
View
button on the upper toolbar and press
N/X
.
3.3 Connecting to Vehicle Power
You need the following to connect the scan tool unit to vehicle power:
•
Data cable
•
Test adapter
•
Auxiliary power cables (see below)
For related information, see the following sections:
•
“Data Cable Connector” on page 10
•
•
“Connecting to a Vehicle” on page 26
z
To connect to vehicle power:
1.
Connect one end of the data cable to the data cable connector on top of the scan tool.
2.
Connect the other end of the data cable to the appropriate test adapter. The scan tool displays
relevant adapter and key usage for the identified vehicle.
3.
Connect the test adapter to the vehicle diagnostic connector. The scan tool displays the
location of the diagnostic connector.
4.
Turn the ignition on.
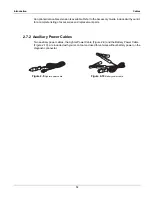
For vehicles that do not supply power through the diagnostic connector, you must use the optional
auxiliary power cables (see “Auxiliary Power Cables” on page 12).
NOTE:
i
Do not plug the Lighter Power Cable into the DC power input port on the top of the unit. Vehicle
power must be supplied to the test adapter for the scan tool to communicate with the vehicle.
z
To use auxiliary power cables:
1.
Connect the required test adapter to the data cable.
2.
Plug the small end of the Lighter Power Cable into the port on the test adapter.
3.
Plug the large end of the Lighter Power Cable into the socket of the Battery Power Cable.
4.
Connect the clamps of the Battery Power Cable to the vehicle battery. Be sure to observe
correct polarity when connecting to the vehicle battery.
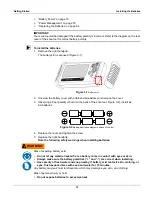
3.4 Installing the Batteries
The scan tool comes with six alkaline AA batteries.
For related information, see the following sections:
Summary of Contents for Solus
Page 1: ...User Manual August 2009 EAZ0007E76F Rev A ...
Page 87: ...80 Index ...


