2
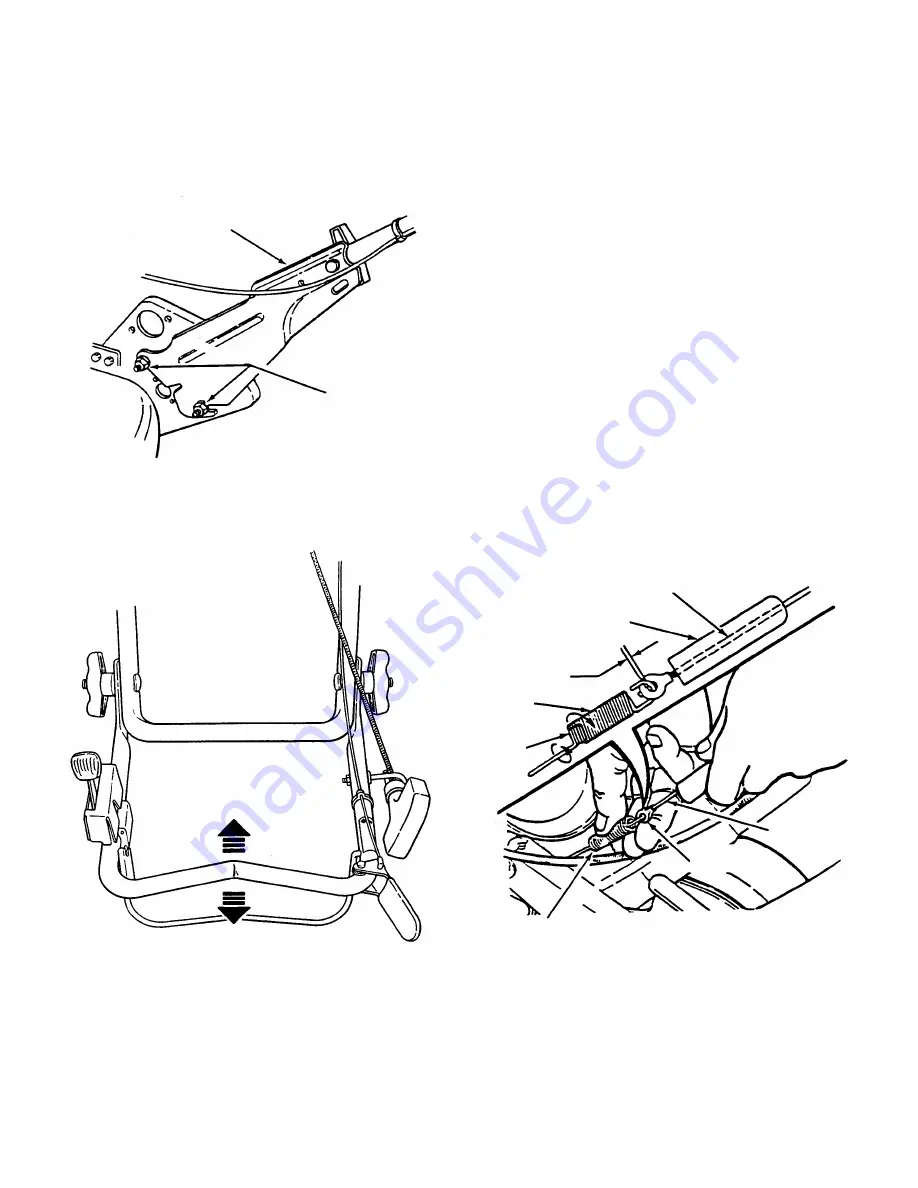
STEP 5: Handle height is adjustable for different height of
operators. Loosen the two nuts on the inside of each of
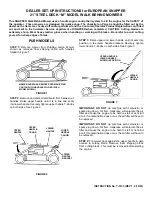
the lower handles. See Figure 4. Move the handle up or
down to the desired height. See Figure 5. Retighten all
nuts securely after adjustment. Pull blade control against
upper handle, pull rope start handle and loop into rope
guide. See Figure 5.
FIGURE 4
FIGURE 5
STEP 6: Set-up is now complete for push models
without self-propelled drive system. For self-propelled
models continue to the “Self-Propelled Models” Section.
Proceed to the pre-sale checklist page of this instruction
to prepare the mower for use.
SELF-PROPELLED MODELS
NOTE: The set-up procedure for self-propelled models is
basically the same as the Push Models. Follow the exact
procedure as described in Steps 1 thru 6 from the Push
Models section.
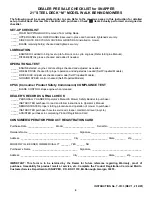
STEP 7: Check the clearance between the clutch cable
and clutch spring. NOTE: Clearance between spring and
cable is very important. Excessive clearance will cause
drive system NOT to operate when wheel drive control
handle is depressed. No clearance at all will cause
mower to continue to propel itself when wheel drive
control handle is released to stop mower movement.
Slide vinyl spring cover (located at the end of clutch
cable) up clutch cable to gain access to the end of spring
and cable loop. With wheel drive control handle
released, clearance between spring hook and cable loop
should be 1/16” to 1/8”. If clearance is more or less than
specified, unhook spring from clutch cable eye, then
adjust by rotating outer spring clockwise or counter
clockwise to achieve the proper clearance. Rehook
spring to clutch cable eye. Slide vinyl cover over the
spring when correct clearance is reached. See Figure 6.
FIGURE 6
LOWER HANDLE
BRACKET
LOOSEN
TWO NUTS
MOVE UPPER HANDLE
UP OR DOWN FOR
PROPER HEIGHT
CLUTCH CABLE
VINYL SPRING COVER
1/16” - 1/8”
CLEARANCE
OUTER
SPRING
INNER
SPRING
CABLE
CLUTCH
CABLE EYE
SPRINGS


