33
Troubleshooting, Adjustment, & Service
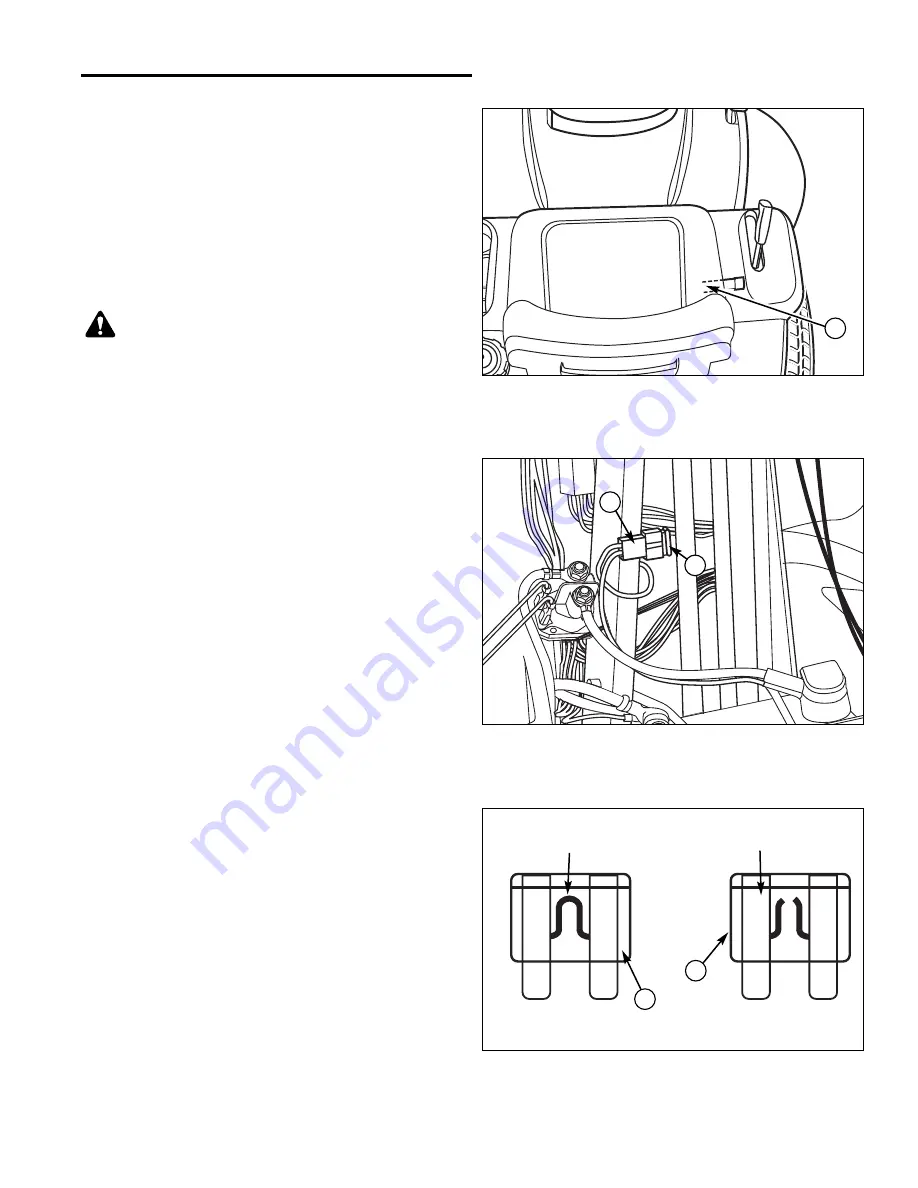
Figure 36. Seat Adjustment
A. Seat Adjustment Lever
Figure 37. Fuse
A. Fuse, 20-amp
B. Fuse Holder
B
A
Figure 38. Blade Type Fuse
A. Good Fuse with Solid Fusible link
B. No Good Fuse with Broken Fusible link
Solid Fusible Link
Broken Fusible Link
B
A
Seat Adjustment
The seat can be adjusted forward and back. Move the
lever (A, Figure 36), position the seat as desired, and
release the lever to lock the seat into position.
Brake Adjustment
This unit does not have a manually adjustable brake.
If the brake does not function properly, see your dealer.
Battery Charging
WARNING
Keep open flames and sparks away from the
battery; the gasses coming from it are highly
explosive. Ventilate the battery well during
charging.
A dead battery or one too weak to start the engine may
be the result of a defect in the charging system or other
electrical component. If there is any doubt about the
cause of the problem, see your dealer. If you need to
replace the battery, follow the steps under “Cleaning the
Battery & Cables” in the Regular Maintenance Section.
To charge the battery, follow the instructions provided by
the battery charger manufacturer as well as all warnings
included in the “Safety Rules” section of this book.
Charge the battery until fully charged. Do not charge at
a rate higher than 10 amps.
Fuse Replacement
The fuse is a 20-amp blade type automotive fuse located
behind the battery on the steering tower.
Replace only
with the same rated fuse: 20-amp.
To replace the fuse:
1. Open the hood and locate the fuse holder (B, Figure 37)
and fuse (A) attached to the steering tower.
2. Hold the fuse holder (B) and pull out the fuse (A).
3. Inspect the fuse for a broken fusible link (see Figure 38).
Replace fuse if connection is broken. If you are not sure
if the fusible link is broken, replace fuse.
4. Hold the fuse holder (B, Figure 37) and insert new fuse
(A) until it is seated properly.
A


