background image


38


2 YEAR LIMITED WARRANTY 


For two (2) years from purchase date for the original purchaser's residential, non-commercial use, 

SNAPPER

, through 

any authorized 

SNAPPER

 dealer will replace, free of charge (except for taxes where applicable), any part or parts found 

upon examination by the factory at McDonough, Georgia, to be defective in material or workmanship or both. 
 
For ninety (90) days from purchase date for the original purchaser's commercial, rental, or other non-residential use, 

SNAPPER

, through any authorized 

SNAPPER

 dealer will replace, free of charge, any part or parts found upon 

examination by the factory at McDonough, Georgia, to be defective in material or workmanship or both.   
 
All transportation costs incurred by the purchaser in submitting material to an authorized 

SNAPPER

 dealer for 

replacement under this warranty must be paid by the purchaser. 
 
This warranty does not apply to certain transmissions, to engines and their components, and batteries, as these items are 
warranted separately.  This warranty does not apply to parts that have been damaged by accident, alteration, abuse, 
improper lubrication, normal wear, or other cause beyond the control of 

SNAPPER

. This warranty does not cover any 

machine or component part that has been altered or modified changing safety, performance, or durability. 
 
Batteries have a one (1) year warranty period with free replacement if required for one (1) year from the original purchase 
date. 

SNAPPER

 will not be responsible for any installation cost incurred. The battery warranty only covers original 

equipment batteries and does not cover damage to the battery or machine caused by neglect or abuse, destruction by 
fire, explosion, freezing, overcharging, or improper maintenance. 
 
There is no other express warranty. 
 

DISCLAIMER OF WARRANTY 

Implied warranties, including those of merchantability and fitness for a particular purpose, are limited to two (2) 
years from purchase date for the original purchaser's residential or other non-commercial use, and ninety (90) 
days from purchase for the original purchaser's commercial, rental or other non-residential use, and to the extent 
permitted by law, any and all implied warranties are excluded. This is the exclusive remedy. Liabilities for 
consequential damages, under any and all warranties are excluded. 
 
Some states do not allow limitations on how long an implied warranty lasts, or do not allow the exclusion or 
limitation of incidental or consequential damages, so the above limitation or exclusion may not apply to you. 

 
This warranty gives you specific legal rights, and you may also have other rights which vary from state to state. 
 

WARNING: THE USE OF REPLACEMENT PARTS OTHER THAN GENUINE SNAPPER PARTS MAY IMPAIR THE 
SAFETY OF SNAPPER PRODUCTS AND WILL VOID ANY LIABILITY AND WARRANTY BY SNAPPER 
ASSOCIATED WITH THE USE OF SUCH PARTS. 
 

IMPORTANT: 

Please fill out the attached 

SNAPPER

 Product Registration Card immediately and mail to:  


Snapper’s Product Registration Center

, P.O. Box 1379, McDonough, Georgia 30253


Summary of Contents for LT180H33 IBV

Page 1: ...ying a SNAPPER product Before operating the Lawn Tractor read and follow the IMPORTANT SAFETY INSTRUCTIONS on pages 2 thru 4 all other instructions contained in this manual and the accompanying bookle...

Page 2: ...achine 1 DO NOT operate machine on slopes exceeding 15 degrees 27 grade 2 Exercise EXTREME CAUTION on slopes above 10 degrees 18 grade Turn blades OFF when traveling uphill Use a slow speed and avoid...

Page 3: ...of the fuel tank or container opening at all times until fueling is complete DO NOT use a nozzle lock open device 10 If fuel is spilled on clothing change clothing immediately 11 Never overfill a fue...

Page 4: ...bolts nuts and screws properly tight Check that all cotter pins are in proper position 6 Always provide adequate ventilation when running engine Exhaust gases contain carbon monoxide an odorless and...

Page 5: ...lustrations in this manual are provided for reference only and may differ from your specific model Contact your Snapper dealer if you have questions SECTION 4 ADJUSTMENTS REPAIR 18 33 Engine Adjustmen...

Page 6: ...wner s Manual before operating this machine Keep these manuals available for future reference CONTROLS All operators should be acquainted with the operator s controls before attempting start up or ope...

Page 7: ...engine and tractor of any accumulation of dirt grass oil etc Keep engine air intake screens and cooling fins clean at all times 2 1 6 With engine OFF move the tractor outside and add fuel to the fuel...

Page 8: ...work DO NOT OPERATE the tractor until the interlock has been repaired FIGURE 2 5 5 Choke engine for cold starting by moving engine speed control to CHOKE position Little or no choking will be needed...

Page 9: ...o ON See Figure 2 8 FIGURE 2 8 WARNING DO NOT operate blades in reverse STOP BLADES LOOK and SEE behind and down for children pets and hazards before and while backing 2 4 STOPPING ENGINE BLADE WHEEL...

Page 10: ...1 Fully depress clutch brake pedal 2 Move park brake lever up into slot See Figure 2 12 FIGURE 2 12 2 4 5 RELEASING PARK BRAKE 1 Fully depress clutch brake pedal Move park brake lever DOWN to release...

Page 11: ...to engage hydro transmission See Figure 2 15 5 Set park brake NOTE The transmission will not propel the tractor if it is left in the ROLL position WARNING DO NOT disengage the hydro transmission and...

Page 12: ...verse operation until the blade engagement lever is moved to the OFF position at which time the system will return to its Reverse Lockout mode This feature should never be selected unless you are abso...

Page 13: ...oil has drained push drain body IN and rotate clockwise to close 4 Fill engine with new motor oil as specified in engine owner s manual WARNING The following procedure requires the engine and blades t...

Page 14: ...on 2 Change air filter Pull up and rotate the air cleaner latch to remove cleaner cover See Figure 3 5 IMPORTANT When cover is removed you are viewing the carburetor side of the air filter which will...

Page 15: ...LADE BRAKE 3 3 4 TRACTOR LUBRICATION 1 Front Wheel Bearings Lubricate each front wheel bearing through the grease fitting on wheel hub Using general purpose grease in a grease gun add grease until gre...

Page 16: ...3 12 9 Park Brake Lever Using general purpose grease lubricate the park brake lever mechanism pivot points which are located on the left hand underside of tractor See Figure 3 13 Mechanism with a thi...

Page 17: ...m the following interlock system checks periodically during the operating season Contact your authorized Snapper dealer if you have questions WARNING DO NOT operate machine if any safety interlock or...

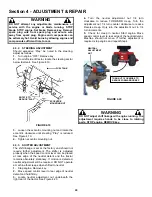
Page 18: ...y adjusted will stop blade rotation in 5 seconds or less when the blade engagement lever is moved to the OFF position 33 DECK BLADE BRAKE ADJUSTMENT 1 Blade brake adjustment is made by turning the adj...

Page 19: ...o adjust tension remove extension rod mounting bolt and nut See Figure 4 4 9 Move extension rod to next hole towards rear of deck and secure with mounting bolt and nut 10 Measure extension spring with...

Page 20: ...ADJUSTMENT SIDE TO SIDE NOTE Adjust tire pressure 12 P S I front and rear before adjusting deck 1 Move tractor to a firm level surface 2 Turn engine OFF Remove key 3 Place a piece of angle iron under...

Page 21: ...DECK LEVEL ADJUSTMENT FRONT TO REAR FRONT LIFT ROD If the sector plates are in their lowest setting and proper level cannot be obtained adjust the front lift rod as follows 1 Move deck lift lever to 5...

Page 22: ...istance from each blade tip to the floor The measurements should be within 1 8 of each other Factory setting FIGURE 4 14 9 If the difference is less than 1 8 go to next section Front to rear level If...

Page 23: ...rning the swivel clockwise will raise the front of the deck Turning the swivel counterclockwise will lower the front of the deck NOTE The deck should be set so that the rear of the deck is 1 4 lower t...

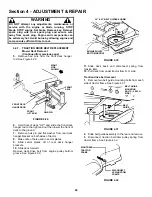
Page 24: ...control lever can be placed at rear edge of the neutral detent and the tractor remains absolutely stationary If motion is detected neutral adjustment will be required DO NOT operate a machine that cr...

Page 25: ...hould less tension be required move stationary idler towards right side of tractor See Figure 4 21 6 Secure stationary idler with mounting bolt 7 Place spark plug wire onto spark plug Set park brake S...

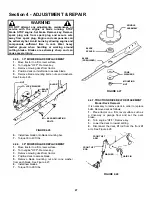
Page 26: ...e ragged and lawn will usually turn brown Sharpen standard blades as follows 1 Move tractor to a firm level surface 2 Turn engine OFF Remove key 3 Remove mowing deck from tractor 4 Remove mower blade...

Page 27: ...IGURE 4 26 6 Install new blade onto blade mounting bar 7 Torque 30 to 40 ft lbs 4 4 6 38 MOWER BLADE REPLACEMENT 1 Move tractor to a firm level surface 2 Turn engine OFF Remove key 3 Remove mowing dec...

Page 28: ...washer from rear deck hanger bracket on both sides of tractor 8 Make note of hole used in sector plates 9 Slide sector plates off of rear deck hanger brackets 10 Slide deck forward Remove deck drive...

Page 29: ...de 7 Pull belt until it can be removed from transmission pulley Traction drive belt replacement 1 Place new traction drive belt over transmission pulley and span to engine pulley 2 Place belt into top...

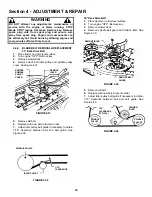
Page 30: ...ee Figure 4 37 FIGURE 4 37 5 Remove old belt 6 Replace with new belt in reverse order 7 Adjust idler pulley belt guide if necessary to obtain 1 16 clearance between belt and belt guide See Figure 4 38...

Page 31: ...are not to disconnect wires from seat switch 5 Reinstall the two adjusting knobs 6 Lower operator s seat FIGURE 4 42 WARNING Keep all sparks flame and fire away from area when charging battery 4 5 3 B...

Page 32: ...a well ventilated area on a level non concrete surface 3 Check date on battery label If battery is placed into service after the date shown charge battery Refer to section BATTERY CHARGING 4 After cha...

Page 33: ...880 Debris Blower 6 1883 6 1883 RAD Quick Hitch Subframe Kit 6 1879 6 1879 Weight Kit 6 1245 6 1245 Tire Chains 6 1085 6 1085 Ninja Recycling Mulch Kit 6 1255 6 1878 38 Wave Recycling Mulch Kit NA 6 1...

Page 34: ...34 SECTION 5 ELECTRICAL SYSTEM SCHEMATIC WIRING HARNESS P N 2 8404 LT160H33IBV LT160H38IBV SCHEMATIC WIRING HARNESS P N 7 3998 LT150H38HKV...

Page 35: ...position 2 Move engine speed control to FAST 3 Fuel tank empty 3 Fill with fuel to proper level 4 Engine air pre cleaner and or air cleaner dirty 4 Clean free of all debris 5 Spark plug defective or...

Page 36: ...too fast 4 Move speed control to a slower speed 5 Deck side to side level requires adjustment 5 Adjust side to side level 6 Deck front to rear level requires adjustment 6 Adjust front to rear level 7...

Page 37: ...ery Page 31 32 X Tires Check Pressures Page 7 X X Drive Belts Check For Wear And Tension Pages 27 30 X X Mower Blades Check Wear Damage And Blade Brake Pages 13 26 27 X Mower Deck Clean Debris Accumul...

Page 38: ...r from the original purchase date SNAPPER will not be responsible for any installation cost incurred The battery warranty only covers original equipment batteries and does not cover damage to the batt...

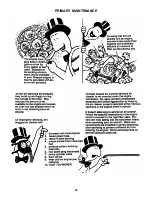
Page 39: ...39 PRIMARY MAINTENANCE...

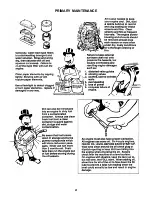
Page 40: ...40 PRIMARY MAINTENANCE...

Page 41: ...41 PRIMARY MAINTENANCE...

Page 42: ...42 PRIMARY MAINTENANCE...

Page 43: ...________________________ Retailer s Phone Number ________________________________________________ It is very important that you register your purchase with Snapper to ensure warranty coverage Please m...

Page 44: ...ave any questions about your Snapper product contact your local authorized Snapper dealer or contact Snapper Customer Service at Snapper McDonough GA 30253 Phone 1 800 935 2967 COPYRIGHT 2004 SNAPPER...

Reviews: