background image

Operation

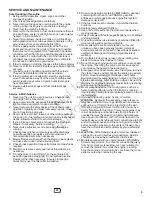
General Operating Safety

Be sure to read all information in the 

Operator Safety


section before attempting to operate this unit. Become 
familiar with all of the controls and how to stop the unit.

Safety Interlock System Tests

This unit is equipped with a Safety Interlock System. Do not 
attempt to bypass or tamper with the switches/devices.

Test 1 — Engine should NOT crank if:

  •  PTO switch is ON, OR

  •  Brake pedal is NOT fully depressed (parking brake 

OFF), OR

  •  Operator is NOT in seat, OR 

  •  The cruise control lever is NOT in NEUTRAL.

Test 2 — Engine SHOULD crank and start if:

  •  Operator is sitting in seat, AND.

  •  PTO switch is OFF, AND

  •  Brake pedal is fully depressed (parking brake ON), AND

  •  The cruise control is in NEUTRAL.

Test 3 — Engine should SHUT OFF if:

  •  Operator rises off seat with PTO engaged, OR

  •  Operator rises off seat with brake pedal NOT fully 

depressed (parking brake OFF).

Test 4 — Check Mower Blade Stopping Time

Mower blades and mower drive belt should come to a 
complete stop within five seconds after electric PTO switch 
is turned OFF. If mower drive belt does not stop within five 
seconds, see an authorized dealer.

Test 5 — Reverse Mow Option (RMO) Check

  •  Engine should shut off if reverse travel is attempted if 

the PTO has been switched on and RMO has not been 
activated.

  •  RMO light should illuminate when RMO has been 

activated.

 WARNING


If the unit does not pass a safety test, do not operate 
it. See an authorized dealer. 

Oil Recommendations

We recommend the use of Briggs & Stratton Warranty 
Certified oils for best performance. Other high-quality 
detergent oils are acceptable if classified for service SF, SG, 
SH, SJ or higher. Do not use special additives.

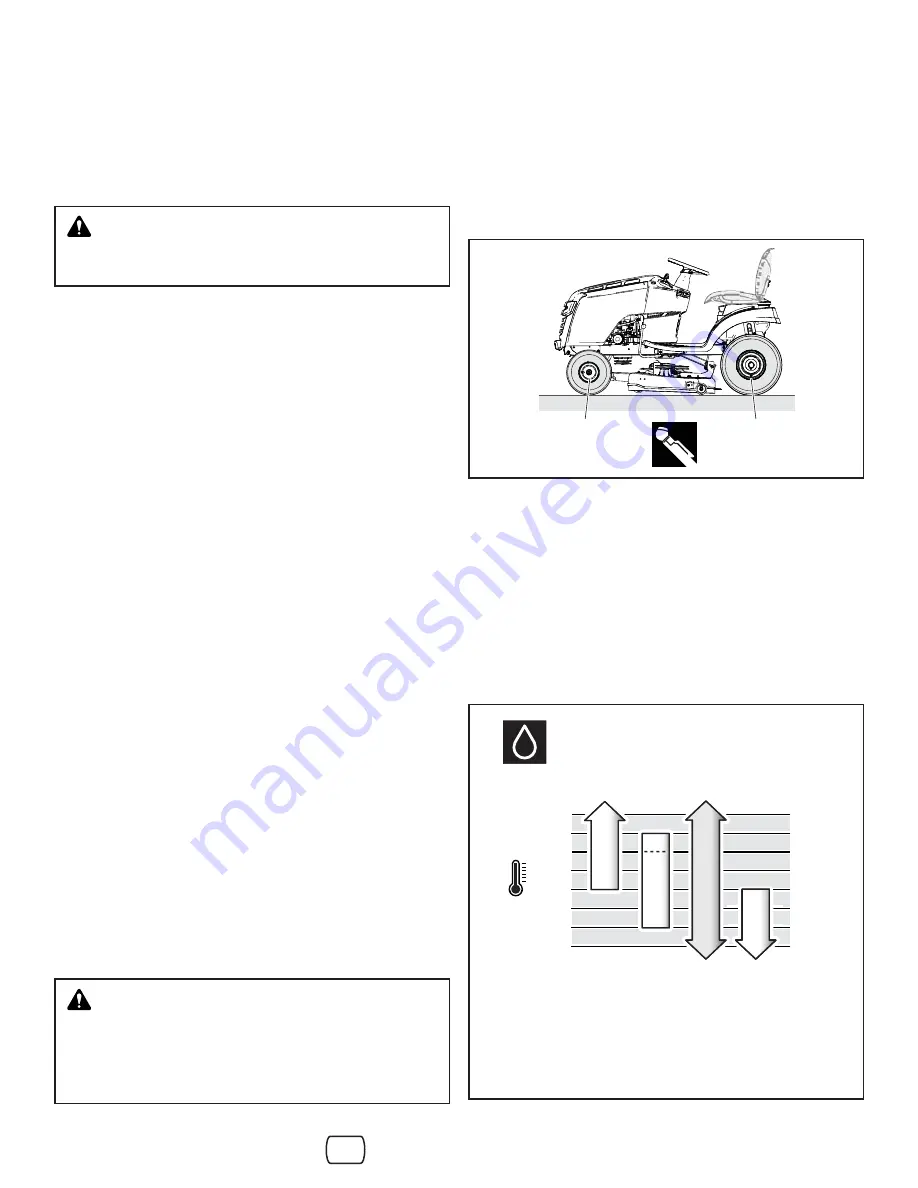
Outdoor temperatures determine the proper oil viscosity for 
the engine. Use the chart to select the best viscosity for the 
outdoor temperature range expected.

Check Tire Pressure

Tires should be checked periodically to provide the optimum 
traction and to guarantee the best cut (see Figure 4). 

NOTE: 

These pressures may differ slightly from the 

“Maximum Inflation” stamped on the side walls of the tires.

** Above 80° F (27° C) the use of 10W30

 may cause

    increased oil consumption. Check oil level more
    frequently.

*  Below 40° F (4° C) the use of SAE 30

 will result

   in hard starting.

80

60

40

120
100

°F

-20

°C

20

Synthetic 5W30

5W30 

0

27

15

4

49 

38

-29

-7

-18 

SAE 30 

*

10W30 

**

Oil Recommendations

 WARNING


Mowing in reverse can be hazardous to bystanders. 

Tragic accidents can occur if the operator is not alert to the 
presence of children. Never activate the RMO if children 
are present. Children are often attracted to the unit and the 
mowing activity.

12-14 psi

(0,82-0,96 bar)

10 psi

(0,68 bar)

Figure 4


15

en

Not 

for  

Reproduction

Summary of Contents for NXT 19542

Page 1: ...1739068 Revision NXTTM Riding Mower Model No Description 2690846 NXT 19542 Riding Mower 19 5 Gross HP 42 106 7 cm Operator s Manual N o t f o r R e p r o d u c t i o n...

Page 2: ...far to find support and service for your SNAPPER mower There are authorized service dealers worldwide who provide quality service You can contact Customer Service by phone at 800 317 7833 or locate a...

Page 3: ...ng 18 Reverse Mowing Option RMOTM 18 Pushing the Tractor by Hand 18 Adjusting the Mower Cutting Height 19 Parking Brake 19 Cruise Control 19 Stopping the Tractor and Engine 19 Maintenance 20 Maintenan...

Page 4: ...R WARNING or CAUTION is used with the alert symbol to indicate the likelihood and the potential severity of injury In addition a hazard symbol may be used to represent the type of hazard DANGER indica...

Page 5: ...ment Be sure to completely read the Safety Rules and Information found on the following pages Also completely read the Operation section Children Tragic accidents can occur with children Do not allow...

Page 6: ...ped with an operator present safety system Do NOT attempt to alter or bypass the system See your dealer immediately if the system does not pass all the safety interlock system tests found in this manu...

Page 7: ...erator is responsible for accidents occurring to other people or property 21 All drivers should seek and obtain professional and practical instruction 22 Always wear substantial footwear and trousers...

Page 8: ...pecially when traveling down slopes Do not shift to neutral and coast downhill 6 Avoid starting stopping or turning on a slope If tires lose traction disengage the blade s and proceed slowly straight...

Page 9: ...mps further than necessary Ensure clamps grip hoses firmly over the filter after installation 12 Do not use gasoline containing METHANOL gasohol containing more than 10 ETHANOL gasoline additives or w...

Page 10: ...y Decals 10 www snapper com DANGER Amputation Hazard Part No 7101665 DANGER Main Panel Part No 1734879 Starter Insert Part No 1739028 Transmission Release Part No 1730202 1730202 N o t f o r R e p r o...

Page 11: ...11 This page intentionally left blank en N o t f o r R e p r o d u c t i o n...

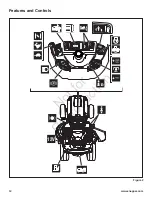
Page 12: ...Features and Controls STOP STOP 12V 4 3 2 1 Total Trip Hours 4 3 2 1 Total Trip Hours Figure 2 12 www snapper com N o t f o r R e p r o d u c t i o n...

Page 13: ...down the engine The electronic dashboard will turn o after 3 minutes Tap the push button when the engine is not running to activate the electronic dashboard STOP STOP Power Take O PTO Switch This enga...

Page 14: ...s RESET for greater than 3 seconds to reset the Trip Hours to 0 3 Press MODE for less than 1 second to display the Clock see Set the Clock section 4 Press MODE for less than 1 second to return to Tota...

Page 15: ...d on and RMO has not been activated RMO light should illuminate when RMO has been activated WARNING If the unit does not pass a safety test do not operate it See an authorized dealer Oil Recommendatio...

Page 16: ...proved gasolines such as E85 Do not mix oil in gasoline or modify the engine to run on alternate fuels This will damage the engine components and void the engine warranty To protect the fuel system fr...

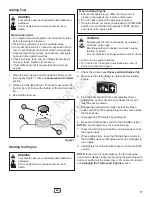
Page 17: ...rs Do not start or run engine in enclosed area even if doors or windows are open 3 Sit in the seat and lift UP the seat adjustment lever position the seat as desired and release the lever to lock the...

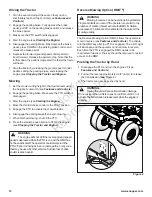
Page 18: ...ngine see Stopping the Tractor and Engine WARNING The engine will shut o if the reverse ground speed pedal is depressed while the PTO is on and the RMO has not been activated The operator should alway...

Page 19: ...elease the brake pedal Disengage the Parking Brake To disengage the parking brake fully depress the brake pedal press DOWN on the parking brake control and release the brake pedal 5 Engage the parking...

Page 20: ...parts must be of the same design and installed in the same position as the original parts Other parts may not perform as well may damage the unit and may result in injury Do not strike the flywheel w...

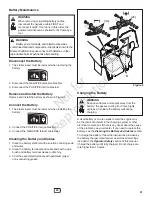
Page 21: ...battery until fully charged Do not charge at a rate higher than 10 amps Disconnect the Battery 1 The starter insert must be removed when removing the battery 2 Disconnect the NEGATIVE black cables rs...

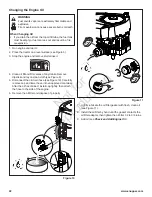
Page 22: ...r areas of any debris Remove dipstick and lay on clean cloth see Figure 6 5 Disconnect the oil drain hose see Figure 10 Carefully remove cap and lower hose into an approved container After the oil has...

Page 23: ...ed Figure 12 Servicing the Mu er WARNING Running engine produces heat Engine parts especially muffler become extremely hot Severe thermal burns can occur on contact Combustible debris such as leaves g...

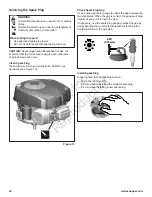
Page 24: ...e correct spark plug is used otherwise engine damage can occur Figure 13 Check Spark Plug Gap Use a spark plug feeler gauge to check the gap between the two electrodes When the gap is correct the gaug...

Page 25: ...moving parts should be lubricated where contact is made with other parts see Figure 14 Keep oil and grease o belts and pulleys Wipe surfaces clean before and after lubrication Figure 14 8x 1x 25 en N...

Page 26: ...til it stops from lack of fuel The use of a fuel stabilizer in the storage container is recommended to maintain freshness WARNING Never store the unit with fuel in an enclosed unventilated structure F...

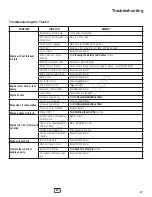
Page 27: ...rich Clean air filter Engine has other problem See authorized dealer Engine knocks Low oil level Check add oil as required Using wrong grade oil See Oil Recommendations Chart Excessive oil consumption...

Page 28: ...speed to fast Slow down Dirty or clogged air filter See Servicing Air Filter section Cutting height set too low Cut tall grass at maximum cutting height during first pass Discharge chute jamming Cut...

Page 29: ...charging cooling carburetor fuel pump etc application limitations ambient operating conditions temperature humidity altitude and engine to engine variability Due to manufacturing and capacity limitati...

Page 30: ...the manufacturing date of the product will be used to determine warranty eligibility We welcome warranty repair and apologize to you for being inconvenienced Warranty service is available only through...

Page 31: ...31 en N o t f o r R e p r o d u c t i o n...

Page 32: ...1 800 317 7833 www snapper com N o t f o r R e p r o d u c t i o n...

Page 33: ...1739068 Revisi n Cortac sped NXTTM N de modelo Descripci n 2690846 Cortac sped NXT 19542 19 5 caballos de fuerza brutos 106 7 cm 42 pulg Manual del usuario N o t f o r R e p r o d u c t i o n...

Page 34: ...SNAPPER Existen distribuidores de servicio t cnico autorizados en todo el mundo que ofrecen un servicio de calidad Puede ponerse en contacto con el Servicio al Cliente llamando al 800 317 7833 o loca...

Page 35: ...r el c sped 18 Opci n de corte en marcha atr s RMOTM 18 Empujar el tractor cortac sped manualmente 18 Ajustar la altura de corte del cortac sped 19 Freno de estacionamiento 19 Control de velocidad de...

Page 36: ...ales Se usa una palabra de se al PELIGRO ADVERTENCIA o PRECAUCI N con el s mbolo de alerta para identi car la probabilidad y potencial gravedad de lesiones Adem s se puede usar un s mbolo de peligro p...

Page 37: ...otalmente la Informaci n y Normas de seguridad que aparecen en las siguientes p ginas Tambi n lea por completo la secci n de Operaci n Ni os Pueden suceder accidentes tr gicos con ni os No les permita...

Page 38: ...nidad est equipada con un sistema de seguridad que detecta la presencia del usuario NO intente alterar ni modificar el sistema Consulte a su distribuidor inmediatamente si el sistema no pasa todas las...

Page 39: ...ente que el operador ser el responsable de los accidentes que puedan sufrir otras personas o propiedades 21 Quienes conduzcan la unidad deber n procurarse instrucci n pr ctica profesional 22 Deber n v...

Page 40: ...podr a hacer que la unidad vuelque La hierba alta puede ocultar obst culos 3 Escoja una velocidad de segado que le permita no tener que detenerse o cambiar la velocidad mientras est recorriendo la pe...

Page 41: ...solina que se derrame podr a incendiarse No disperse las abrazaderas del tubo de combustible m s all de lo necesario Asegure firmemente las tuercas de agarre de las abrazaderas sobre el filtro tras su...

Page 42: ...coman as de seguridad Riesgo Peligro de amputaci n N Pieza 7101665 Panel principal de peligro N Pieza 1734879 Llave de acceso N Pieza 1739028 Liberaci n de la transmisi n N Pieza 1730202 1730202 N o t...

Page 43: ...11 11 Esta p gina se dej en blanco intencionalmente es N o t f o r R e p r o d u c t i o n...

Page 44: ...Caracter sticas y controles Figura 2 12 www snapper com STOP STOP 12V 4 3 2 1 Total Trip Hours 4 3 2 1 Total Trip Hours N o t f o r R e p r o d u c t i o n...

Page 45: ...os Toque el bot n de arranque cuando el motor no est en marcha para activar el tablero electr nico STOP STOP Interruptor PTO Esto acopla y desacopla los accesorios que utiliza el PTO Para acoplar el P...

Page 46: ...establecer las Horas de Viaje a 0 3 Oprima MODO MODE por menos de 1 segundo para exhibir el Reloj ver la secci n Ajuste de la hora en el reloj 4 Oprima MODO MODE por menos de 1 segundo para exhibir el...

Page 47: ...archa atr s RMO El motor deber a apagarse si se intenta la marcha atr s si se ha activado PTO y no se ha activado la opci n de cortar el c sped marcha atr s La luz de opci n de cortar el c sped marcha...

Page 48: ...cerlo funcionar con otros combustibles Hacer tal cosa da ar a los componentes del motor y anular a la garant a del motor Para proteger el sistema de combustible de la formaci n de resinas mezcle un es...

Page 49: ...usar quemaduras graves o incluso la muerte Arranque el motor y d jelo en marcha en exteriores No arranque el motor ni lo deje en marcha en reas cerradas aunque haya puertas o ventanas abiertas 3 Si nt...

Page 50: ...ERTENCIA El motor se apagar si se encuentra presionado el pedal de acelerador de reversa mientras que PTO se encuentra activado y a n no se ha activado la opci n de cortar el c sped marcha atr s El op...

Page 51: ...freno de estacionamiento HACIA ARRIBA y suelte el pedal del freno Desactivaci n del freno de estacionamiento Para desactivar el freno de estacionamiento presione el pedal del freno a fondo presione e...

Page 52: ...las piezas originales Otras piezas pueden no funcionar de la misma manera pueden da ar la unidad y pueden causar lesiones No golpee el volante con un martillo o un objeto s lido ya que ste puede romp...

Page 53: ...a secci n Seguridad del usuario en este manual Cargue la bater a hasta que est totalmente cargada No cargue la bater a a m s de 10 amperios Desconectar la bater a 1 Se debe retirar la llave de acceso...

Page 54: ...tire la varilla para medir el nivel de aceite y col quela sobre un pa o limpio v ase Figure 6 5 Desconecte la manguera de desag e del aceite v ase Figura 10 Retire con cuidado la tapa y coloque la man...

Page 55: ...Estr jelo en un pa o limpio Limpieza del cartucho Golp elo suavemente sobre una super cie plana para eliminar los desechos livianos No intente limpiar el cartucho Mantenimiento del silenciador ADVERT...

Page 56: ...buj a apropiada de otro modo podr a da arse el motor Figura 13 Comprobaci n de la abertura de la buj a Utilice un calibre de espesor de buj as para comprobar el espacio entre los dos electrodos Cuand...

Page 57: ...r an lubricarse en caso de que entren en contacto con otras piezas v ase Figura 14 Mantenga libre de lubricante y grasa las correas y poleas Limpie las super cies antes y despu s de la lubricaci n Fig...

Page 58: ...sta que se detenga debido a la falta de combustible Es recomendable usar un estabilizador de combustible en el contenedor de almacenamiento para mantener el combustible en buen estado ADVERTENCIA No a...

Page 59: ...tible es viejo o se ha echado a perder Consulte a un distribuidor autorizado El motor no arranca bien o no funciona bien La mezcla de combustible es demasiado rica Limpie el filtro del aire El motor t...

Page 60: ...La velocidad de tierra es demasiado r pida Disminuya la velocidad El cortac sped tiene otro problema Consulte a un distribuidor autorizado El motor se atasca f cilmente con el cortac sped en marcha La...

Page 61: ...de aire tubos de escape carga refrigeraci n carburador bomba de combustible limitaciones de aplicaci n condiciones ambientales de funcionamiento temperatura humedad altitud y la variabilidad entre mot...

Page 62: ...solamente a trav s de concesionarios de servicio autorizados por Briggs Stratton o BSPPG LLC La mayor a de las reparaciones por el servicio de garant a se gestionan de manera rutinaria aunque en ocas...

Page 63: ...31 31 es N o t f o r R e p r o d u c t i o n...

Page 64: ...1 800 317 7833 www snapper com N o t f o r R e p r o d u c t i o n...

Reviews: