background image

OPERATOR’S MANUAL and DEALER SET-UP for SNAPPER 

73” MOWER for OUT FRONT Z-RIDER 


INTRODUCTION: These instructions cover set-up of the Snapper 73” Mower for the Out Front Z-Rider. 
The linkage on this mower has been designed to allow the use of the electric actuator on the deck to assist in 
attaching the mower to the power unit. Follow and complete each step carefully. 


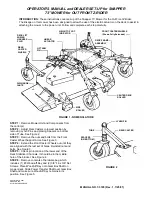
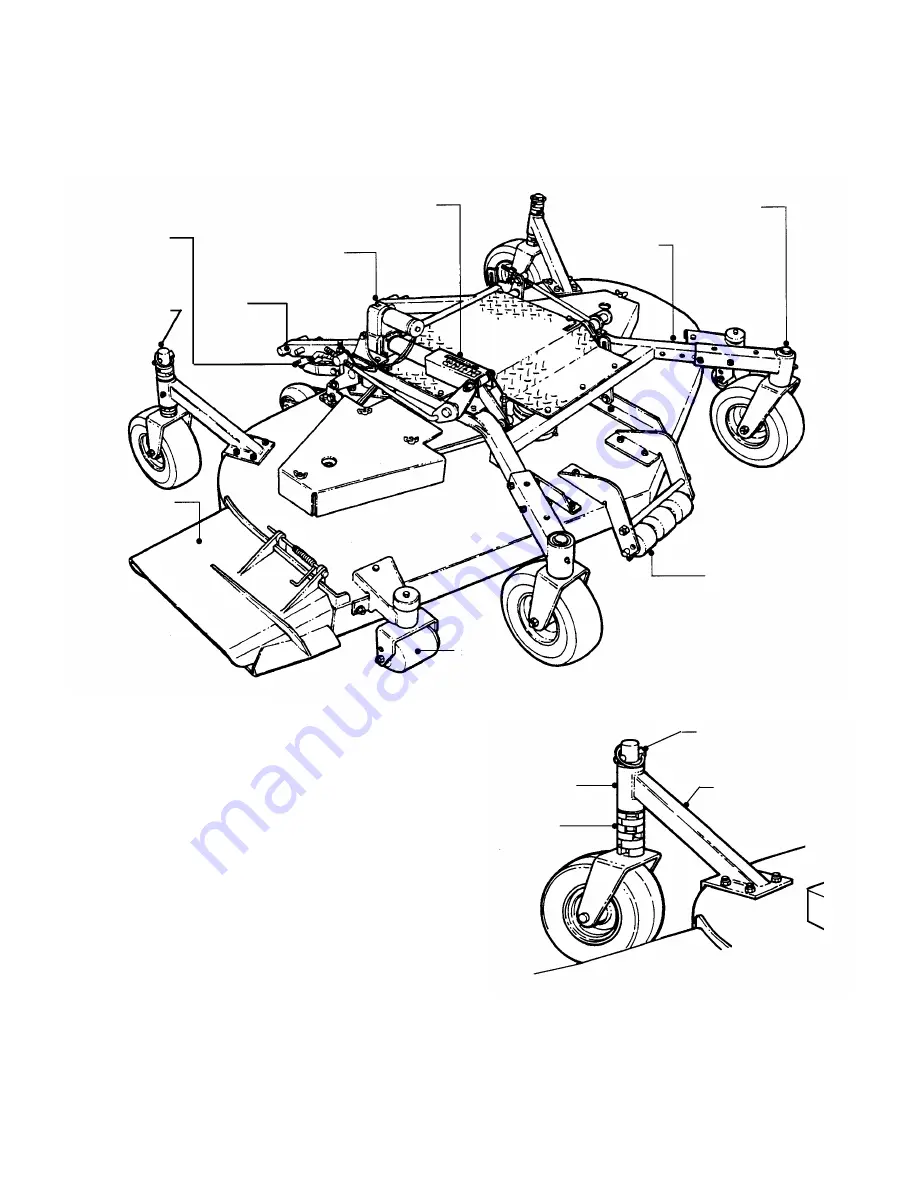
FIGURE 1 - NOMENCLATURE 

 
STEP 1:
  Remove Mower Unit and Components from 
the carton(s). 
STEP 2:  Adjust Rear Casters to lowest position by 
removing Lynch Pins and placing Spacers on bottom 
side of Tube. See Figure 2. 
STEP 3:  Remove the nuts and bolts from the Front 
Caster Wheel Support Arms. See Figure 3. 
STEP 4:  Extend the Front Caster Wheels out until they 
are aligned with the last set of holes. Reinstall nuts and 
bolts. See Figure 3. 
STEP 5:  Check pin location at the lower end of the 
Deck Stabilizer Channels. It should be in the middle 
hole of the bracket. See Figure 4. 
STEP 6:  Remove contents of hardware bag which 
includes (1) #9 Woodruff Key and (2) 3/8”-16 x 3/8” Set 
Screws. Place Woodruff Key onto Gear Box Shaft on 
mower deck. Slide Power Transfer Shaft over Gear Box 
Shaft and make sure Woodruff Key remains in its 
position. See Figure 5. 


COPYRIGHT © 2001 
SNAPPER INC. 
ALL RIGHTS RESERVED 


FIGURE 2 


MANUAL NO. 7-3720 (Rev. 1, 7/25/01) 

TUBE 

SPACERS 
(ON BOTTOM) 

LYNCH PIN 

REAR CASTER 

DECK LIFT 
WIRING 
HARNESS 
PLUG 

REAR 
CASTER 
WHEELS 

LINEAR 
ACTUATOR 

HEIGHT OF CUT 
INDICATOR 

DECK FRAME 
ASSEMBLY 

FRONT CASTER WHEELS 
(Shown Fully Extended) 

DISCHARGE 
CHUTE 

SIDE 
ROLLER 

CENTER DECK 
ROLLER 

LIFT ARM 
PIN 

Summary of Contents for Out Front Z-rider Mower

Page 1: ...xtend the Front Caster Wheels out until they are aligned with the last set of holes Reinstall nuts and bolts See Figure 3 STEP 5 Check pin location at the lower end of the Deck Stabilizer Channels It...

Page 2: ...ility of the machine 1 DO NOT operate machine on slopes exceeding 15 degrees 27 grade 2 Exercise EXTREME CAUTION on slopes above 10 degrees 18 grade Turn blades OFF when traveling uphill Use a slow sp...

Page 3: ...nfluence of alcohol or drugs OPERATION Continued From Previous Column 6 STOP MACHINE on level ground lower deck engage parking brake and make sure engine and blades have stopped before removing grass...

Page 4: ...plug s and secure wire s away from spark plug s 10 DO NOT change engine governor speed settings or overspeed engine DO NOT make adjustments with the engine running 11 Lubricate machine at intervals sp...

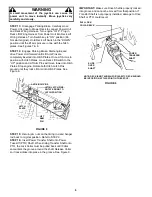
Page 5: ...deck to lift and attach the deck frame to the power unit STEP 11 Located on the hitch plates at the front of the Power Unit rotate the Spring Loaded Hitch Latch Pins to the unlatched position See Figu...

Page 6: ...ins will move lower into Hitch Plates Stop engine Rotate both Hitch Latch Pins around until they lock Lift Arm into Hitch Plates See Figure 8 FIGURE 8 STEP 15 Return jam nuts on the timing rod and han...

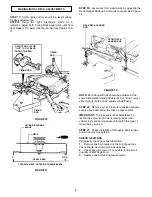
Page 7: ...and below the tube on rear casters IMPORTANT The rear casters are adjustable To lessen the amount of mower scalping adjust rear casters by repositioning spacers to match the type of terrain being mowe...

Page 8: ...Damage Replace if Needed Inspect Belts for Wear or Damage Replace if Needed WEEKLY Check Tire Pressure Add or Adjust as required Check Safety Interlock System Inspect OPC Switch for proper Operation...

Page 9: ...will not be responsible for any installation cost incurred The battery warranty only covers original equipment batteries and does not cover damage to the battery or machine caused by neglect or abuse...

Reviews: