Lit. No. 85757, Rev. 01
21
November 15, 2018
PERIODIC MAINTENANCE
• When servicing, you may need to close the
shut-off valve and/or the return valve, to prevent
stored brine from exiting the holding tank.
• Wash unit after each use to prevent material
build-up and corrosion.
• Use dielectric grease on all electrical connections
to prevent corrosion each time power or signal
plugs are disconnected.
• Paint or oil all bare metal surfaces as needed.
• Inspect unit for defects: broken, worn, or bent
parts, and similar.
• Inspect all tubing, hoses, and harnesses for
cracks and leaks.
• Clean the brine
fi
lter as needed. Close the shut-off
valve and access the
fi
lter by unscrewing the top
cap, then unscrewing the
fi
lter cover.
• Retighten bolts, screws, and other connections
after
fi
rst use and as needed.
END OF SEASON AND STORAGE
• Before long periods of storage,
fl
ush out the
tank, pumping system, and boom to remove salt
build-up and prevent corrosion.
• Do not leave unused material in the unit for a
prolonged period of time.
NOZZLE MAINTENANCE
Remove nozzles by pushing in and rotating the nozzle
cap counterclockwise and clean as necessary.
When reassembling nozzles, make sure that the
nozzle holes are in line with the boom. Failure to
align the nozzle holes will result in inconsistent brine
application.
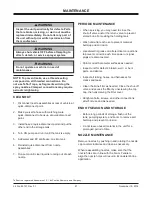
MAINTENANCE
NOTE: To prevent leaks, use a thread-sealing
compound on all threaded connections. Do
not use Te
fl
on
®
tape, as fragments will clog the
spray nozzles. Clamped connections may require
periodic retightening
CLEAN OUT
1. Disconnect nozzle assemblies at rear of vehicle at
quick-disconnect point.
2. Make yourself a hose with matching male
quick-disconnect to hook up at quick-disconnect
point.
3. Install hose at quick-disconnect point and put the
other end in the storage tank.
4. Turn ON pump and run it until the tank is empty.
5. Add water and RV antifreeze; mix into tank.
6. Reinstall quick-disconnect from nozzle
assemblies.
7. Run pump until clear liquid is running out of each
nozzle.
Te
fl
on
®
is a registered trademark of E. I. du Pont de Nemours and Company.
WARNING
Inspect the unit periodically for defects. Parts
that are broken, missing, or worn out must be
replaced immediately. Do not alter any part of
the unit without prior written permission from
the manufacturer.
WARNING
Always shut vehicle OFF before attempting to
attach, detach, or service sprayer system.
WARNING
Do not operate a machine in need of
maintenance.
Summary of Contents for Accuspray VSS-1000-1
Page 2: ......
Page 4: ...Lit No 85757 Rev 01 4 November 15 2018...
Page 6: ...Lit No 85757 Rev 01 6 November 15 2018...


