14
3.
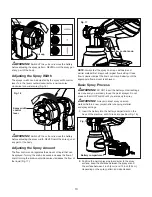
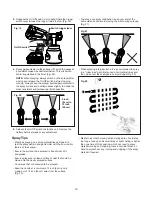
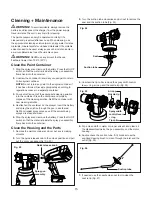
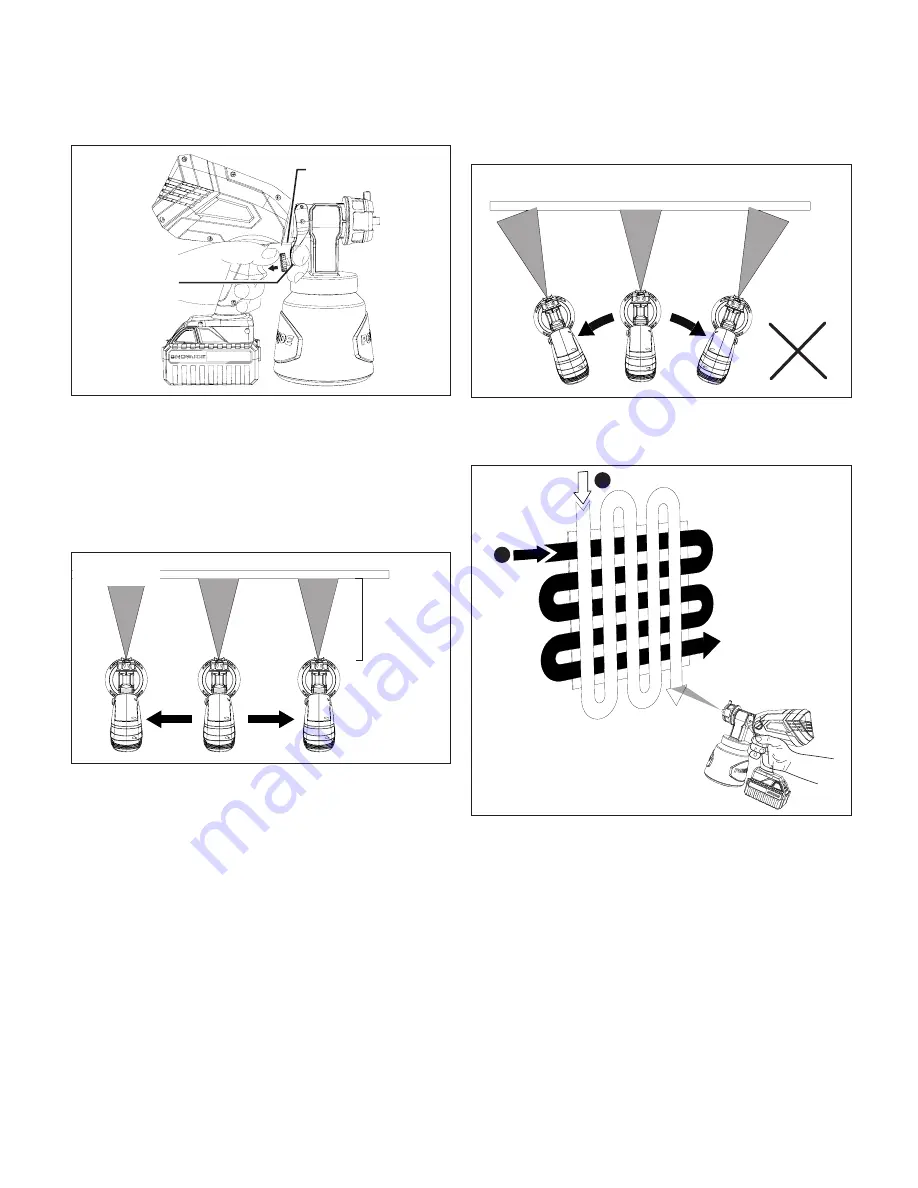
Squeeze the On/Off switch, which will actuate the trigger
switch lever to press the trigger inside the tool (Fig. 19).
4. Spray perpendicular to the surface with smooth passes at
a consistent speed as illustrated below. This will help to
avoid irregularities in the finish (Fig. 20).
NOTE:
When spraying, always switch on the sprayer after
moving and release the On/Off switch before stopping
moving. Always keep the sprayer pointed perpendicular to
the spray surface and overlap passes slightly to obtain the
most consistent and professional finish possible.
5.
Release the On/Off switch to stop the unit. Remove the
battery before storage or any adjustment.
Spray Tips
•
Practice spraying on a scrap material like cardboard to
test the spray pattern and get familiar with the flow control
feature of the sprayer.
• Ensure the surface to be sprayed is free of dust, dirt,
and grease.
• Ensure spray area is clean and free of dust that could be
blown onto the newly sprayed surface.
• Cover area that not intended to be sprayed.
• Keep the nozzle at a minimum of 2 inch (5 cm) and a
maximum of 12 inch (30 cm) away from the surface
(Fig. 20).
• To get an even spray distribution, keep your arm at the
same distance and avoid moving the wrist during spraying
(Fig. 21).
• When spraying a large surface, it's recommended to spray
in a "crisscross" path: first spray in horizontal stripes and
then cross over these stripes in vertical stripes (Fig. 22).
• Maintain a smooth moving action during spray. Avoid stay
too long at one spot. Several times of light coating is better
than one time of thick coating, which can lead to spray
material running and dripping. Have a dry paint brush on
hand to smooth out any running and dripping of the spray
material if needed.
Fig. 19
On/Off switch
Switch trigger lever
Fig. 20
2 inch
(5 cm) to
12 inch
(30 cm)
Fig. 21
Fig. 22
1
2
Summary of Contents for POWERJOE 24V-PS1-RM
Page 20: ...20 NOTES ...
Page 21: ...21 NOTES ...
Page 22: ...22 NOTES ...
Page 24: ...sunjoe com ...


