12
2.
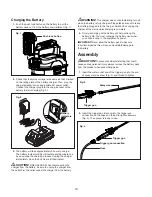
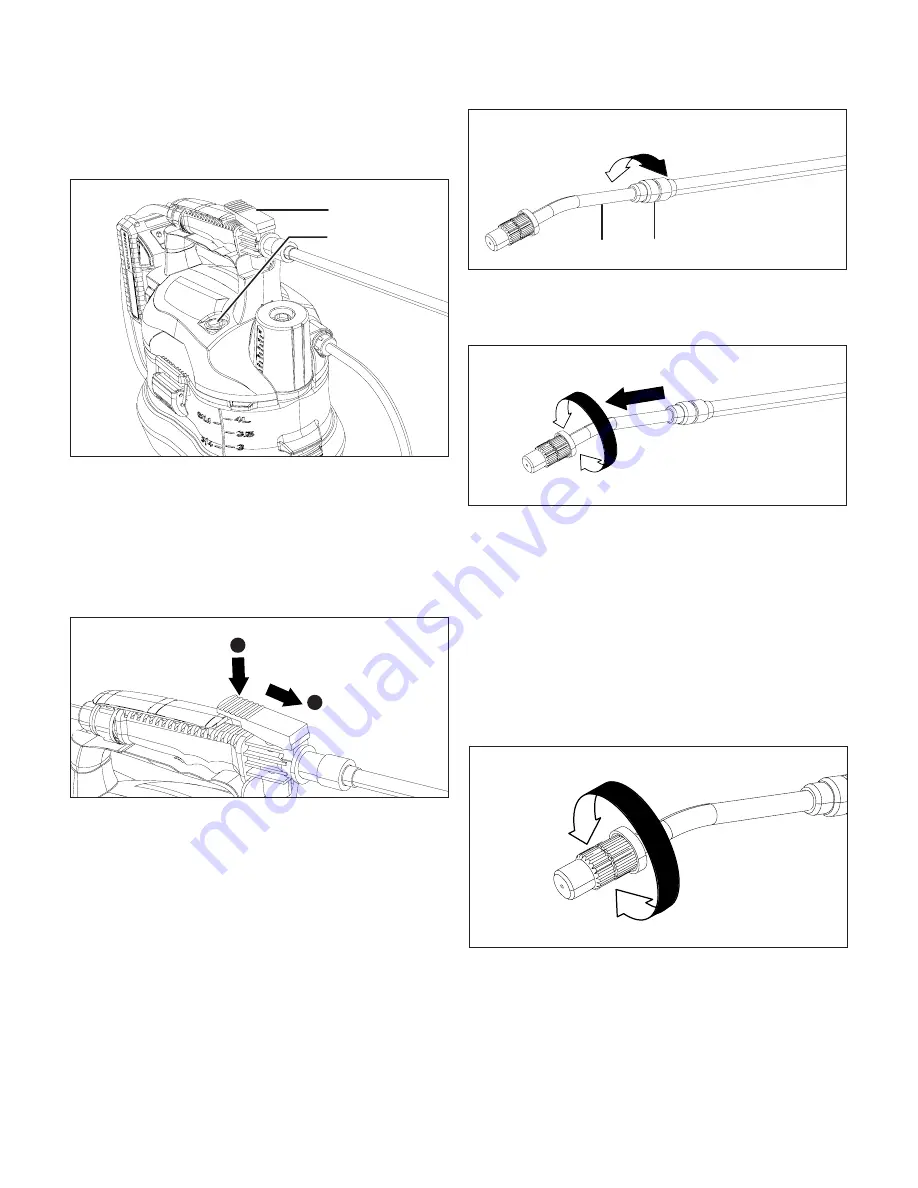
Press the On/Off switch on the ON(I) side, the switch will
light up to indicate that the sprayer is in standby mode.
Press the trigger on the trigger gun to start the sprayer
(Fig. 8).
3.
Release the trigger to stop the sprayer. Press the On/Off
switch on the OFF(O) side (Fig. 8).
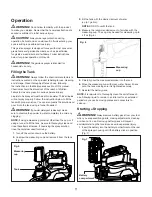
The trigger is equipped with lock-on feature, which is
convenient when spraying for an extended period of time or
when covering a large area.
4. To start spray with lock-on function, depress the trigger
and slide it forward (Fig. 9).
5. To release the locked trigger, press the trigger and slide
it backward.
m
WARNING!
Make sure the trigger is not locked on
before inserting the battery pack into the sprayer.
Telescoping Spray Wand
Follow the instruction below to adjust the spray wand.
1.
Turn off the unit and remove the battery.
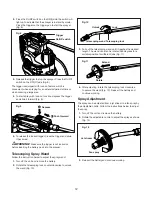
2. Rotate the telescoping lock counterclockwise to unlock
the wand (Fig. 10).
3. Pull out the telescoping wand until it reaches the desired
length. The wand can also be rotated 360 degrees for a
suitable position for different jobs
(Fig. 11).
4. After adjusting, rotate the telescoping lock clockwise
to secure the wand (Fig. 10). Reinsert the battery and
continue working.
Spray Adjustment
The spray can be adjusted from a jet stream to a fan spray by
the adjustable nozzle. Follow the instructions below to adjust
the spray.
1.
Turn off the unit and remove the battery.
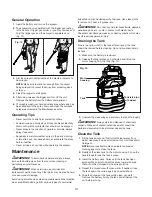
2. Rotate the adjustable nozzle to adjust the spray as shown
(Fig. 12).
3. Reinsert the battery and continue working.
Fig. 8
Trigger
On/Off switch
Fig. 9
1
Depress
2
Push forward
Fig. 10
Lock
Telescoping lock
Unlock
Telescoping wand
Fig. 11
Rotate
Extend
Fig. 12
Fan spray
Jet stream


