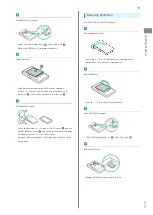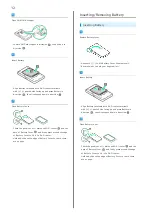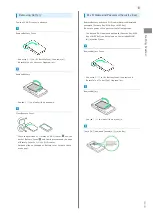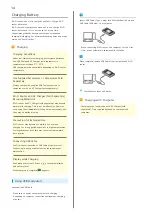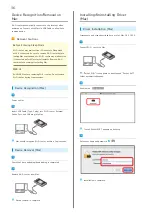
25
Connecting with WLAN
602HW
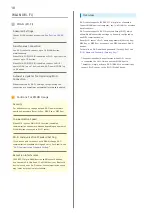
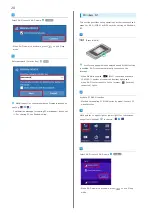
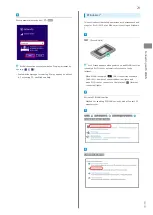
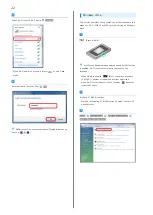
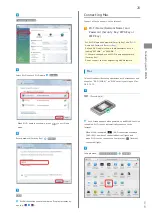
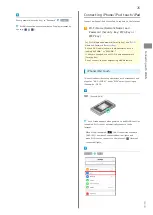
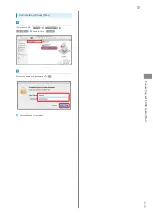
Enter password (Security Key) in "Password"
Connect
WLAN connection counter number on Display increases by
one (e.g.
).
Connecting iPhone/iPod touch/iPad
Connect an iPhone/iPod touch/iPad to connect to the Internet.
Wi-Fi Name (Network Name) and
Password (Security Key: WPA Key or
WEP Key)
For Wi-Fi Name and password (Security Key), see "
Name and Password (Security Key)
Default Wi-Fi name is shown in alphanumerics with a
leading "602HWa-" or "602HWb-."
If they are changed, use set Wi-Fi name and password
(Security Key).
Do not connect to other neighboring WLAN network.
iPhone/iPod touch
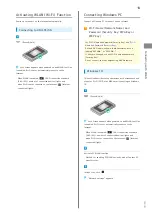
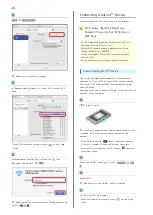
This section describes setup operations with screenshots and
steps for "Wi-Fi (SSID A)" under "WPA" security setting on
iPhone with iOS 10.
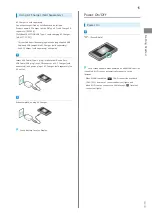
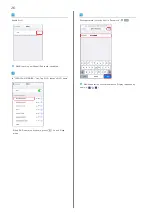
(Press & Hold)
Lock Screen appears when powered on and WLAN function
is enabled. Wi-Fi router automatically connects to the
Internet.
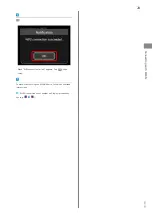
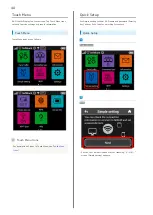
・When WLAN is enabled,
(Wi-Fi connection standard
(2.4G/5G) / number of connected devices) lights and
when Wi-Fi router connects to the Internet,
(Internet
connected) lights.
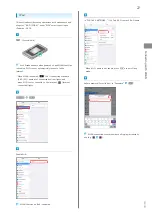
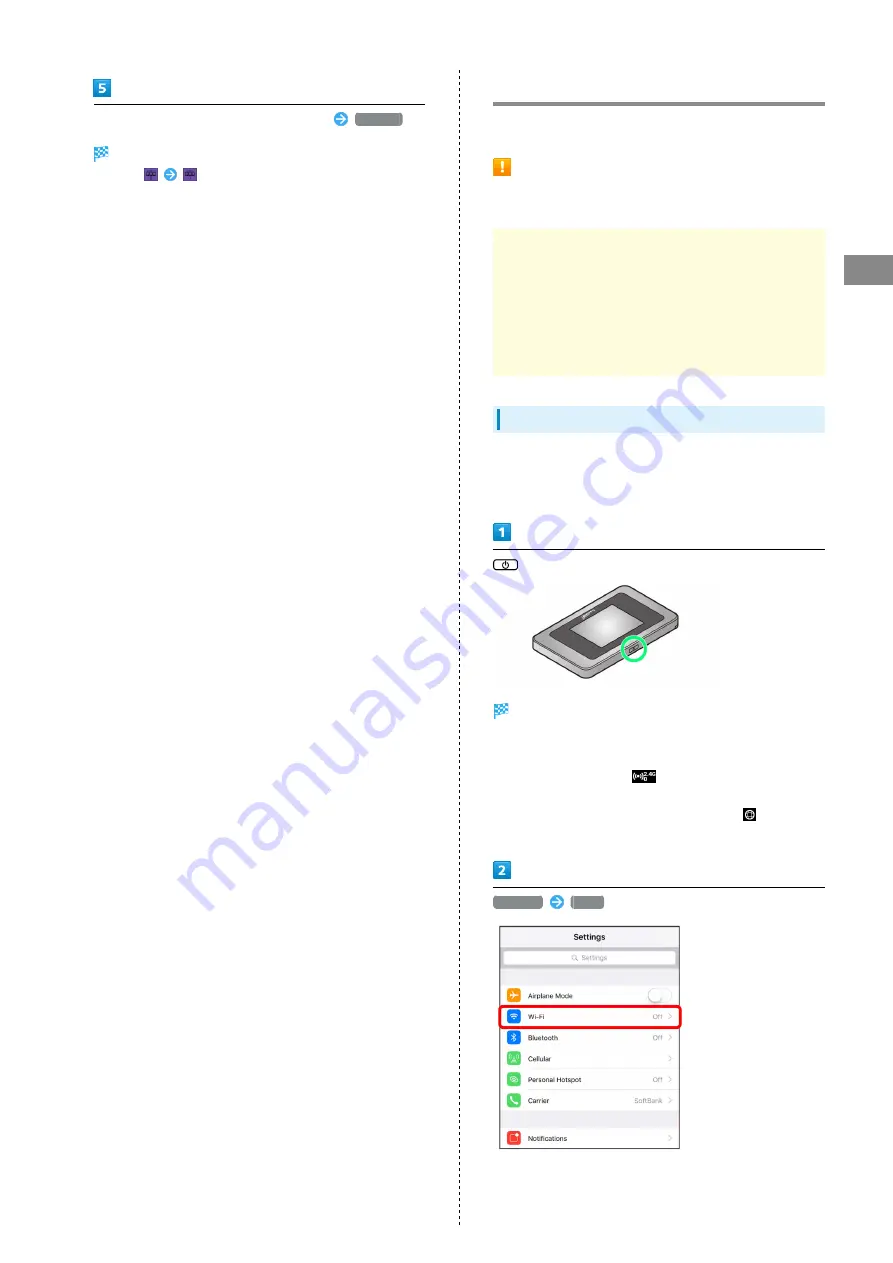
Settings
Wi-Fi
Summary of Contents for 602HW
Page 1: ...602HW User Guide...
Page 2: ......
Page 32: ...30...
Page 40: ...38...
Page 82: ...80 Set each item Apply LAN Wi Fi basic settings for Wi Fi name SSID A are made...
Page 87: ...85 Settings Using WEB UI 602HW Set each item Apply LAN Wi Fi advanced settings are made...
Page 91: ...89 Settings Using WEB UI 602HW OK MAC Address Filtering is canceled...
Page 93: ...91 Settings Using WEB UI 602HW Set each item Apply DHCP is set...
Page 95: ...93 Settings Using WEB UI 602HW Apply Network mode is set...
Page 97: ...95 Settings Using WEB UI 602HW Select the network OK Network search is set...
Page 100: ...98 New profile Set each item Apply Created profile appears for profile name...
Page 102: ...100 Enter each item Apply Edited information appears...
Page 117: ...115 Settings Using WEB UI 602HW Set each item Apply Firewall is set...
Page 119: ...117 Settings Using WEB UI 602HW In Filter mode Blacklist Whitelist Add...
Page 122: ...120 Delete OK Apply IP address filtering settings are canceled...
Page 125: ...123 Settings Using WEB UI 602HW Apply Domain Name Filter is set...
Page 127: ...125 Settings Using WEB UI 602HW Delete OK Apply...
Page 128: ...126 OK Domain name filtering settings are canceled...
Page 131: ...129 Settings Using WEB UI 602HW Apply Portmapping is set...
Page 132: ...130 Canceling Portmapping In Menu List Router Setting Portmapping Delete...
Page 133: ...131 Settings Using WEB UI 602HW OK Apply Portmapping settings are canceled...
Page 135: ...133 Settings Using WEB UI 602HW Add Enter each item OK...
Page 136: ...134 Apply Special application settings are added...
Page 138: ...136 OK Apply Special application settings are canceled...
Page 140: ...138 Set each item Apply DMZ host settings are applied...
Page 142: ...140 Set each item Apply SIP ALG settings are applied...
Page 144: ...142 Enable Disable Apply UPnP settings are applied...
Page 146: ...144 Cone Symmetric Enter each item Apply NAT settings are applied...
Page 154: ...152 OK Wi Fi router reboots to its default settings...
Page 155: ...153 Settings Using WEB UI 602HW Rebooting Wi Fi Router In Menu List System Reboot Reboot...
Page 156: ...154 OK Wi Fi router is rebooted...
Page 162: ...160 Resetting Data Traffic In Main Menu Data Traffic Reset...
Page 163: ...161 Settings Using WEB UI 602HW Yes Data traffic volume is reset...
Page 166: ...164 Delete OK Information is deleted after pop up screen is shown...
Page 168: ...166 Delete OK Information is deleted after pop up screen is shown...
Page 177: ...175 Settings Using WEB UI 602HW Enter Login password Login Settings open LAN Wi Fi...
Page 180: ...178 Enter Login password Login Settings open LAN Wi Fi...
Page 183: ...181 Settings Using WEB UI 602HW Enter Login password Login Settings open LAN Wi Fi...
Page 185: ...183 Settings Using WEB UI 602HW OK LAN Wi Fi basic settings for Wi Fi name SSID B are made...
Page 198: ...196 Data Usage Reset...
Page 199: ...197 Settings Using WEB UI 602HW Yes Data volume is reset...
Page 204: ...202 Delete YES Information is deleted after pop up screen is shown...
Page 206: ...204 Enter Login password Login Settings open Device Information Information is shown...
Page 208: ...206 Connected Devices Information of connected devices is shown...
Page 209: ...Appendix Troubleshooting 208 Specifications 211 Warranty Service 213 Customer Service 213...
Page 216: ...214...
Page 231: ......

