background image

6-20

6

Camera

*

Available for External Camera.

K

Photo Camera: Centre Auto Focus, Video Camera: Auto Focus

Photo Camera

Press 

s

 or 

N


x


A

 Select 

Shooting Settings


A

 Press 

h

 or 

b


A

 Select 

Focus


A

 Press 

h

 or 

b


A

 Select a mode 

A

 Press 

h

 or 

b

Video Camera

Press 

s

 or 

N


x


A

 Select 

Focus


A

 Press 

h


or 

b


A

 Select a mode 

A

 Press 

h

 or 

b

^

Setting returns to default after exiting mobile camera.

1

Available in Video Camera mode.

2

Available in Photo Camera mode.

3

Not available when Optical Zoom is at level 9 - 11.

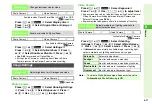
K

Off

Press 

s

 or 

N


x


A

 Select 

Modes


A

 Press 

h


or 

b


A

 Select 

Monochrome


A

 Press 

h

 or 

b


A


Choose 

On

 or 

Off


A

 Press 

h

 or 

b

1

Available when Picture Size is 

480 x 640

 or larger.

2

Available for External Camera.

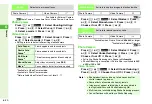
K

Off

Photo Camera

Press 

s

 or 

N


x


A

 Select 

Modes


A

 Press 

h


or 

b


A

 Select 

Shake Reducing


A

 Press 

h

 or 

b


A


Choose 

On

 or 

Off


A

 Press 

h

 or 

b

^

Activating Shake Reducing sets Scene to 

Automatic

.

^

Shake Reducing is cancelled if Picture Size is switched to 

240 

x 320

 or 

120 x 160

.

Video Camera

Press 

s

 or 

N


x


A

 Select 

Shake Reducing


A


Press 

h

 or 

b


A

 Choose 

On

 or 

Off


A

 Press 

h

 or 

b

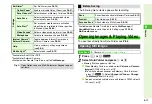
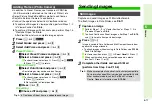
Focus

Select auto or manual focus

Photo Camera

!

*

Video Camera

!

*

Auto Focus

1

Frame appears and focus adjusts

Centre Auto 
Focus

2

Frame appears and focus adjusts

Multi Auto 
Focus

2

Three frames appear and focus adjusts

Manual Focus

Adjust focus manually (see 

P.6-6

)

Macro

3

Focus adjusts faster for close-up shots

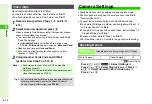
Monochrome

Activate to capture images in black and white

Photo Camera

!

Video Camera

#

Shake 

Reducing

Activate to reduce camera shake

Photo Camera

!

1

Video Camera

!

2

Note

H

^

Shake reduction may take up to five seconds after 
shutter release to process.

^

Some effects of camera shake may remain.

^

Images may appear relatively dark when captured in 
low light conditions with Shake Reducing 

On

.

^

Multi Job is not available during Shake Reducing process.

^

Cancel Continuous Shoot to use Shake Reducing.

Summary of Contents for 910SH

Page 1: ...e Accessible SoftBank services may vary by service area subscription etc SoftBank 910SH is compatible with 3G network technology Note Copying this manual in whole or part without authorisation is proh...

Page 2: ...or operations are indicated as shown to the right Basic Multi Selector Operations B E Press C or D B F Press B or A B G Press C D B or A Operate compatible functions such as mobile camera and volume c...

Page 3: ...ifferent size is set or while Simple Menu see P 2 19 is active Abbreviated Steps Press b Perform the operation such as opening a window Main Menu H Menu Item A Selection A Operation A Options N A Menu...

Page 4: ...re and download as required Complimentary sample not available for purchase Note H Supplied Utility Software is designed exclusively for 910SH Tip H For accessory related information please contact So...

Page 5: ...t Power On Off 1 23 C My Details 1 24 C Keypad Lock 1 24 Handset Menus 1 26 C Main Menu 1 26 C User Shortcuts 1 28 C Multi Job 1 32 C Pen Light 1 32 Security Codes 1 33 C Handset Code 1 33 C Centre Ac...

Page 6: ...on Settings 3 12 Editing Characters 3 12 C Deleting Replacing 3 12 C Copy Cut Paste 3 12 C Deleting Text On and After Cursor 3 13 Additional Functions 3 13 C Copying from Phone Book 3 13 C Using Text...

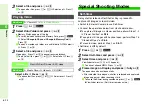
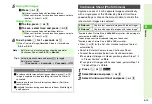
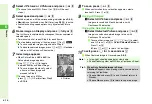
Page 7: ...1 C Recording Video 6 11 C Video Recording Operations 6 12 Opening Images Playing Video 6 13 C Opening Still Images 6 13 C Playing Video 6 14 Special Shooting Modes 6 14 C Self timer 6 14 C Continuous...

Page 8: ...ure Effects 8 15 C Panorama Images 8 16 C Split Screen 8 17 Memory Card 8 18 C Precautions 8 19 C Inserting Removing Memory Card 8 19 C Format Card 8 20 C Backup Restore 8 21 C Additional Functions 8...

Page 9: ...Searching Entries by Subject 11 6 C Editing Entries 11 6 C Deleting Entries 11 6 Tasks 11 7 C Saving Entries 11 7 C Opening Entries 11 9 C Searching Entries by Subject 11 10 C Editing Entries 11 10 C...

Page 10: ...s 13 19 C Retrieving Complete S Mail Messages 13 21 C Retrieving Mail List 13 22 Using Messages 13 23 C Checking Messages 13 23 C Replying to Messages 13 26 C Forwarding Messages 13 26 C Cancelling Se...

Page 11: ...C Opening S Application Properties 15 6 C Moving S Applications to Memory Card 15 6 C Deleting S Applications 15 6 C Screensaver 15 7 C Setting Permissions 15 8 C S Application Operational Settings 1...

Page 12: ...k 18 14 C Accepting a Circle Talk Request 18 16 C Adding Cancelling Participants 18 16 C Creating Circle Talk Member List 18 17 C Editing Circle Talk Member List 18 18 C Circle Talk Settings 18 18 Nea...

Page 13: ...s Make sure you thoroughly understand these symbols before reading on Symbols and their meanings are described below CSymbols Safety Precautions Before Using Handset DANGER Great risk of death or seri...

Page 14: ...gnite causing injury Use a case to carry battery Prevent injury from battery leakage breakage or fire Do not Heat or dispose of battery in fire Open modify disassemble battery Damage or solder battery...

Page 15: ...tact SoftBank Customer Centre Customer Assistance for repairs Do not modify handset Charger or Desktop Holder fire or electric shock may result Do not use Mobile Light near people s faces 910SH Mobile...

Page 16: ...tery and unplug Charger contact SoftBank Customer Centre Customer Assistance Take measures to prevent accidents For safety never use handset while driving Pull over beforehand Mobile phone use while d...

Page 17: ...t objects on cord Exposed wire may cause fire or electric shock Do not short circuit Charger terminals May cause overheating fire or electric shock Keep metal away from terminals Do not use Desktop Ho...

Page 18: ...nesses March 2001 Persons with implanted pacemaker defibrillator should keep handset more than 22 cm away Radio waves can interfere with implanted pacemakers or defibrillators causing such devices to...

Page 19: ...alfunction or accidents Usage environment Excessive dust may prevent heat release and cause burnout or fire Avoid using handset on the beach Sand may cause malfunction or accidents Keep handset away f...

Page 20: ...Display window Mobile Light cover Acrylic resin Shortcuts A a Key Clear Back Key Multimedia Text Key Keypad Multi Job Manner Key Multi Selector Cursor Keys Mail Key Yahoo Keitai Key Start Key Power O...

Page 21: ...ed fuse 1 A fuse for In Car Charger Or may cause damage fire Always charge battery in a well ventilated area Avoid covering wrapping Charger and Desktop Holder may cause damage fire Do not use In Car...

Page 22: ...dinary refuse always tape over battery terminals before disposal Take exhausted battery to a SoftBank shop or follow the local disposal regulations Keep battery out of children s reach Charge battery...

Page 23: ...for inspection upon request Handset use near landlines TVs or radios may cause interference Beware of eavesdropping Because this service is completely digital the possibility of signal interception i...

Page 24: ...or service cancellation Camera Media Player S Applications After a period of disuse these functions may be unusable retrieve Network Information see P 10 15 to restore usability Handset is not water...

Page 25: ...the MPEG 4 Systems Patent Portfolio License for encoding in compliance with the MPEG 4 Systems Standard except that an additional licence and payment of royalties are necessary for encoding in connec...

Page 26: ...nd NetFront SMIL Player SMIL player developed by ACCESS Co Ltd Copyright 2004 2006 ACCESS Co Ltd ACCESS and NetFront are trademarks or registered trademarks of ACCESS Co Ltd in Japan or other countrie...

Page 27: ...maximum communication distance is ten metres Microsoft Excel and Microsoft Word are product names of Microsoft Corporation in the United States Microsoft and PowerPoint are registered trademarks of M...

Page 28: ...om Screen Sky Mail Movie Sha mail Sha mail 3D Pictogram Input Memory Near Chat Multi Job S Mail Arrange Mail Feeling Mail S Cast S Town S Loop Standby Window PC Site Browser Weather Indicator Live Mon...

Page 29: ...kg Tests for SAR are conducted with handset transmitting at its highest certified power level and follow the testing methods set by the government While there may be differences between the SAR levels...

Page 30: ...1 1 Getting Started...

Page 31: ...2 16 Simple Menu Select a simplified menu ideal for users who use only basic handset functions P 2 19 Kanji Conversion Entering Japanese text with Predictive or Previous Usage reduces required keystro...

Page 32: ...rom Phone Book entries etc P 11 18 P 11 21 P 11 22 S FeliCa Hold handset over compatible reader writers to use e money services etc all around Japan P 16 2 S Cast Subscribe to Japanese mobile periodic...

Page 33: ...ppears and handset returns to Standby This is not a malfunction If Insert USIM Card appears or handset does not restart clean and properly reinsert USIM Card then restart handset USIM Card General Inf...

Page 34: ...lose removed USIM Card Inserting Removing USIM Card Inserting Tip H USIM Tray see P 1 6 Tray Tab Tab 1 Using Tab pull out Tray as shown until it clicks 2 Slide in USIM Card with IC chip facing up 3 Pu...

Page 35: ...Lock or PIN2 Lock is activated if PIN1 or PIN2 is incorrectly entered three times consecutively Cancel PIN Lock see P 9 24 by entering the Personal Unblocking Key PUK Code For information on PUK Code...

Page 36: ...A a Key Open Shortcuts menu In text entry windows toggle upper lower case roman letters or standard small hiragana katakana 5Clear Back Key Delete entries escape return to previous window 6Keypad 7U K...

Page 37: ...HMemory Card Slot Insert Memory Card here IVIDEO OUT Headphone Optical Digital Line In Port Connect optional Headphones Video Cable etc JCharger Terminal KInfrared Port Use for infrared data transmis...

Page 38: ...Transmission in Progress Indicator constantly appears if IP Service Setting is On and Hot Status Connection Setting is Online j Packet Transmission Available 3Mail q Unread Mail w Unread Delivery Repo...

Page 39: ...y Phone B Bluetooth Transmission in Progress 7 Bluetooth Talk in Progress C PC Site Browser in Use AMode see P 9 2 k Manner b Drive H Original BBattery Strength see P 1 17 Indicator may appear vertica...

Page 40: ...While External Display Backlight is on with clamshell closed press 0 to toggle Clock view Clock Date World Clock or Large Clock Switch Clock view and press 0 for 1 seconds to set Display Date Time see...

Page 41: ...6 2 activates by default Perform basic operations using h s 3 L or M instead of keys used with clamshell open Display Positions Note H Answer calls with clamshell open use Headphones to answer with D...

Page 42: ...Key Press Methods Press Single soft press basic key press method Full Press h only Half press to focus lens then full press to capture an image Long Press Press and hold Side Key Assignments Viewer h...

Page 43: ...ndset is off Charging takes approximately 150 minutes with handset off B Charging time may vary by ambient temperature Handset and Charger may warm during charging Separate Charger from TV radio if in...

Page 44: ...ten Battery Time Poor Usage Conditions B Extreme temperatures use within a range of 5 C to 35 C B Impaired handset battery or Charger terminals B Signal is weak handset is out of range Power Consuming...

Page 45: ...During Video Call A message appears and call ends with a double beep then short beeps sound Handset shuts down after 20 seconds Do not dispose of an exhausted battery with ordinary refuse always tape...

Page 46: ...70 Approx 20 Approx 10 Remaining Strength at 25 C Hours of Use Battery low Please connect to charger appears Charge or replace battery immediately Level 3 Level 2 Level 1 Level 0 M C L B K A J Minimum...

Page 47: ...files sending messages etc 1 Press down and slide cover as shown 2 Lift and remove cover as shown 3 Remove battery Take hold of Battery Tab here and lift as shown Installing Removing Battery Inserting...

Page 48: ...all Light goes out Extend Charger blades Fold back when not in use 3 After Charging Unplug Charger from AC outlet then handset Squeeze release tabs to remove connector Replace Port Cover to protect Ex...

Page 49: ...own in 1 and push handset as indicated in 2 until it clicks into place resting flat Charging starts and Small Light illuminates red see P 1 17 Charging takes approximately 150 minutes Charging is comp...

Page 50: ...en handset Squeeze release tabs to remove connector Replace Port Cover to protect External Device Port In Car Charger Cigarette Lighter Socket In Car Charger Release Tabs Charger Connector External De...

Page 51: ...s Clock is set automatically after retrieval To update Network Information manually see P 10 15 Retrieve NW Info Unless otherwise noted operations in this manual are described with Clock set Return to...

Page 52: ...set 1 Press b for 1 seconds b disappears My Details Keypad Lock Activating Cancelling Note H Emergency calls 110 etc are possible even when Keypad Lock is active See P 2 3 Emergency Calls Tip H When K...

Page 53: ...Launch Hot Status Circle Talk S Town S Loop or Near Chat Yahoo Keitai Access Yahoo Keitai Mobile Internet and PC sites Media Player Play download music video Messaging Open create messages etc Camera...

Page 54: ...ed function or operation Press N to select or execute the assigned function or operation 3 LM s u h Mobile Camera Other Windows Press h to select or execute the assigned function or operation Press LM...

Page 55: ...ew item A Press N U Press k A Select an item A Press N x A Select Move A Press b A Use E to select target location A Press b Press k A Press N x A Select Set to Default A Press b A Choose Yes A Press...

Page 56: ...and day and press C to view entries up to 12 months forward of current date 4 Enter four digits for time 24 hour format to set Alarm CExample Enter 1111 to use Calculator 1 Press 1111 2 Press j Quick...

Page 57: ...k for 1 seconds 2 Select a function and press b Menu window opens Q appears Press r to toggle active windows 3 Press g to exit The other window appears Q disappears C When a confirmation appears choos...

Page 58: ...landlines or subscribe to fee based information The 4 digit number 9999 by default required to restrict handset services see P 12 7 If Network Password is incorrectly entered three times consecutivel...

Page 59: ...2 1 Basic Handset Operations...

Page 60: ...sor and press i to delete the digit above the cursor Move cursor and press i for 1 seconds to delete the digits above and after the cursor Before moving cursor press i for 1 seconds to delete the enti...

Page 61: ...ck Call Timers see P 2 14 and Call Costs see P 2 15 For operations during a call see P 2 11 2 12 Place calls with clamshell open To place calls in Viewer position use a handsfree device Headphones lin...

Page 62: ...or All Calls 2 Select a record and press b 3 Press f Handset dials the number CIndicators Redial q Dialled Voice Call O Dialled Video Call 1 Requested Circle Talk Tip H When the same number is dialle...

Page 63: ...appears A Enter country code A Enter a phone number including the dialling code A Skip ahead to Step 5 B Omit the first 0 of the dialling code except when calling Italy country code 39 2 Press N x 3...

Page 64: ...ld C Answering a Video Call see P 5 3 2 Press f When Any Key Answer see P 9 2 is Active Press any of these keys to answer calls 0 9 q p G k j 3 Press g to end call Alternatively close handset clamshel...

Page 65: ...ange ringtone volumes patterns vibration patterns and Information Light status see P 9 14 9 16 To instantly mute ringtone for that call press i clamshell open or press 0 clamshell closed Redirecting a...

Page 66: ...f Handset dials the number CIndicators Calling from Received Calls r Answered Voice Call N Rejected Voice Call Q Answered Video Call S Rejected Video Call 4 Requested Circle Talk E Missed Call Notific...

Page 67: ...f and press b Answer Phone Activating Cancelling Main Menu H Settings A Call Video Call F A Answer Phone Tip H Alternatively press i for 1 seconds in Standby to activate cancel Answer Phone Note H Whe...

Page 68: ...e Volume applies Answer Time C Adjust ring time between 0 and 30 seconds Answer Phone waits to answer calls Press b A Select Settings A Press b A Use F to select Call Video Call A Select Answer Phone...

Page 69: ...ss M N C To cancel press M M CSubscription to Call Waiting see P 12 5 or Conference Call see P 12 6 is required During a call press N x A Select Hold A Press b C To cancel press N x A Select Retrieve...

Page 70: ...Save the other party s number to Phone Book Press N x A Select Phone Book List A Press b A Press N x A Select Add New Entry A Press b A Perform from Step 2 on P 4 4 Open Message Check received sent dr...

Page 71: ...ideo Call A Press b C To edit numbers before dialling select a record and press N x A Select Edit Before Call A Press b A Edit number A Press f Long Press for Video Calls Press f A Select a record A P...

Page 72: ...ceived and total Charges do not appear 1 Select Last Data or All Data and press b 2 Press b to return to Data Counter menu Press g to return to Standby Select Clear Counter A Press b A Choose Yes A Pr...

Page 73: ...Max Cost press N Z A Enter PIN2 A Press b A Enter the amount A Press b Call Costs Main Menu H Settings A Call Video Call F A Call Time Cost A Call Costs Tip H Call Costs remain even after handset pow...

Page 74: ...ess Manner Key to automatically mute all ringtones and activate Vibration mode for incoming calls mail etc CVibration Mode see P 9 16 Activate Vibration mode to use handset vibration to alert you to i...

Page 75: ...s and Manner mode is cancelled Activating Cancelling Activating Cancelling When Manner Mode is Active C Keypad Tones Power On Off and error tones are muted Swap Call see P 12 6 beeps are audible Even...

Page 76: ...ess b U disappears and Offline Mode is cancelled Activating Cancelling Offline Mode Activating Main Menu H Settings A Network Settings F A Offline Mode Cancelling Main Menu H Settings A Network Settin...

Page 77: ...Menu Simple Main Menu Press N to toggle description on off Activating Cancelling Simple Menu Activating Cancelling Note H Some menu items function names etc differ from Standard Menu Tip H Activate S...

Page 78: ...See P 2 9 Simple Menu See P 2 19 Data Folder Pictures See P 8 2 DCIM See P 8 2 My Pictograms See P 8 2 Ring Tones See P 8 2 S Appli See P 15 2 Music See P 8 2 Data Folder Videos See P 8 2 Lifestyle a...

Page 79: ...3 1 Text Entry...

Page 80: ...case mode see below Character Selection Help C In a text entry window press N x A Select Help A Press b Entry Modes Current Entry Mode A Kanji hiragana H Single byte alphanumerics upper lower case D...

Page 81: ...he entry mode 4 U M Pause and are for phone number entry Key Assignments Key Kanji Hiragana Double byte Katakana Double Single byte Alphanumerics Double Single byte Numbers Single byte Character Codes...

Page 82: ...ana Double Single byte Alphanumerics Double Single byte Numbers Single byte Character Codes C Conversion Up 5 Cursor Up D Conversion Down 6 Cursor Down X Line Break B Cursor Left A Cursor Right j Chan...

Page 83: ...a skip ahead to Step 6 5 Press D convert and use E to select a word The most recent selection appears first in the list C To see other suggestions press N z or M J C To exit the list press i C To chan...

Page 84: ...try press p six times for space Predictive Previous Usage C Use these functions to convert hiragana to kanji more quickly Both functions are active by default see P 3 12 Optional Predictive Functions...

Page 85: ...see Symbols press M toggle as follows Symbol List s Log History C To see Pictograms press N toggles as follows Pictogram Lists Log History B Alternatively press D repeatedly to scroll through Symbols...

Page 86: ...b A Select Clear History A Press b A Choose Yes A Press b B To return to the text entry window press i A Press i Emoticons Tip H For other emoticons enter and press D convert Alternatively enter a des...

Page 87: ...r and lower case modes Y and Z are double byte Second digit Press next Second digit Press next 1 2 3 4 5 6 7 8 9 0 1 2 3 4 5 6 7 8 9 0 First digit Press first 1 First digit Press first 1 A B C D E 2 2...

Page 88: ...ragana and press M S To enter AM press 26 then M S 2 Use E to select a word and press b Hiragana to Roman Letter Conversion hiragana with or is converted to the same characters Symbols Hiragana to Num...

Page 89: ...with a hiragana in the same row for appear Word suggestions vary by time of day Example When is entered Words in the list are preset by time blocks If Clock is unset only words for 11 00 16 59 are ava...

Page 90: ...deleted Place cursor at the end of text and press i for 1 seconds to delete all text When cursor is located amidst a block of text characters on and after cursor are deleted 2 Enter another character...

Page 91: ...Insert Phone Book entry items into text entry windows Select from name phone numbers mail addresses Category postal address homepage Note and Birthday 1 Press N x Move cursor to target location before...

Page 92: ...press b 4 Select a size and press b Using Text Templates Saving to Text Templates C Follow these steps to save text in text entry windows to Text Templates Press N x A Select Text Templates A Press b...

Page 93: ...4 1 Phone Book...

Page 94: ...nt Information When battery is exhausted removed for long periods Phone Book entries may be lost handset damage may also affect handset information recovery SoftBank is not liable for damages from los...

Page 95: ...ory handset only Address 1 Enter postal code 20 characters country name 32 characters state province 64 characters city name 64 characters and street name number 64 characters Item Description Homepag...

Page 96: ...ress b To save additional phone numbers repeat Steps 6 8 9 Select Add Email Address and press b 10 Enter a mail address and press b 11 Press b 12 Select an icon and press b To save additional mail add...

Page 97: ...3 Ringtone 1 Select Preset Sounds Ring Songs Tones Music or Flash Ringtones and press b Ringvideo 1 Select Videos and press b 4 Select a file and press b C For Preset Sounds select a tone A Press b C...

Page 98: ...aved image appears for calls mail from phone numbers mail addresses saved in that entry Follow these steps after opening Phone Book Details see P 4 4 When finished Phone Book Details returns Complete...

Page 99: ...6 to open Secret entries To cancel Secret activate Show Secret Data see P 9 26 and choose Off in Step 2 To edit Phone Book entries see P 4 10 Editing Phone Book Entries Secret entries do not appear in...

Page 100: ...lt search method to call numbers within entries To dial numbers saved in Secret entries first activate Show Secret Data see P 9 26 To search by other methods see P 4 9 1 Press D 2 Use F to specify kat...

Page 101: ...ault For Both entries in both storage media appear Phone Book Search Methods By Reading Shows entries that start with specified Reading By Category Opens entries in the specified Category By a ka sa t...

Page 102: ...SIM Card USIM Card does not support some Phone Book entry items see P 4 3 Those items are deleted when Phone Book entries are copied from handset 1 Press D then select an entry 2 Press N x 3 Select Ma...

Page 103: ...dit Name and press b C To change icons select Change Icon A Press b A Select an icon A Press b Omit the next steps 4 Enter name Enter up to 16 characters on handset USIM Card character entry limit var...

Page 104: ...ts at one time see Contact Groups in Step 4 on P 13 8 Create up to five Contact Groups 1 Enter a Group name and press b Save up to 20 members per Group 1 Select a Group and press b 2 Select Assign New...

Page 105: ...b 1 Select a member and press N x 2 Select Remove Entry and press b 3 Choose Yes and press b Save phone numbers to Speed Dial List for easy dialling 1 Select from w to m and press b 2 Select an entry...

Page 106: ...A Press b B To overwrite existing number choose Yes A Press b Note H Saved numbers are deleted from Speed Dial List when edited in Phone Book or when source entry is deleted Numbers are editable even...

Page 107: ...deleted 3 If the same entry item is edited in Phone Book and SAB SAB content is referenced 4 Unrelated SAB changes remain 5 Unrelated Phone Book changes remain S Address Book SAB Note H Sync commands...

Page 108: ...ets SAB content remains as last saved Other 3G Handsets Service contract and SAB content remain accessible via PC V3 V4 V5 V6 V8 Series Service contract is terminated and SAB content is deleted Servic...

Page 109: ...and press b 3 Enter Handset Code and press b Handset connects to the Server and Backup starts After Backup details appear C To cancel press M 3 A Choose Yes A Press b 4 Press b to exit 1 Select Resto...

Page 110: ...and press b 3 Choose On and press b 4 Enter Handset Code and press b KEvery Sun 00 00 Every Month Select Every Month A Press b A Enter date A Press b A Enter time A Press b Every Week Select Every Wee...

Page 111: ...lect Edit Add Details A Press b A Select an item A Press b For more see P 4 4 Press N x A Select Reset My Details A Press b A Choose Yes A Press b Opening Log Main Menu H Phone A S Address Book My Det...

Page 112: ...5 1 Video Call...

Page 113: ...ing on the other party s handset specifications or settings incoming image may appear small or not at all Rapid motion can make images appear choppy or distorted Conversations may be hampered by ambie...

Page 114: ...mage is sent C For operations during a Video Call see P 5 4 Answer with Voice Only 1 Press b L 2 Select Hide Picture and press b Outgoing image is suppressed Video Call charges apply C For operations...

Page 115: ...s N x A Select Hold A Press b B To answer the call on hold press b A Select Show Picture or Hide Picture A Press b Callers placed on hold receive Hold Guidance Picture Microphone is muted Note H Answe...

Page 116: ...call press N x A Select Optical Zoom On or Optical Zoom Off A Press b Optical Zoom cannot be enabled disabled by using E Enable Optical Zoom from Options While Internal Camera is in use Optical Zoom r...

Page 117: ...versed Mirror Image is On when initiating Video Calls During a call press N x A Select Settings A Press b A Select Exposure A Press b A Use E to adjust level A Press b Alternative Image appearance is...

Page 118: ...or or Frame Rate Prior A Press b Select Quality Prior for higher quality and Frame Rate Prior for faster frame rate Outgoing Picture setting may automatically change during calls depending on the othe...

Page 119: ...om Phone Book or Call Log select Auto Answer List A Press b A Select an entry A Press N x A Select Change A Press b A Select From Contacts List or From Call Log A Press b A Select a number A Press b C...

Page 120: ...6 1 Camera...

Page 121: ...ernal Camera Mobile Camera Basics 910SH Mobile Light emits relatively strong light Do not point Mobile Light at faces of people especially children or animals at close range Shutter Click C Shutter cl...

Page 122: ...Electric Bulb L Fluorescent 7Mobile Light see P 6 19 I On K Automatic J Low Light 8Focus see P 6 20 8 Centre Auto Focus 7 Multi Auto Focus N Manual Focus K Macro 9Anti Shake Alert see P 6 19 F On AExp...

Page 123: ...A Bright 9Save to see P 6 24 O Handset d Memory Card D Ask Each Time 1Options Press to open iconised menu items 2Toggle Mode Cancel End Press to toggle between Photo Camera and Video Camera modes Pres...

Page 124: ...re slider 2 Hide indicators to frame image on full Display see P 6 18 Display Icons Toggle Viewfinder size see P 6 21 Display Size 3 Toggle between Auto Focus Manual Focus and Macro see P 6 20 Focus 4...

Page 125: ...rehand see P 6 20 Before image capture half press h again or press f to start over 910SH mobile camera features an Optical Zoom function Optical Zoom lens moves to change focal length while maintainin...

Page 126: ...ts VGA For Msg W 240 x H 320 dots QVGA For Msg W 120 x H 160 dots QQVGA Format JPEG jpg 1 Save Location Handset Data Folder Pictures or Memory Card Data Folder Pictures DCIM2 Picture Quality High Qual...

Page 127: ...press 3 4 Press h to save Image is saved and Viewfinder returns for another shot C When confirmation for save location appears select a location A Press h 5 Press 3 for 1 seconds to exit 1 Frame image...

Page 128: ...ng mobile camera before returning to Viewfinder Choose Yes and press b to end Handset returns to Standby Choose No and press b to return to captured image Still Image Functions Before Image Capture Sh...

Page 129: ...disable Optical Zoom see P 6 21 Save Pictures to Select handset or Memory Card see P 6 24 Auto Save Select whether to save captured image automatically see P 6 24 Auto Start1 Set or cancel mobile cam...

Page 130: ...44 dots QCIF W 128 x H 96 dots SubQCIF W 640 x H 480 dots VGA W 640 x H 360 dots Wide 1 W 320 x H 240 dots QVGA W 240 x H 176 dots HQVGA 1 Format MPEG 4 or H 263 3gp 2 MPEG 4 3gp 2 MPEG 4 ASF 3 Save L...

Page 131: ...A Press h or b 7 Press 3 for 1 seconds or g to exit Press s or N x to use the following functions 1 Available for SubQCIF or QCIF 2 Available for External Camera Video Camera Note H Even if Microphone...

Page 132: ...elf timer2 Set Self timer see P 6 14 Settings Optical Zoom2 Enable or disable Optical Zoom see P 6 21 Save Videos to3 Select handset or Memory Card see P 6 24 Auto Save Select whether to save recorded...

Page 133: ...era to use Self timer Conduct the operations below from Viewfinder window B To capture still images in Viewer position perform Steps 1 2 in Viewer Position on P 6 8 B To capture still images with hand...

Page 134: ...ress h or b for the first shot Handset captures the rest automatically Switch to External Camera to use Continuous Shoot Conduct the operations below from Viewfinder window B To capture still images i...

Page 135: ...individually select a frame or Index Image and proceed to Step 8 C To send image via S Mail press M E A Perform from Step 3 on P 13 8 8 To save press h or b C When confirmation for save location appe...

Page 136: ...Press M B Press i to return B Not available in Viewer position 3 Press h or b Cancelling 1 Choose Off and press h or b Capture and send images as S Mail attachments To attach images in Data Folder se...

Page 137: ...assigned to some functions see P 6 5 Function Shortcuts Conduct the operations below from Viewfinder window B To capture still images in Viewer position perform Steps 1 2 in Viewer Position on P 6 8...

Page 138: ...t available KAutomatic Press s or N x A Select Mobile Light A Press h or b A Select a mode A Press h or b Setting returns to default after exiting mobile camera Grid Display Show or hide grid on Displ...

Page 139: ...h or b Activating Shake Reducing sets Scene to Automatic Shake Reducing is cancelled if Picture Size is switched to 240 x 320 or 120 x 160 Video Camera Press s or N x A Select Shake Reducing A Press h...

Page 140: ...External Camera see P 6 23 Exposure slider disappears after a few seconds of inactivity Available for External Camera KAutomatic Press s or N x A Select Shooting Settings A Press h or b A Select Whit...

Page 141: ...ct a mode A Press h or b Scene setting returns to default upon exiting Photo Camera Video Camera or switching between Internal Camera and External Camera see P 6 23 KOn Press s or N x A Select Setting...

Page 142: ...hort video up to 295 KB to send via S Mail For longer recording select Extended Video Photo Camera Video Camera QCIF 176 x 144 W 176 x H 144 dots Format MPEG 4 or H 263 3gp SubQCIF 128 x 96 W 128 x H...

Page 143: ...activate or Off A Press h or b Save to Select a save location for images or video Photo Camera Video Camera Camera Mode Size Save Location Photo Camera 120 x 160 or 240 x 320 Video Camera Phone Memor...

Page 144: ...7 1 Media Player...

Page 145: ...to search by title artist etc 1 Select Music or Videos and press b 2 Select Download Music or Download Videos and press b Handset connects to the Internet and the corresponding download page appears F...

Page 146: ...achable to S Mail CPlay SD Audio standard compliant music files These files cannot be used as ringtones Handset supports Secure AAC and AAC files compliant with the SD Audio standard B For AAC files s...

Page 147: ...a encryption and authentication Analogue recording is not supported Optical Conversion Cable optional accessory Optical digital connecting cable sold separately Estimated Recording Time for Memory Car...

Page 148: ...tputs of audio sources To place calls or send mail stop recording and cancel Offline Mode CDo not remove Memory Card while recording Doing so may damage the card or result in lost files 1Title 2Track...

Page 149: ...z Similar to bit rate higher rates translate into better sound quality Sampling frequency is automatically set to 32 kHz 44 1 kHz or 48 kHz according to the recording method or audio source When recor...

Page 150: ...back at the beginning of music 1 Select SD AUDIO Recorder and press b Receive calls during recording appears To prevent disruption by calls choose No and press b in Step 2 to activate Offline Mode see...

Page 151: ...Track Bookmark is not created automatically KNormal 96 kbps Press N x A Select Bit Rate A Press b A Select Normal 96 kbps or High quality 128 kbps A Press b Sound quality is better at 128 kbps However...

Page 152: ...k 4Artist Name No Artist Name appears if not available Artist names also appear on External Display during playback 5Track Number 6Status 1 Playing 0 Paused 3 Fast Forwarding 4 Fast Rewinding 7Playbac...

Page 153: ...dow opens and playback starts Playback stops after the last file when Playback Pattern is set to Normal see P 7 11 1 In Random Play B only replays the current file 2 Not available for the last file wh...

Page 154: ...top music appears when g is pressed in Standby Choose Yes or No and press b Playback Settings Sound Effects Increase bass for dynamic sound or create a surround field Main Menu H Media Player A Music...

Page 155: ...ccessible via Access WEB Link see P 7 11 Accessing Linked Information To disable linked information see P 7 14 Web Link Settings 8Sound Effects see P 7 14 i Bass l Surround k Surround Bass Indicator d...

Page 156: ...nly Change Settings Press N x A Select Settings A Press b A See right Edit See P 7 14 Frame Advance While paused press A Long Press Toggle Display Size Press 2 or r see P 7 14 All Videos Video with Li...

Page 157: ...Settings Always On Backlight remains on during playback Always Off Backlight remains off during playback Normal Settings Applies Display Backlight setting see P 9 11 Display Size Change playback size...

Page 158: ...hoose Yes and press b Incoming transmissions are blocked during editing 4 Select Crop and press b 5 Select Delete Before or Delete After and press b Video plays To adjust start point press b to start...

Page 159: ...s press M K To add more repeat Steps 5 10 C To edit saved subtitles select one A Press b A Select Edit Text A Press b A Edit A Press b A Perform from Step 9 C To delete saved subtitles select one A Pr...

Page 160: ...Background Colour A Press b A Select a colour A Press b C When finished press i A Perform from Step 10 on P 7 16 Up to two effects can be applied per entry Follow these steps in Step 9 on P 7 16 KWhit...

Page 161: ...ic All files are saved in All Videos or All Music Use Playlists to organise them Playlists store only file locations Source files remain in All Videos or All Music Three Playlists are saved by default...

Page 162: ...ss N x A Select Edit List Title A Press b A Enter new name A Press b 3 Press N x 4 Select Add New Playlist and press b 5 Enter name and press b Add files to Playlists from All Videos or All Music Play...

Page 163: ...nd press N x 2 Select Delete and press b 3 Choose Yes and press b 1 Select a file and press N x 2 Select Delete Track and press b 3 Choose Yes and press b Opening Playlist Properties C Follow these st...

Page 164: ...8 1 Managing Files Data Folder...

Page 165: ...Other Documents Flash Ringtones Flash Pictures DCIM Ring Songs Tones Still Images Downloaded Pictograms Shortcut to S Applications see P 15 2 Video Images Downloaded E Books etc Downloaded Flash Files...

Page 166: ...e G PNG png PNG image y E Animation NEVA files nva Animation may include sound p SVG svgz SVG T file Icon Format Extension Description m MPEG 4 3gp 3GPP video image z MPEG 4 or H 263 3gp or mp4 3GPP v...

Page 167: ...ge to Phone or Change to Memory Card A Press b C To open a created sub folder or a sub folder in DCIM select it A Press b 2 Select a file and press b The content plays or appears C Press b to zoom in...

Page 168: ...rames 4 Press b to stop Note H Remote control on LCD Remote Mic optional accessory is disabled for Music Player activated via Data Folder Activating Mobile Camera C Open file list in Pictures DCIM or...

Page 169: ...Menu H Data Folder SVG Files C Handset supports Scalable Vector Graphics Tiny SVG T Follow these steps to view graphics such as tables or maps Press b A Select Data Folder A Press b A Select Other Do...

Page 170: ...A Select a CCF file A Press b B ComicSurfing S Application starts Refer to the ComicSurfing help menu for operational instructions When an S Application is paused Application suspended End application...

Page 171: ...older To delete S Applications see P 15 6 Deleting S Applications 1 Select a folder and press b 2 Deleting Folders 1 Select a folder and press N x Select a folder other than S Appli or Lifestyle appli...

Page 172: ...Copying Moving Single Files 1 Select a file and press N x Copying Moving Multiple Files 1 Perform from Step 2 on P 8 5 to select multiple files and press N x 3 Select Copy or Move and press b 4 Selec...

Page 173: ...A Press b B For Display size images or Centred use E to zoom in out or press N to rotate 4 Press b Wallpaper is set 1 Select Pictures Ring Songs Tones Music Videos or Flash Ringtones and press b 2 Sel...

Page 174: ...ooth on the printer 1 Select Pictures DCIM or Other Documents and press b C To open a created sub folder or a sub folder in DCIM select it A Press b 2 Select a still image and press N x 3 Select Print...

Page 175: ...ve to the upper left corner of the portion to crop and press b 3 Use G to move to the lower right corner of the portion to crop and press b C To cancel press i A Start over from Step 1 4 Use G to spec...

Page 176: ...o change the stamp press i 2 Use G to move text or stamp to target location and press b C To specify colours press N n A Select text colour A Press b A Select outline colour or no outline A Press b A...

Page 177: ...current image only 1 In Step 1 on the left press N 2 Press N u A rectangle appears with in the upper left corner Face Arrange Main Menu H Data Folder A Pictures A Select a file A Options N A Edit A P...

Page 178: ...y for compatible files Select a frame A Press b A Press b A Press M q A Enter name A Press b A Select a location A Press b C To change the frame press i before assigning it Select from Sharpness to Da...

Page 179: ...e Effects Use JPEG images between W 48 x H 64 and W 120 x H 160 dots W 160 x H 120 dots Some portions may be cropped to adjust two images to the same size The result may not be satisfactory if colour...

Page 180: ...the positions press N 6 Press M q 7 Press b 8 Enter name and press b 9 Select a location and press b Image is saved to Data Folder as a new entry Combine up to four reduced images into one Apply to JP...

Page 181: ...e a particular file to Memory Card refer to that section of the manual Memory Card Split Picture Preview Keep Memory Card out of children s reach may cause suffocation if swallowed Note H SoftBank is...

Page 182: ...ot expose Memory Card to strong impacts pressure or liquids Do not touch Memory Card terminals or expose them to metal objects Do not expose Memory Card to direct sunlight or excessive heat e g inside...

Page 183: ...k choose Yes A Press b 2 Enter Handset Code and press b 3 Choose Yes and press b Removing 1 2 Note H Do not force Memory Card into or out of handset damage may result When s appears Memory Card may no...

Page 184: ...te corresponding data on handset to proceed Some items may not be transferable Some backup files may not be usable on other SoftBank handsets or PCs etc When handset or Memory Card memory is low entri...

Page 185: ...sferring data backed up on other SoftBank handsets to handset B Messages may not transfer depending on the size B Handset stores up to 500 messages between Drafts Unsent Messages and Sent Messages If...

Page 186: ...ss b 5 Choose Yes and press b C To cancel press M 3 C For Select All confirmation appears Choose Yes or No A Press b Select Memory Card A Press b A portion of Memory Card is reserved for storing copyr...

Page 187: ...3 for other images 5 Press M K0 Copy each Enter a number 01 99 A Press b KOff Choose On or Off A Press b Digital Print Order Format DPOF Selecting Images Prints Main Menu H Settings A Connectivity F A...

Page 188: ...es A Press b Index Print Create Index Print a print with thumbnails Main Menu H Settings A Connectivity F A Memory Card A DPOF A Settings A Index Print Check Settings View current print settings Main...

Page 189: ...9 1 Additional Settings...

Page 190: ...l A Press N Z A Select Answer Phone A Press b A Choose On or Off A Press b Select a mode A Press M l A Enter Handset Code A Press b A Choose Yes A Press b Mode Settings Activating a Mode Mode Settings...

Page 191: ...b Incoming Calls Alarm Select Voice Call Video Call Circle Talk or Alarm A Press b A Select from Pattern 1 to Pattern 3 My Pictures DCIM Flash Other Documents or Custom Screen A Press b C For My Pictu...

Page 192: ...System Graphics for Voice Call Video Call Circle Talk or Alarm follow these steps after opening the corresponding menu Select Custom Screen A Press b A Press b Note H Ringtone and ringvideo images fo...

Page 193: ...Soft Keys in Standby Main Menu H Settings A Phone Settings F A Display A Standby Display A Show Indicators Show Operator Name Show or hide the name of your service provider SoftBank etc in Standby Mai...

Page 194: ...atus see P 18 4 Standby Window opens in Shortcut mode see left by default 1 Press C Standby Window opens in last used mode 2 Use G to select an item and press b Shortcut target news or member status a...

Page 195: ...ress b A Select an entry A Press b Select an icon A Press N x A Select Icon Panel Display A Press b A Select Delete A Press b A Choose Yes A Press b My Status icon cannot be deleted Press N x A Select...

Page 196: ...Press N x A Select Member Panel Settings A Press b A Select Assign Member A Press b A Select Phone Book A Press b A Select an entry A Press b Select a member A Press N x A Select Member Panel Settings...

Page 197: ...creens can also be downloaded via http www custamo com using a PC 1 Select Download Custom Screens and press b Handset connects to the Internet and appears C To read introduction to first select b A P...

Page 198: ...creens returns Select a Custom Screen A Press N x A Select Delete A Press b A Choose Yes A Press b C To delete the corresponding Custom Screen Key at the same time choose Yes A Press b B To cancel cho...

Page 199: ...ightness A Press b A Use E to adjust level A Press b K2 minutes Select a period A Press b Main Menu H Data Folder Note H Some Custom Screens may not contain files for Wallpaper System Graphics rington...

Page 200: ...nal Display Main Menu H Settings A Phone Settings F A Display A External Display A Backlight LCD Contrast Adjust External Display Contrast from nine levels Main Menu H Settings A Phone Settings F A Di...

Page 201: ...video audio inputs of the device and VIDEO OUT Port of handset Video Cable is designed exclusively for 910SH Plug in firmly To disconnect grasp the plug and pull gently Do not pull twist or bend Video...

Page 202: ...tput and follow these steps Select Display Size A Press b A Select Standard or Large A Press b Rotate Image C Activate Video Output and follow these steps Select Rotation Setting A Press b A Select fr...

Page 203: ...w Message or Delivery Report select Assign Tone A Press b A Select Videos or Flash Ringtones A Press b A Select a file A Press b C To play files select one and press M L B Press i to stop Duration Not...

Page 204: ...es only when ringtone is a compatible SMAF file Selecting Light Colour Select an item A Press b A Select Light Colour A Press b A Select a colour A Press b Activating Deactivating Select an item A Pre...

Page 205: ...ect an item A Press b A Select Tone or Sound A Press b A Select Ring Songs Tones A Press b A Select a file A Press b C To play files select one and press M L B Press i to stop Duration Select an item...

Page 206: ...Settings A Phone Settings F A Ringer Output Earpiece Volume Setting applies when placing answering calls Main Menu H Settings A Phone Settings F A Earpiece Volume Any Key Answer Activate or cancel Any...

Page 207: ...rases per reading Enter a word phrase A Press b A Enter a reading keyword A Press b Enter up to 15 characters per word phrase and eight characters in hiragana per reading C Alternatively in other text...

Page 208: ...to open Face Recognition window Precautions for capturing portrait scanning face B Make sure your face is clearly visible facial features may be obscured by hair coloured glasses masks etc B Face sho...

Page 209: ...traits per user Change location face angle accessory brightness etc for each shot Saving multiple portraits increases recognition accuracy However security will be compromised A person s portraits can...

Page 210: ...your face matches saved portrait Note H Do not wear a mask when capturing portraits even for use with Low Mask see P 9 23 Security Level Activating Cancelling Main Menu H Settings A Phone Settings F A...

Page 211: ...tion Please wait appears Preview Internal Camera Viewfinder appears as a guide Panda Panda graphic appears with operational tips Custom Screen Custom Screen see P 9 9 graphic based guidance appears Se...

Page 212: ...serted Main Menu H Settings A Phone Settings F A Locks A PIN Entry A Switch On Off PIN Lock C PIN1 Lock or PIN2 Lock is activated if PIN1 or PIN2 is incorrectly entered three times consecutively To ca...

Page 213: ...end the call press N to show Options b to toggle Loudspeaker on off or switch Video Call images M to mute unmute Microphone f to switch between callers in Call Waiting 0 9 to enter Handset Code or i t...

Page 214: ...l choose Off A Press b Note H This function is available only for compatible USIM Cards To send SMS to designated numbers save SMS Centre Number 819066519300 to Fixed Dialling No list Do not change Ce...

Page 215: ...yer is active B Bluetooth is active B Infrared is active Changing Handset Code Chng Handset Code Whenever necessary change Handset Code Main Menu H Settings A Phone Settings F A Locks A Chng Handset C...

Page 216: ...tone varies by device Ringtone Auto Answer Tone Availability Not available in Manner mode KOff Enter Handset Code A Press b A Select Switch On Off A Press b A Choose On or Off A Press b Call Settings...

Page 217: ...onds Auto Answer waits to answer calls Main Menu H Settings A Call Video Call F A Auto Answer Additional Settings Minute Minder Handset beeps once each minute during calls Main Menu H Settings A Call...

Page 218: ...10 1 Connectivity...

Page 219: ...ogress choose Yes A Press b Bluetooth Getting Started Communication System Bluetooth specification Ver 2 0 Bluetooth Profiles Supported Headset Profile Hands Free Profile Dial up Networking Profile Ob...

Page 220: ...hers C Press M 3 to cancel 2 Select a device and press b C When transmission is in progress choose Yes A Press b 3 Enter the same Authorisation Code 4 to 16 digits for handset and the other device and...

Page 221: ...see below to Show My Phone Opening Paired Device List Main Menu H Settings A Connectivity F A Bluetooth Visibility Main Menu H Settings A Connectivity F A Bluetooth A My Device Settings A Visibility...

Page 222: ...Reminder Tone Video to Alert 1 omits Secret and if unsetable on the target device Due Date Time Text Templates Available2 Available Bookmarks Available Available3 Received Msg N A4 Available5 Sent Mes...

Page 223: ...Choose Yes and press b Offline Mode is set and transfer starts C When requested enter Authorisation Code A Press b CReceiving 1 Choose On and press b Bluetooth is activated 2 When connection is reques...

Page 224: ...available during operation OK appears C To accept connection request from unpaired devices choose Yes A Press b A Enter Authorisation Code A Press b 3 Choose Yes and press b Offline Mode is set 4 Tran...

Page 225: ...cel C Press g to end Pair with handsfree devices beforehand see P 10 3 1 Press A List of paired handsfree devices appears 2 Select a device and press b The device is connected and P checked appears C...

Page 226: ...nect to handset when placing or receiving calls O indicates that the device is not selected When O is set to the connected device a confirmation appears Bluetooth Settings Device Name Specify a Blueto...

Page 227: ...may impair file transfers clean Infrared Ports with a soft cloth beforehand Infrared Getting Started Tip H When transfer fails Device not found Reconnect appears Take the precautions below then choos...

Page 228: ...or files etc Some files may not be saved in whole or part Only compatible devices receive files transferred via high speed infrared Transferable Files Function One File All Files Notes Phone Book Avai...

Page 229: ...d Data Folder files one at a time Send DCIM folder files one by one received DCIM files are automatically saved in Pictures folder Unsent Messages are not transferable Messages may not be received dep...

Page 230: ...tivated and handset returns to Standby Acquire infrared transmission within three minutes 2 When connection is requested Calling not available during operation OK appears 3 Choose Yes and press b Offl...

Page 231: ...nutes 2 When connection is requested Calling not available during operation OK appears 3 Choose Yes and press b Offline Mode is set and transfer starts When finished handset returns to Standby If the...

Page 232: ...ss b A Enter URL A Press b KOn Choose On send or Off A Enter Handset Code A Press b KAlways Confirm Select Always Confirm Send or Do Not Send A Press b A Enter Handset Code A Press b Network Settings...

Page 233: ...11 1 Tools...

Page 234: ...t By Date A Press b A Select a colour A Press b C To use the colour set for the day of the week select No Setting A Press b Removing Restoring Holidays Press N x A Select Settings A Press b A Select S...

Page 235: ...t Calendar Alarm A Press b A Select Normal Mode or Manner Mode A Press b A Select Vibration A Press b A Select On Link to Sound or Off A Press b Organise daily weekly monthly and yearly schedule Save...

Page 236: ...ding vibrating etc according to related settings Image appears if System Graphics is set see P 9 3 However video and SMAF file images take priority over System Graphics Note H When entries are transfe...

Page 237: ...b Repetitive Schedule Select Repeat A Press b A Select from Day to Every Year A Press b A Enter repeat time 00 99 times A Press b Start date and time are reflected in the items For Month if the day is...

Page 238: ...ess N x A Select Delete A Press b A Select This Appointment A Press b A Choose Yes A Press b All Entries of the Day Select a date A Press N x A Select Delete A Press b A Select All This Day A Press b...

Page 239: ...A Press b Save event with deadlines Check completed tasks see P 11 10 Save up to 300 entries between Tasks and Calendar see P 11 3 1 Select Add New Entry and press b 2 Enter subject and press b Enter...

Page 240: ...age appears if System Graphics is set see P 9 3 However video and SMAF file images take priority over System Graphics Follow these steps after Step 7 on the left After each setting New Entry window re...

Page 241: ...nchecked entries use F to select e Incomplete Tasks 2 Select an entry and press b C To send the entry via S Mail press N x A Select Send A Press b A Select As Message A Press b A Complete and send mes...

Page 242: ...hoose Yes A Press b Completed Tasks C To mark completed follow these steps after Step 1 on P 11 9 Select an unchecked entry O A Press b A Press b B To cancel checks select a checked entry P A Press b...

Page 243: ...ed One Time Alarm 1 Select Once Only and press b 5 Press M q Alarm is set For more settings start over from Step 1 6 Press g to exit Handset returns to Standby and e appears Alarm is activated soundin...

Page 244: ...C Press M C g or i Alarm activates only when handset is on at Alarm Time Snooze C When Snooze see P 11 13 is set Alarm repeats at the set interval Accept incoming calls End the call to reactivate Snoo...

Page 245: ...an entry A Press b A Edit settings B For details see procedure for saving entries Select an entry A Press N x A Select Reset Alarm A Press b A Choose Yes A Press b Select an entry A Press N x A Select...

Page 246: ...ng 1 Select Daylight Saving and press b 2 Choose On and press b C To cancel choose Off A Press b 1 Select World Clock and press b Use Calculator for basic arithmetic up to 12 digits and percentage cal...

Page 247: ...ory f x Multiply C M Add Memory M1 Divide D Decimal q Equal b Switch p C CE Clear i Percent N2 Money Converter C To change exchange rate open Calculator and follow these steps Press N x A Select Money...

Page 248: ...ding is saved to handset or Memory Card C When confirmation for save location appears select a location A Press b Extended Voice 1 Press b to stop Recording is saved to Memory Card Play sounds from Sp...

Page 249: ...1 Select a file and press b 1 Open a page select a file and press b 1 In a Messaging folder select a message and press b 2 Select a file and press b Deleting Files C Follow these steps after Step 2 in...

Page 250: ...e View page centre 6 Zoom In Zoom in 7 Lower Left View lower left portion of page 8 Select Page Jump to specified page B Enter page number A Press b 9 Lower Right View lower right portion of page 0 He...

Page 251: ...rcode recognition tone sounds and scan results appear C Using Scan Results see P 11 20 11 21 C To start over press i A Choose Yes A Press b A Repeat from Step 1 Main Menu H Tools A Tools 3 F A Barcode...

Page 252: ...P 4 4 Access Internet Sites5 Select a URL starting with http or rtsp A Press b A Handset connects to the Internet Save to Data Folder Images Melodies Select an image or melody file A Press N x A Sele...

Page 253: ...nes Text Templates or Other Documents Save up to the equivalent of 513 digits 311 alphanumerics or 131 kanji per QR Code Large items are divided into maximum of 16 QR Codes Created QR Codes are saved...

Page 254: ...ailable Phone Book Encode name reading phone numbers mail addresses address and note Main Menu H Tools A Tools 3 F A Barcode A Create QR Code A Phone Book Text Input Enter and encode text Main Menu H...

Page 255: ...if incorrect change mode If text exceeds limit results appear with overage truncated C To change mode press N x A Select Change Mode A Press b A Select a type A Press b Scan results and alternatives...

Page 256: ...P 11 26 C Press b to resume C To clear the records press N x A Select Reset A Press b 3 To exit press i then choose Yes and press b Set Countdown Timer up to 60 minutes in 1 second increments Alarm To...

Page 257: ...mount A Press b A Edit A Press b C To delete an entry select one A Press N x A Select Delete Item A Press b A Choose Yes A Press b C To delete all entries press N x A Select Delete All A Press b A Cho...

Page 258: ...from menu items 1 Select Phone Help and press b Phone Help window opens 2 Use E to toggle guides Alternatively press p or q 3 Press b to return Text Templates New Entry Main Menu H Tools A Tools 3 F A...

Page 259: ...12 1 Optional Services...

Page 260: ...Forwarding When you know you won t be able to receive calls made to handset automatically divert incoming calls to another phone number see right Voicemail Set handset to forward all or all unanswere...

Page 261: ...call numbers 001 0041 etc 0120 Toll free numbers 0990 Fee based services Dial Q2 etc Forwarding Video Calls Video Calls are forwarded only to Video Call compatible devices that comply with 3G 324M Ti...

Page 262: ...ollow these steps in Standby B Press b A Select Settings A Press b A Use F to select Call Video Call A Select Voicemail Divert A Press b A Select Voicemail A Press b A Select Call Voicemail A Press b...

Page 263: ...ation Main Menu H Settings A Call Video Call F Retrieving Missed Call Notification Records C Missed Call Notification records are stored at the Centre When handset is turned on or comes into range Inf...

Page 264: ...does not ring or vibrate for incoming calls while a line is engaged A tone sounds from Earpiece When Voicemail or Call Forwarding is active unanswered calls are transferred to Voicemail Centre or the...

Page 265: ...er ID Payphone Reject calls from public phones Unavailable Reject calls with undisplayable Caller ID Note H Network Password selected at initial subscription see P 1 29 is required to change Call Barr...

Page 266: ...A Select Status A Press b Call Barring status appears C Press b to return Restricting Outgoing Calls Set Cancel Restriction Set or cancel restriction of outgoing calls Main Menu H Settings A Call Vide...

Page 267: ...Choose On reject or Off A Press b Rejecting a Call Set Reject Number Designate phone numbers to reject Main Menu H Settings A Call Video Call F A Call Barring A Rejected Numbers A Black List A Set Re...

Page 268: ...ls before a phone number when placing a call KOn Choose On send or Off A Press b Select Status A Press b Caller ID status appears C Press b to return Changing Network Password Change NW Password Chang...

Page 269: ...13 1 Messaging...

Page 270: ...out messaging to SoftBank Customer Centre General Information see P 19 28 Exchange short text messages of up to 160 alphanumerics with SoftBank handsets S Mail Exchange text messages of up to 30 000 c...

Page 271: ...A Press b B Press b to return Save up to 5 MB or 1 000 messages in Received Msg folder Handset stores up to 3 MB or 500 messages between Sent Messages Drafts and Unsent Messages A notice appears when...

Page 272: ...Select Sort A Press b A Select an option A Press b To change message list view see right Message Contents Tip H To activate Display Backlight press 0 9 Press p to open previous message older one or pr...

Page 273: ...ult Account Name is random alphanumerics 1 Select Address Setting and press b Handset connects to the Internet 2 Select English and press b Follow onscreen instructions Tip H Alternatively open a Mess...

Page 274: ...r code see P 13 37 is GSM 7bit Send up to 300 KB including message text via S Mail Message text character limit differs by attachment size or number of recipients Approximate mail size appears in Mail...

Page 275: ...C To delete the message see Step 8 on P 13 9 C To preview 3D Pictogram see Step 8 on P 13 9 C Delivery Options see P 13 16 C Send Reservation see P 13 18 C Saving to Drafts see P 13 18 7 Press M N 1...

Page 276: ...SoftBank handset number or mail address and press b 5 Select subject field and press b Subject entry window opens Alternatively enter the first character to open subject entry window C To edit recipi...

Page 277: ...e call to return Sending from Phone Book Entries C Open a Phone Book entry and follow these steps Phone Numbers Select a number A Press b A Select Create Message A Press b A Select S Mail or SMS A Pre...

Page 278: ...ring Recipients C To add recipients open Mail Composition window see P 13 7 and follow these steps Select recipient field A Press b A Select Add Recipient A Press b A Perform from Step 4 on P 13 7 or...

Page 279: ...file and press b Flash Flash Ringtone Files see P 8 7 1 Select Flash or Flash Ringtone and press b 2 Select a file and press b Phone Book Entries 1 Select Attach Contact and press b 2 Select an entry...

Page 280: ...entered text press N A Select the start point A Press b A Select the end point A Press b A Select Font Colour A Press b A Select a colour A Press b C To change colour of all entered text press N A Pre...

Page 281: ...History Inserting Background Sound 1 Select Insert and press b 2 Select Insert BGM Sound and press b 3 Select Ring Songs Tones or Music and press b 4 Select a file and press b C To record sound selec...

Page 282: ...ect Right to Left or Swing A Press b C To cancel press N A Select the start point A Press b A Select the end point A Press b A Select Effect A Press b A Select Scrolling A Press b A Select Scroll Off...

Page 283: ...Pictogram and press b S Mail Composition window returns Creating Templates C In S Mail Composition window press N x A Select Save as Template A Press b A Enter name A Press b A Select Save here A Pres...

Page 284: ...A Select Messaging Settings A Press b A Select Priority A Press b A Select priority A Press b Priority setting does not affect delivery speed CAvailable when forwarding Server Mail Remote Forward KNot...

Page 285: ...Select Quiz A Press b A Select Edit Question A Press b A Select Question A Press b A Enter a question A Press b A Select Answer A Press b A Enter the answer A Press b A Press N CAvailable when messagi...

Page 286: ...t of range or power off will not be resent When memory is full delete messages see P 13 29 before creating new ones Follow these steps after Step 6 on P 13 7 for SMS or Step 8 on P 13 9 for S Mail 1 P...

Page 287: ...ays for compatible messages see P 13 24 3D Pictogram To cancel 3D Pictogram see P 13 25 Display Effect C To retrieve complete S Mail messages see P 13 21 C Using Messages see P 13 23 Incoming Text Mes...

Page 288: ...confirmed Delivery Report A Press b A Press M M B When Report list appears press b to open first report A Press i A Select next report A Press b Alternatively open sent message a appears for delivered...

Page 289: ...nts B Files are attached to the message X S Mail Notice appears for S Mail messages in Received Msg folder when the remaining portion is in Server Mail Box Idle Screen Info Show or hide subject sender...

Page 290: ...Select Mail List and press b 3 Press N x 4 Select Retrieve Mail List and press b After retrieval Mail List appears When Mail List has already been retrieved it is refreshed C To cancel retrieval press...

Page 291: ...tion window appears press b C When folders appear select one A Press b C To open properties not available for unsent messages select a message A Press N x A Select Message Details A Press b B Press D...

Page 292: ...A slide consists of message text with image sound or video After Step 2 above press N x A Select Slide Play A Press b B Press i to stop Editing Sent Unsent Messages C In Step 1 on P 13 23 select Sent...

Page 293: ...M r 3 Repeat Step 2 as required C To uncheck all press N x A Select Unselect All A Press b Change received message status to read or unread 1 Select Received Msg and press b C When folders appear sele...

Page 294: ...orm from Step 5 on P 13 7 or on P 13 8 1 Select Received Msg and press b C When folders appear select one A Press b 2 Select a message and press b 3 Press N x 4 Select Forward and press b For S Mail m...

Page 295: ...message and press N x When selected sent message is addressed to multiple recipients cancellation request is sent to all the recipients 3 Select Set Sent Cancel and press b 4 Choose Yes and press b H...

Page 296: ...save see P 4 4 C To save to an existing Phone Book entry open one A Press b A Press M q Use linked numbers addresses or URLs http https or rtsp within message text to place calls send messages or acc...

Page 297: ...and press N x 3 Select Lock and press b o appears for protected messages C To cancel protection select Unlock A Press b Protected messages cannot be deleted 1 Select Received Msg Drafts Sent Messages...

Page 298: ...t File Details A Press b B Press b to return C To switch display size select Picture Appearance A Press b A Select Normal or Fit for Screen A Press b 4 Select Save to Data Folder and press b 5 Enter n...

Page 299: ...ss b Wallpaper ringtone or ringvideo is set C For images smaller or larger than Display select Centred Full Screen or Fit Image A Press b 7 Press b Organise received sent messages into My Folders Acti...

Page 300: ...4 Select Advanced and press b 5 Select Move to Folder and press b 6 Select a folder and press b Set keys sender recipient S Mail subject or SMS message text string by folder to sort received sent mess...

Page 301: ...Enter Handset Code and press b Empty folder move or delete messages beforehand 1 Select Received Msg or Sent Messages and press b 2 Select a folder My Folder or Spam Folder and press N x 3 Select Del...

Page 302: ...on P 4 8 Direct Entry 1 Select Enter Number or Enter Address and press b 2 Enter recipient s SoftBank handset number or mail address and press b Create mail from Standby using numbers addresses saved...

Page 303: ...de A Press b A Choose On or Off A Press b When Anti Spam Measures is active unsolicited messages spam are filtered into Spam Folder Auto sort keys see P 13 32 are available for Spam Folder Keys in fol...

Page 304: ...b A Choose On or Off A Press b KView Setting Name Alert Sound On View Setting Select View Setting A Press b A Select Name Address Name Subject or Off A Press b Alert Sound Select Alert Sound A Press b...

Page 305: ...et Default A Press b Selected number moves to Setting1 Default and shifts the others down KShift JIS Select Shift JIS 70 characters or GSM 7bit 160 single byte alphanumerics A Press b Secret Folder Se...

Page 306: ...Select Send Save or Send Not Save A Press b S Mail Settings Message DL Set complete S Mail retrieval to auto or manual Main Menu H Messaging A Settings A S Mail Settings A Message DL Reply To Setting...

Page 307: ...14 1 Yahoo Keitai...

Page 308: ...et connection and thus transmission fees apply To disconnect press i Yahoo Keitai Internet SoftBank Mobile Internet portal PC Sites Websites designed for PCs Tip H An additional contract is required t...

Page 309: ...s B Some sites may not appear correctly 2 Highlight a menu item 3 Press b Handset connects to the Internet Handset remains connected to the Internet even if it is closed C To disconnect press i 4 Repe...

Page 310: ...S Mail SMS C Open History and follow these steps Select an item A Press N x A Select Send URL A Press b A Select S Mail or SMS A Press b A Complete and send message Perform from Step 3 on P 13 8 or on...

Page 311: ...in that direction CSelecting Items Basic Operations Back Return to the previous page Jump to Top Bottom Jump to page top or bottom Secure Area Open secure page Authentication Access pages requiring u...

Page 312: ...r for unselectable items CNon Framed Pages Scroll bar appears on the right or bottom when page content continues beyond view Slider indicates current page position Use G to scroll slider moves accordi...

Page 313: ...ect Switch Tab A Press b A Select a tab A Press b B Alternatively press q for 1 seconds then select a tab C To close the active tab press N x A Select Tab Menu A Press b A Select Close Tab A Press b C...

Page 314: ...o select an item Some menu lists support multiple selection select items and press i to exit list Command Button Use to send reset etc Highlight and press b to execute the indicated command Text Entry...

Page 315: ...up to 100 Bookmarks between Yahoo Keitai and Streaming Bookmarks and up to 100 for PC sites Saved Pages Save page content handset opens saved pages without connecting to the Internet Save frequently...

Page 316: ...ed Pages first perform Step 1 on the left CBookmarks Titles Select a title A Press N x A Select Edit A Press b A Select Title A Press b A Enter title A Press b A Press M q URLs Select a title A Press...

Page 317: ...ad to Step 4 3 Select a file and press b C To open files select View or Play A Press b B Press i to return C To open properties select Details A Press b B Press b to return 4 Select Save and press b D...

Page 318: ...r rtsp URLs Enjoy audiovisual media while it downloads Only compatible Yahoo Keitai files support streaming Downloaded content cannot be saved 1 Select a file and press b Streaming begins Playing Musi...

Page 319: ...ize toggles as follows Full Screen no indicators Full Screen with indicators Normal Enlarge B Display Size cannot be changed while stream is paused press 2 to show or hide indicators Display Size may...

Page 320: ...pdate notices on handset Live Monitor consists of Live Monitor List and S Loop List In Standby view breaking news in Live Monitor List see P 9 6 1 Select Live Monitor List or S Loop List and press b C...

Page 321: ...net select the title in information A Press b A Choose Yes A Press b B Handset connects to the Internet Register with up to one News Flash item and four General news items 1 Select Live Monitor List a...

Page 322: ...ss b Update Live Monitor items automatically after a set interval from Automatic Update activation Open properties see above to see next Automatic Update time Automatic Update does not apply to Live M...

Page 323: ...r List or S Loop List and press b 2 Deleting Single Items 1 Select an item and press N x 2 Select Delete and press b 3 Select Delete This Monitor and press b 4 Choose Yes and press b Deleting All Item...

Page 324: ...ess i 4 Repeat Steps 2 3 to open additional links C Basic Operations see P 14 5 C Saving Bookmarks Pages see P 14 9 C Using Linked Info see P 14 12 C To return to Yahoo JAPAN Home press N x A Select H...

Page 325: ...y Text A Press b A Perform from Step 3 in Copy Cut Paste on P 3 13 Press N x A Select Reload A Press b Reload simultaneously updates the corresponding content saved in Saved Pages Press N x A Select E...

Page 326: ...for specific procedure Files are uploadable only via pages supporting uploads KStandard Select a size A Press b KSingle Line Select a unit A Press b KShow Images Play Sounds Images Select Images A Pr...

Page 327: ...tion sent by a server for user identification Authentic Info User ID or password previously entered for authentication Download to Select whether to save downloaded files on handset or Memory Card Mai...

Page 328: ...es Enable or disable cookies see P 14 21 Main Menu H Yahoo Keitai A Common Settings A Security Settings A Cookies Script Settings Select whether or not to run scripts Main Menu H Yahoo Keitai A Common...

Page 329: ...15 1 S Applications...

Page 330: ...Applications can be deleted see P 15 6 To restore them perform Memory All Clear see P 15 10 Lifestyle Appli C Lifestyle Appli an S Application required to use S FeliCa is preloaded on handset see P 1...

Page 331: ...ew S Applications on the target device Use Video Output with compatible S Applications confirm compatibility in Video out in properties see P 15 6 Before performing the steps below connect Video Cable...

Page 332: ...atically saved and a confirmation appears When you download a new version of S Application set as Screensaver see P 15 7 Screensaver may be cancelled 5 Choose Yes and press b Internet connection ends...

Page 333: ...b in Standby A appears while an S Application is paused 2 Select Resume and press b C To end the S Application select End A Press b C To open Main Menu and keep the S Application paused select Cancel...

Page 334: ...cription Description of the S Application Save Size Downloaded file size Recorded Record game scores etc up to this size Screensaver Compatibility with Screensaver Profile Versions VSCL Overseas JSCL...

Page 335: ...reensaver Main Menu H S Appli A Settings A Screensaver A Switch On Off Setting Screensaver Main Menu H S Appli A S Appli Activation Time C Enter time delay before Screensaver activates in Standby Pres...

Page 336: ...ction Connect to other devices Read User Data Access Phone Book Calendar etc Write User Data Edit Phone Book Calendar etc Use Multimedia Use Media Player Location Access Send Location Information Main...

Page 337: ...i A Settings A Vibration Calls Alarms Select handset response to incoming calls etc while an S Application is active Main Menu H S Appli A Settings A Calls Alarms Call Message Alarm Start Priority S A...

Page 338: ...S Appli Library to default setting Main Menu H S Appli A Settings A Memory All Clear Note H Memory All Clear deletes downloaded S Applications and Lifestyle Appli Memory All Clear resets Near Chat app...

Page 339: ...16 1 S FeliCa Japanese Only...

Page 340: ...by bitWallet Inc Note H IC Card data content varies by service and usage history Procedures to delete IC Card data vary by Lifestyle Appli contact service providers for details Service Usage Outline D...

Page 341: ...rge in advance Complete transactions without activating a Lifestyle Appli 1 Place m logo over reader writer Confirm scan results on reader writer display If recognition is slow move handset around sli...

Page 342: ...play a message vibrate or activate mail Internet or an S Application for some services To disable response see P 16 7 Interface Settings Reader writer will scan FeliCa IC Card even during calls or Int...

Page 343: ...Lock Notice and press b 7 Sending Notice to Remote Lock Activator 1 Select As Reply and press b C Press i to return Sending Notice to Specified Address 1 Select AddressTo Notice and press b 2 Select...

Page 344: ...Press b A Repeat Steps 4 5 6 Select Count for Lock and press b 3 times is set by default 7 Enter Missed Call count 3 10 consecutive times required to activate IC Card Lock and press b To enable Call...

Page 345: ...s Choose On for S Appli to activate S Application Browser to access Internet Messaging to activate mail Vibration to vibrate handset and Pop up Message to open pop up message Interface Settings is On...

Page 346: ...esetting Defaults Main Menu H Lifestyle appli A IC Card Settings A Set to Default Note H Set to Default does not delete downloaded Lifestyle Appli Reset All see P 9 27 Memory All Clear see P 15 10 ret...

Page 347: ...17 1 Entertainment...

Page 348: ...CancelService and press b Handset connects to the Internet and service registration page opens Follow onscreen instructions 1 Delivery Notice appears and Information window opens F appears for new inf...

Page 349: ...Press b A Select Entertainment A Press b A Select CAST A Press b A Select Demand Re delivery A Press b A Choose Yes A Press b Stored Information Main Menu H Entertainment A CAST Using Information Save...

Page 350: ...b Weather Indicator is updated when update time arrives Select Manual Update A Press b Handset connects to the Internet and Weather Indicator is updated 1 Select Weather and press b Information appea...

Page 351: ...2 Select an E Book and press b indicates location of the current page C If the E Book is password protected enter password A Press b A Reading window opens C To see the title author etc press N x A S...

Page 352: ...not be usable Horizontal Vertical C Scroll up by line Backward by page D Scroll down by line Forward by page B Backward by page Scroll left by line A Forward by page Scroll right by line C Copy text...

Page 353: ...er file A Press N x A Select Change Name A Press b A Edit A Press b Deleting Folders Files Select a folder file A Press N x A Select Delete A Press b A Choose Yes A Press b Moving Files Select a file...

Page 354: ...information contained in images Main Menu H Entertainment A E Book A Open E Book Assign Save images as Wallpaper For images smaller or larger than Display select Centred Full Screen or Fit Image A Pre...

Page 355: ...18 1 Communication...

Page 356: ...Internet access is restricted by subscription When using S Town for the first time agree to the terms of service then complete free user registration 1 Select S Town and press b S Town starts Refer to...

Page 357: ...y by default 1 Select S Town and press N S Town Library opens S Loop is a communication service 1 Select S Loop and press b Handset connects to the Internet and S Loop Main Menu opens Refer to the S L...

Page 358: ...roup Name 5Connection Status Online Offline or Unknown appears 6Status Current status indicated by Status Icon Pictogram and Status Label description appears 7Availability Availability for Calls Mail...

Page 359: ...ptance Memo An acceptance reply to your Request Memo Abstention Memo A rejection reply to your Request Memo also arrives when no reply is sent within two hours Removal Memo Your number is deleted from...

Page 360: ...2 Enter a phone number and press b 4 Choose Yes and press b Request Memo is sent to the number Member is saved when Request Memo is accepted Acceptance Memo arrives Waiting and Unknown appear for pend...

Page 361: ...tus member list 1 Use F to select a Group then E to select a member 2 Press b Member status details appear C Window Description see P 18 4 Adding from Request Memo Auto Reject C Abstention Memo is sen...

Page 362: ...se steps after opening My Status details Step 1 on the left to change Status availability and Comment For other items see P 18 9 1 Select any item except Connection status and Standby Window On Off an...

Page 363: ...Status Icon Label combinations Answer Status All OK Calls Answer OK Mail Reply OK Circle Talk Join OK Only Mail is OK Calls Answer NG Mail Reply OK Circle Talk Join NG All NG Calls Answer NG Mail Che...

Page 364: ...press b Removal Memo is sent and the member is deleted from Hot Status member list Editing Hot Status Member List Renaming Groups Main Menu H Communication A Hot Status Moving Members Main Menu H Comm...

Page 365: ...s Answer OK Mail Reply OK Circle Talk Join OK Press N x A Select Settings A Press b A Select Answer Status A Press b A Select User Setting A Press b A Select a type A Press b A Select availability A P...

Page 366: ...tion List appears C To open details select a notification A Press b B For Request Memos see P 18 7 Adding from Request Memo Normally Hot Status information is updated automatically Follow these steps...

Page 367: ...Total Number of Participants 2Participants Names appear if saved in Phone Book Otherwise phone numbers appear 3Connection Status 4Circle Talk Status Circle Talk Receiver Receiver Initiator Receiver Re...

Page 368: ...me is up 6 To speak again press u while Press 5 to speak appears Press 5 when finish appears when you have the floor Busy appears if the floor is taken by another participant try again later 7 Press g...

Page 369: ...Press D 2 Select an entry and press b Call Log 1 Use F to open Dialled Numbers or Received Calls 2 Select a number and press u C Adding Cancelling Participants see P 18 16 3 Press b Note H Incoming C...

Page 370: ...C T Members List and press b Only available during Circle Talk 2 Select a member or Group From Phone Book 1 Select Phone Book and press b 2 Select an entry C For entries with multiple numbers press b...

Page 371: ...t time choose Yes A Press b 3 Saving as Individuals 1 Select Individual and press b 2 Select Members List or Phone Book and press b 3 Select an entry and press b The entry is saved as a member C For e...

Page 372: ...oose Yes and press b KOn Press u A Press N x A Select Loudspeaker A Press b A Choose On or Off A Press b KVoice Call Video Call Call Reject Press u A Press N x A Select Calls A Press b A Select Voice...

Page 373: ...oys Bluetooth wireless technology transmission connection fees do not apply Usage requires the pre installed Near Chat S Application Activate the following Bluetooth settings beforehand Near Chat Japa...

Page 374: ...e sounds again notification appears and Information window opens Check request log in Latest Information see below 2 Choose Yes and press b Near Chat S Application starts For details read the instruct...

Page 375: ...19 1 Appendix...
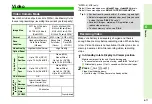
Page 376: ...es P 13 23 Server Mail Box P 13 22 Create New SMS P 13 7 Settings P 13 35 Memory Status P 13 3 Main Menu Sub Menu Refer to Camera P 6 2 Data Folder Pictures P 8 2 DCIM P 8 2 My Pictograms P 8 2 Ring S...
Page 377: ...tom Screens P 9 9 Sounds Alerts P 9 14 Date Time P 9 18 Language P 9 8 User Dictionary P 9 19 Ringer Output P 9 18 Earpiece Volume P 9 18 Simple Menu P 2 19 Locks P 9 20 Software Update P 19 8 Master...

Page 378: ...ted There may be debris on IC chip terminals Make sure USIM Card is properly inserted If the message still appears USIM may be damaged Make sure the correct USIM Card is inserted The inserted USIM Car...

Page 379: ...ger Connection Port Desktop Holder External Device Port Battery may not charge outside 5 C to 35 C Battery may be terminally exhausted or defective Make sure connector is securely inserted and try aga...

Page 380: ...may flicker under fluorescent lights Display went dark Leaving handset open with no key presses for a preset period cancels Backlight Time Out then panel Display Saving this is not a malfunction Pres...

Page 381: ...ages are delivered automatically Delete unprotected messages automatically to receive new ones see P 13 36 Even if memory is not full handset cannot receive new messages larger than remaining memory D...

Page 382: ...ect USB Cable from handset beforehand Read Software Update Precautions left beforehand 1 Select Software Update and press b Confirmation appears Follow onscreen instructions O appears during update Up...

Page 383: ...ppears at scheduled update time Press b or wait approximately ten seconds for update to start Update will not start while handset is in use When the current operation ends confirmation appears After t...

Page 384: ...027 028 029 031 032 033 034 035 036 037 038 039 040 041 042 043 044 045 046 Space 0 1 2 3 4 5 6 7 8 9 047 048 050 051 052 053 054 055 056 057 058 060 061 062 063 064 065 070 071 072 073 074 075 076 07...

Page 385: ...43 244 245 246 247 248 249 250 251 252 253 254 255 256 257 258 259 260 261 261 262 263 264 265 266 267 268 269 270 271 272 273 273 274 275 276 277 278 279 280 281 282 283 284 285 286 287 288 289 290 2...

Page 386: ...77 378 379 380 381 382 383 384 385 386 386 387 388 388 389 390 390 391 392 393 393 394 395 396 397 398 399 400 401 402 403 404 405 405 406 407 408 409 410 411 412 413 414 415 415 416 417 418 419 420 4...

Page 387: ...05 506 507 508 509 510 511 512 513 514 515 516 517 518 519 520 521 522 523 524 525 526 527 528 529 530 531 532 533 534 535 536 537 538 539 540 541 542 543 544 545 546 547 548 549 550 551 552 553 554 5...

Page 388: ...65 666 667 668 669 670 671 672 673 674 675 676 677 678 679 680 681 682 683 684 685 686 687 688 689 690 691 692 693 694 695 696 697 698 699 700 701 702 703 704 705 706 707 708 709 710 711 712 713 714 7...

Page 389: ...ast Digit FirstThree Digits Last Digit 0 1 2 3 4 5 6 7 8 9 0 1 2 3 4 5 6 7 8 9 0 1 2 3 4 5 6 7 8 9 0 1 2 3 4 5 6 7 8 9 797 798 799 800 801 802 803 804 805 806 807 808 809 810 811 812 813 814 815 816 8...

Page 390: ...19 16 19 Appendix Pictogram List Note H Pictograms do not appear in e mail or on incompatible SoftBank handsets Tip H Pictograms in 2 are animated...

Page 391: ...Time Standby Time decrease with frequent use of Display Keypad backlights Talk Time Standby Time may decrease when an S Application is active Talk Time Standby Time decrease with handset use in poor s...

Page 392: ...perature 5 C to 35 C Dimensions W x H x D Approximately 55 x 45 x 22 mm without protruding parts cord Cord Length Approximately 1 5 m Voltage 3 7V Battery Type Lithium ion Capacity 810 mAh Dimensions...

Page 393: ...17 7 Auto Delete 13 36 Auto Focus Video Call 5 5 Auto Mark Level 7 8 Auto Play File 13 38 Auto Resend Messaging 13 35 Auto Save mobile camera 6 24 Auto Start 6 24 Back Internet 14 5 Background Colour...

Page 394: ...Groups 4 12 Continuous Shoot 6 15 Cookies 14 21 14 22 Copy Internet sites 3 12 Copy Text Internet sites 14 19 Cost Units 2 15 Countdown Timer 11 24 Country Codes 9 28 Create QR Code 11 22 Crop 7 14 C...

Page 395: ...icture Editor 8 15 Free Text Picture Editor 8 13 Function List 19 2 Go to 11 5 Greeting Message 9 5 Grid Display 6 19 Handset Code 1 29 Handset Security 9 20 Handsfree devices connecting 10 8 Handsfre...

Page 396: ...Card 8 23 Memory Status Messaging 13 3 Memory Status Phone Book 4 8 Memory Status S Appli Library 15 2 Memory Status schedule 11 6 Memory Status Tasks 11 10 Merge Panorama Picture Editor 8 16 Message...

Page 397: ...Picture Editor 8 12 Picture Quality Photo Camera 6 22 Picture Size Photo Camera 6 22 PIN 1 6 9 24 PIN Entry 9 24 Play Voice Memo 2 12 Playback Pattern Music Player 7 11 Playback Pattern Video Player 7...

Page 398: ...15 7 Script Settings 14 22 Scroll bar 14 6 Scroll Unit 13 37 14 20 Scrolling 7 17 SD AUDIO Recorder 7 7 SD Local Contents 8 23 SD VIDEO 6 14 Search 14 19 Search for Devices 10 3 Secret Phone Book 4 7...

Page 399: ...13 25 Symbols 3 7 Sync Settings Phone Book 4 17 Synch Recording 7 8 Synchronisation Phone Book 4 15 4 18 Synchronisation S Applications 15 3 System Graphics 9 3 System Sounds 9 17 Tasks 11 7 Template...

Page 400: ...ia Player 7 10 Wallpaper 9 3 Warning Message 14 21 Warning Tone 9 17 Weather Indicator 17 4 Web Access Custom Screen 9 10 WEB Link Connection 7 11 Web Link Settings 7 14 White Balance 6 21 Withheld Ca...

Page 401: ...thin warranty are performed under terms and conditions described Out of warranty possible repairs are performed upon request at subscriber expense For other services contact the distributor the neares...

Page 402: ...ntre Phone Number Subscription Area General Information G0088 240 157 Hokkaido Aomori Akita Iwate Yamagata Miyagi Fukushima Niigata Tokyo Kanagawa Chiba Saitama Ibaraki Tochigi Gunma Yamanashi Nagano...

Page 403: ...ndustry maintain high environmental standards Recycle your old handsets batteries and charger units all manufacturers and brands Before you recycle please remember these important points Handsets batt...

Reviews: