|
71
June 2020
|
Solar Stik
®
, Inc.
24VDC PRO-Verter 5000-120 AGS Operator Manual
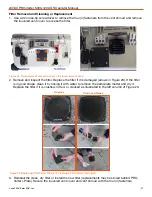
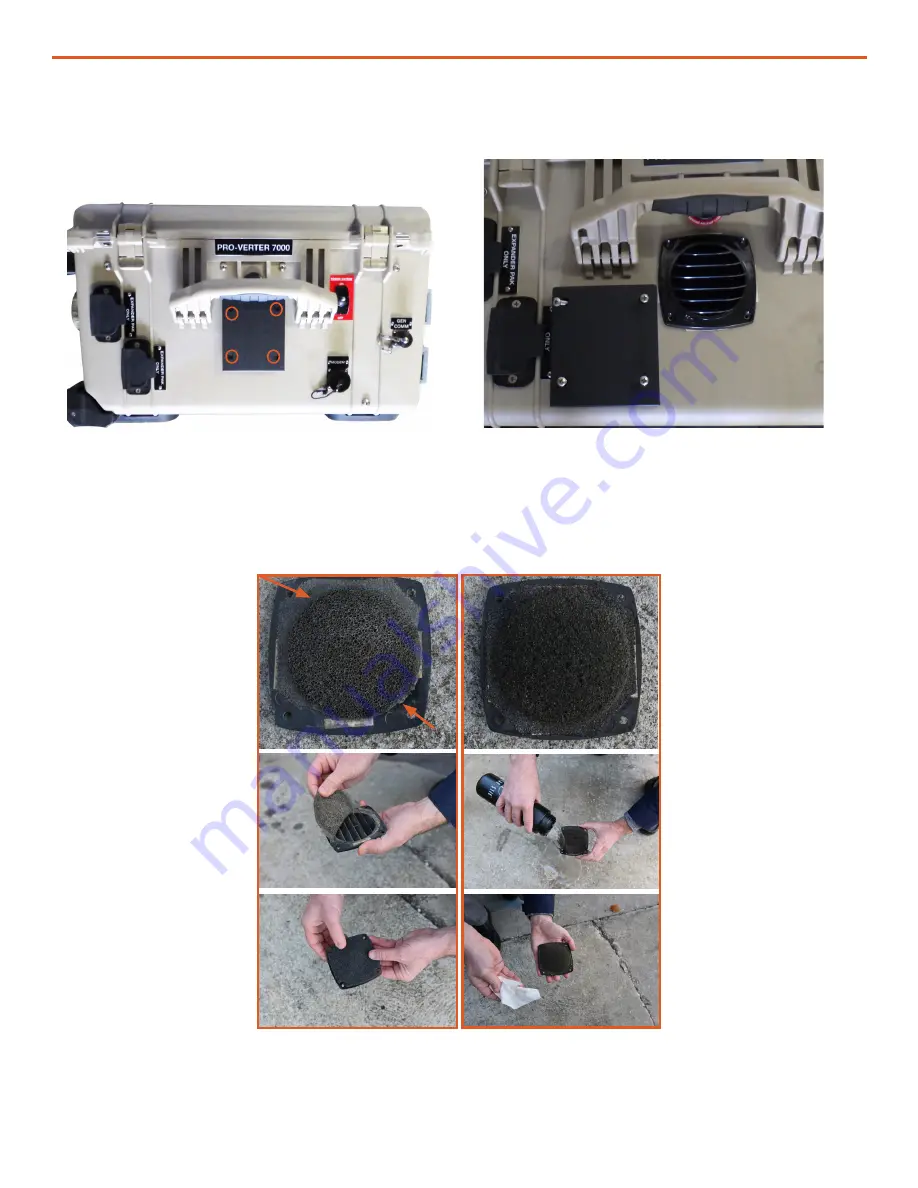
1. Use a #2 cross-tip screwdriver to remove the four (4) fasteners from the vent shroud and remove
the louvered vent cover to access the filter.
Figure 22. Removed vent shroud to access the louvered vent cover
Filter Removal and Cleaning or Replacement
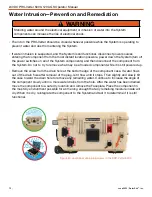
2. Remove and inspect the filter. Replace the filter if it is damaged (arrows in Figure 23). If the filter
is in good shape, clean it by rinsing it with water to remove the particulate matter and dry it.
Replace the filter if it is crushed, rotted, or cracked as illustrated in the left column of Figure 23.
3. Reinstall the clean, dry filter or install the new filter (replacements may be stored behind PRO-
Verter I-Plate). Secure the louvered vent cover and vent shroud with the four (4) fasteners.
Figure 23. Replacing PRO-Verter filter (left); cleaning a PRO-Verter filter (right)
Replace
Clean and Reuse

