1. The
CarStart
comes with a wall mount charger.
2. Plug the wall charger into an AC outlet.
3. Plug the charger cord into the Recharge Jack on the front of the unit.
4. The right LED will turn on while the charger is plugged into AC power to indicate
the unit is charging.
5. We do not recommend charging the unit for more than 24 hours under normal
usage. Suggested recharge times are:
• Recharge the unit for 3 hours when the unit is used for jump starting.
• Recharge the unit for 12-24 hours under very high discharge conditions.
6. Press and hold the red button to check the battery charging status. When the unit
is fully charged, all LED’s will light.
Performance of your
CarStart
will depend upon several factors:
• A good, solid connection between the
CarStart
clamps and the battery
and ground connections are a must. Moving the clamps back and forth while
connecting to the battery will help create a better connection.
• Clean connections between your vehicle or equipment battery and its terminals
are very important. For an optimal connection, corrosion (soft grayish-white build-
up) on battery terminals must be removed. With the ignition turned off, disconnect
the battery cables and clean the terminals and battery posts with a baking soda
solution.
• All batteries are affected by temperature changes, and the small, lightweight
battery in the
CarStart
is more sensitive to storage temperature than a standard
automotive battery. The ideal storage environment is room temperature, or 68ºF.
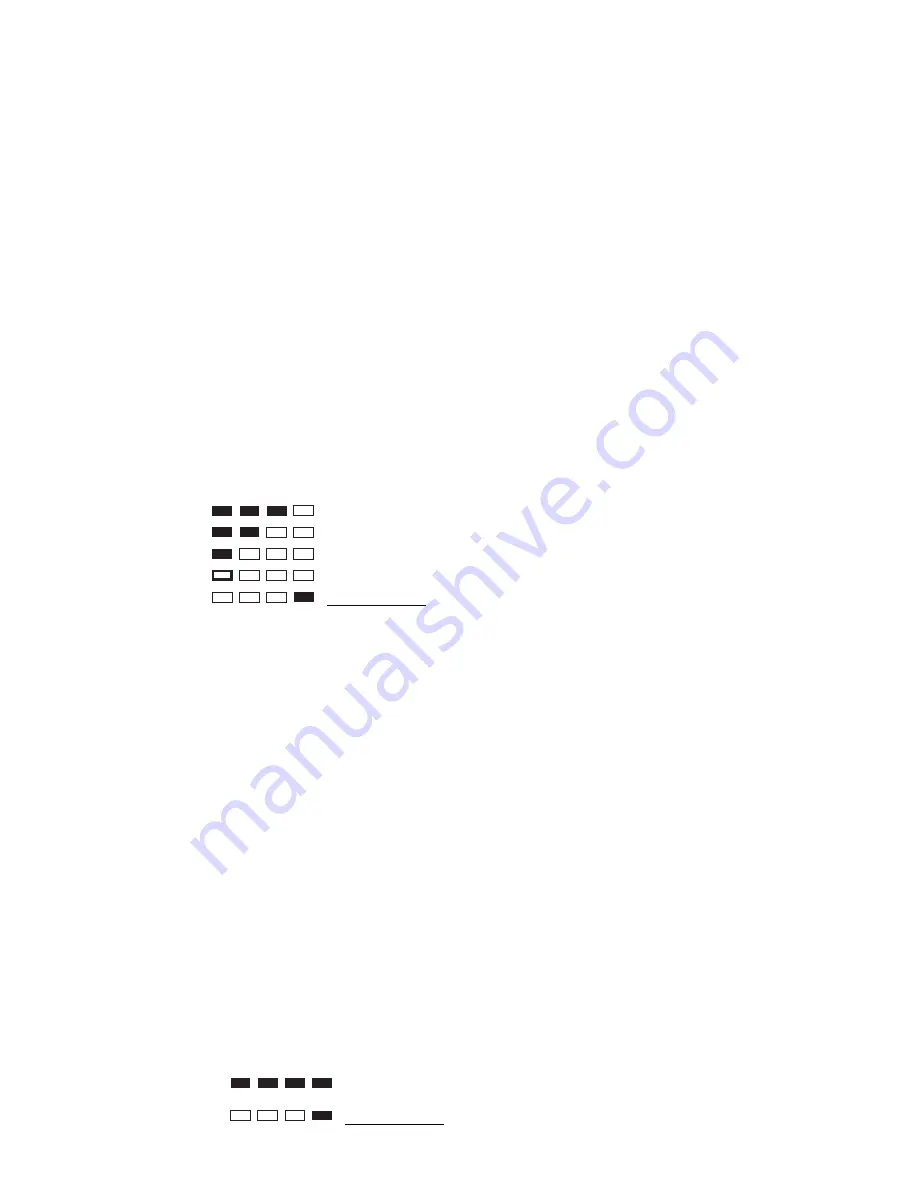
Press and hold the red battery level status button to display the battery status.
Performance and Temperature
Battery Status
Quand le Chargeur Est Branché sur
Toujours Sur
Cuándo Corcel se Conecta
Siempre En
When Charger is Plugged In*
3 lights . . . . . . . . . . Good
2 lights . . . . . . . . . . Medium
1 light . . . . . . . . . . . Low
Flashing . . . . . . . . . Recharge Unit
Always On
*
Please note this light indicates the charger is working.
LED Display - Press and hold red button
4 lights
. . . . . . . . .
Charging complete
Always On When Charger is Plugged In
wenn Auflader angeschlossen ist*
3 Lichter. . . . . . . . . . Gut
2 Lichter. . . . . . . . . . Mitte
1 Licht . . . . . . . . . . . Tiefpunkt
Aufleuchten . . . . . . . Laden Sie auf
Immer auf,
*
Bitte merken Sie dieses Licht anzeigt, dass der Auflader arbeitet.
LED Ausstellung - Presse und hält roten Knopf
4 Lichter
. . . . . . . . .
Laden vollständig
Immer auf, wenn Auflader angeschlossen ist
Cuándo Corcel se Conecta*
3 luces . . . . . . . . . . Bueno
2 luces . . . . . . . . . . Medio
1 luz .
. . . . . . . . . . . Bajo
Destellar . . . . . . . . . Recargue la Unidad
Siempre En
*
Note por favor que esta luz indica el corcel trabaja.
Despliegue LED - La prensa y tiene el botón rojo
4 luces
.
. . . . . . . . .
Cargar completo
Quand le Chargeur Est Branché sur*
3 lumières. . . . . . . . Bon
2 lumières. . . . . . . . Milieu
1 lumière. . . . . . . . . Niveau bas
Flashing . . . . . . . . . Recharger l'Unité
Toujours Sur
*
S'il vous plaît noter cette lumière indique que le chargeur travaille.
Exposition LED - La presse et tient le bouton rouge
4 lumières
. . . . . . . .
Charger complet
Quando il Caricatore è Inserito In
Sempre Su
Quando il Caricatore è Inserito In*
3 luci . . . . . . . .
Buono
2 luci . . . . . . . .
Mezzo
1 luce . . . . . . .
Basso
Lampeggiare . .
.
.
.
.
.
.
.
. Ricaricare l'Unità
Sempre Su
*
Per favore di notare questa luce indica il caricatore lavora.
La Mostra LED - la stampa e tiene il bottone rosso
4 luci
. . . . . . . .
L'addebitamento completo
.
.
.
.
Recharging the CarStart


