3906
1381
+
-
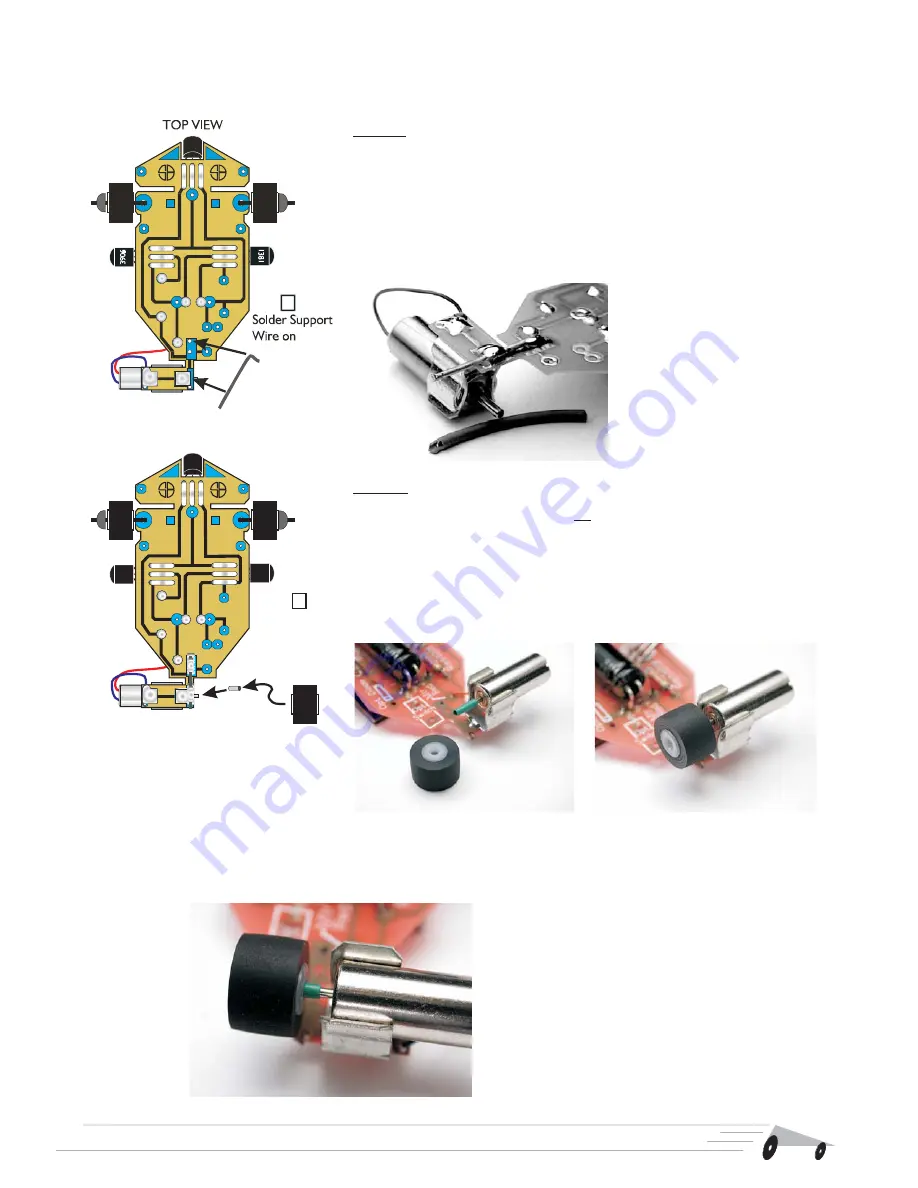
Construction - Motor Mount Support & Drive Wheel
7
+
-
11
Step 11: Find your small thick piece of wire, and pull the insulation off
so you are left with a small piece of solid
copper wire.
Bend one end 90 degrees down, and
shown
on the illustration. This gives your motor mount more strength, and allows
you the option of aligning the motor so you can adjust where your
SolarSpeeder goes.
(SAVE
the insulation - you’ll need it!)
solder the wire onto the pads
Mount wire
insulation on
motor shaft,
then wheel
12
Step 12: Time to mount the wheel; Let’s start by taking that insulation you
saved from the last step, and cutting it down to a short length about 5/32 long
(here-make it as long as this line:
). Slide it onto the motor shaft, making
sure you
shove it all the way to the side of the motor (it rubs, and slows
it down).
Slide the wheel on top of the sleeve, and glue the sleeve, wheel, and motor
shaft together with the
amount of glue. You don’t need much, and you
don’t want to accidently glom up the motor with too much glue!
don’t
tiniest
Close-up of stripped copper wire
soldered onto motor mount support
pads
Slide the sleeve onto the motor
shaft...
...then add the wheel. A drop of glue
in the wheel hole to secure the
works, and you’re done!
This is how it looks finished... almost.
We’ve pulled the sleeve and motor apart a
bit so you can see how they go together.
When finished, the wheel sits right on top
of the sleeve.
Note that there’s a space between the
sleeve and motor body, so there’s no
chance of rubbing!


