6
Safety, Installation, and Operations Manual
© Solaria Corporation All rights reserved. Contents subject to change without notice. SOL-MAN-0002 Rev 09,12-2020
Power Unlocked by Design
y
Refer to the NEC for additional multiplying factors that may be applicable.
y
All Solaria modules are equipped with connecting cables and locking connectors. Modules have been designed
to be easily connected. The locking connectors are not to be disconnected under load. The proper procedure
to disconnect the module locking connectors is as follows: Turn off the inverter(s), shut off the module DC
disconnect(s) and then disconnect the locking connectors using an approved tool set. To re-install, connect the
module locking connectors, turn on the module DC disconnect(s) and turn on the inverter(s).
y
Match the polarities of the cables and terminals when making connections; failure to do so may result in
damage to the modules and other electrical equipment.
y
A properly rated and certified over-current device must be connected in series with each module or string of
modules when reverse currents can exceed the value of the maximum protective fused value noted on the
module label. The rating of the over-current device shall not exceed the value of the maximum protective fuse
rating specified on the module label.
y
All Solaria modules are factory supplied with bypass diodes located in the junction box.
y
The junction box is not designed or certified to be field accessible or maintainable and should under no
circumstances be opened. Opening the junction box may void the module warranty.
3.1 Grounding (Grid-tied applications)
y
Before installing the solar system, contact local authorities to determine the necessary system hardware
grounding requirements.
y
Module frames should be electrically connected to an earth ground for safety and protection from lightning in
accordance to the National Electric Code (NEC).
y
PowerXT
®
residential solar modules may be installed on a mounting system certified to UL 2703 with approval
of the mounting system manufacturer.
y
When using a mounting system, grounding of modules must be accomplished by the method prescribed by the
mounting system manufacturer.
y
Where common grounding hardware (nuts, bolts, star washers, split-ring lock washers, flat washers and the
like) are used to attach the solar module to a listed grounding/bonding device, the attachment must be made in
conformance with the grounding device manufacturer’s instructions.
Common hardware items such as nuts, bolts, star washers, lock washers, and the like have not been
evaluated for electrical conductivity or for use as grounding devices and should be used only for
maintaining mechanical connections and holding electrical grounding devices in the proper position
for electrical conductivity. Such devices, where supplied with the module and evaluated through the
requirements in IEC/UL 61730, may be used for grounding connections in accordance with the instructions
provided with the module.
y
Follow these instructions to ground the module.
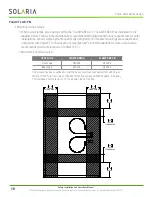
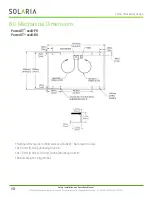
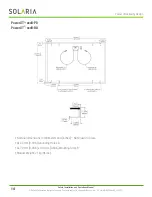
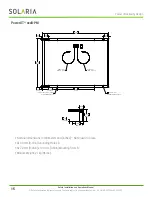
The module frame has four 4.5 mm grounding holes (‘A’) that are shown on the module drawing. Attach
a 10 AWG (2.588 mm diameter) bare copper ground conductor to a grounding lay-in lug mounted at one
of the four grounding holes on the module frame. Use a grounding lug with tin plating and stainless-steel
hardware (#10-32 hex head screw at 4 mm diameter, flat washers, tooth lock washer and nut).
A #10 flat washer must be used between the screw head and the grounding lug to prevent damage to the


