62
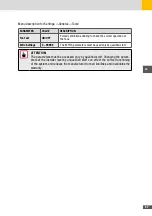
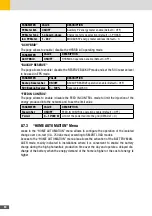
PARAMETER
VALUE
DESCRIPTION
Timer LD
0 - 9999 min
Power off timer (Default = 0 min)
LD – Day
Mon - Sun
Day selection for enabling LD program
LD – Start time
hh:mm
LD program start time setting (Default = 00:00)
LD – Stop time
hh:mm
LD program stop time setting (Default = 00:00)
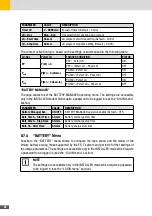
The contact activation logic, based on the settings, is summarized in the following table:
LD-SEL
Pstart LD
TRIGGER CONDITION
STATUS
PV
P (W) > 0
PPV > Pstart LD
ON
PPV < (Pstart LD – Physt LD)
OFF
P
GRID
P(W) > 0 (drawn)
PGRID > Pstart LD
ON
PGRID < (Pstart LD – Physt LD)
OFF
P
GRID
P(W) < 0 (feed-in)
PGRID < Pstart LD
ON
PGRID > (Pstart LD + Physt LD)
OFF
“BATTERY MANAGER”
The page allows to set the BATTERY MANAGER operating mode. The settings are accessible
only in the INSTALLER mode which require a password to be logged in (see the “LOGIN menu”
section).
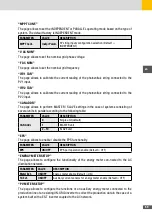
PARAMETER
VALUE
DESCRIPTION
Battery Manager Sel�
ON/OFF
BATTERY MANAGER operation enable (Default = OFF)
Batt� Disch� - Start Time hh:mm
Battery discharge start time
Batt� Disch� - Stop Time
hh:mm
Battery discharge stop time
Batt� Ch� Start Time
hh:mm
Battery charge start time
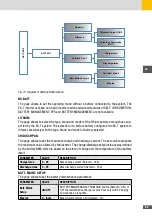
8�7�4 “BATTERY” Menu
Access to the “BATTERY” menu allows to configure the type, brand and the model of the
lithium battery among those supported by the ES-T system and perform further settings of
the usage parameters. The settings are accessible only in the INSTALLER mode which require
a password to be logged in (see the “LOGIN menu” section).
NOTE
The settings are accessible only in the INSTALLER mode which require a password
to be logged in (see the “LOGIN menu” section).
Summary of Contents for 10ES-T
Page 1: ...Instruction Manual SolarMax ES T series 5ES T 6ES T 8ES T 10ES T ...
Page 10: ...10 3 2 Function Fig 2 Function of ES T ...
Page 22: ...22 5 2 Electrical connection diagram ES T Fig 6 Electrical connection diagram ...
Page 74: ...74 Fig 52 Login page The HOME page will appear Fig 53 HOME page ...


