70
■
Make sure you have connected an external USB memory where has been uploaded the
ES-T update file. The external USB memory must be large enough and must have at least
128Mb of free space.
■
Make sure that the external USB memory has been recognized by the system (the USB
icon in the status bar of the display is shown)
Perform the following steps to update the System:
ATTENTION!
■
Do not power-off (AC and DC) the system during the update procedure. We
recommend that the update procedure is only carried out when the system is
on and there is enough energy produced by the solar PV panels (at least 1kW).
A power supply outage during the update procedure could affect the correct
operation of the system and relieves the manufacturer from all liabilities, as
well as invalidate the warranty.
■
Do not remove the external USB memory during the update procedure.
Removal of the external USB memory during the update could affect the cor-
rect operation of the system and relieves the manufacturer from all liabilities,
as well as invalidate the warranty.
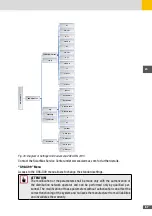
1. Access the menu “SETTINGS --> GENERAL --> FW UPGRADE”.
2. Follow the instructions displayed on the front panel.
During the update procedure the DLX enters safety mode and interrupts its functions for
the entire duration of the procedure (a few minutes).
3. The inverter restarts automatically once the update is complete.
If the update procedure is not successful and a control panel lockout occurs, please contact
the SolarMax Service Center unter
.
Summary of Contents for 10ES-T
Page 1: ...Instruction Manual SolarMax ES T series 5ES T 6ES T 8ES T 10ES T ...
Page 10: ...10 3 2 Function Fig 2 Function of ES T ...
Page 22: ...22 5 2 Electrical connection diagram ES T Fig 6 Electrical connection diagram ...
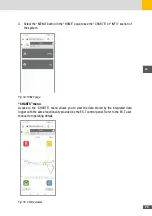
Page 74: ...74 Fig 52 Login page The HOME page will appear Fig 53 HOME page ...

