background image

7


SC200 

FITNESS


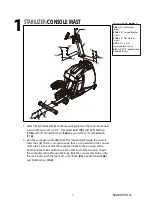
STABILIZER/

CONSOLE MAST 


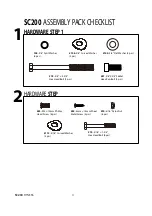
HARDWARE 

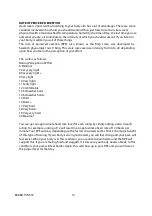
STEP 1


108.

 3/8” Split Washer  

(6 pcs) 

#106.

 3/8” Curved Washer 

(2 pcs

#100.

 3/8" Flat Washer  

(4 pcs) 

#78.

 3/8" × 3-3/4"_ 

Hex Head Bolt (2 pcs) 

#81.

 3/8”X3/4” Socket Head 

Cap Bolt (4 pcs) 


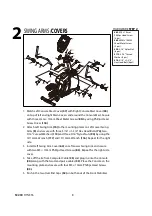
1.


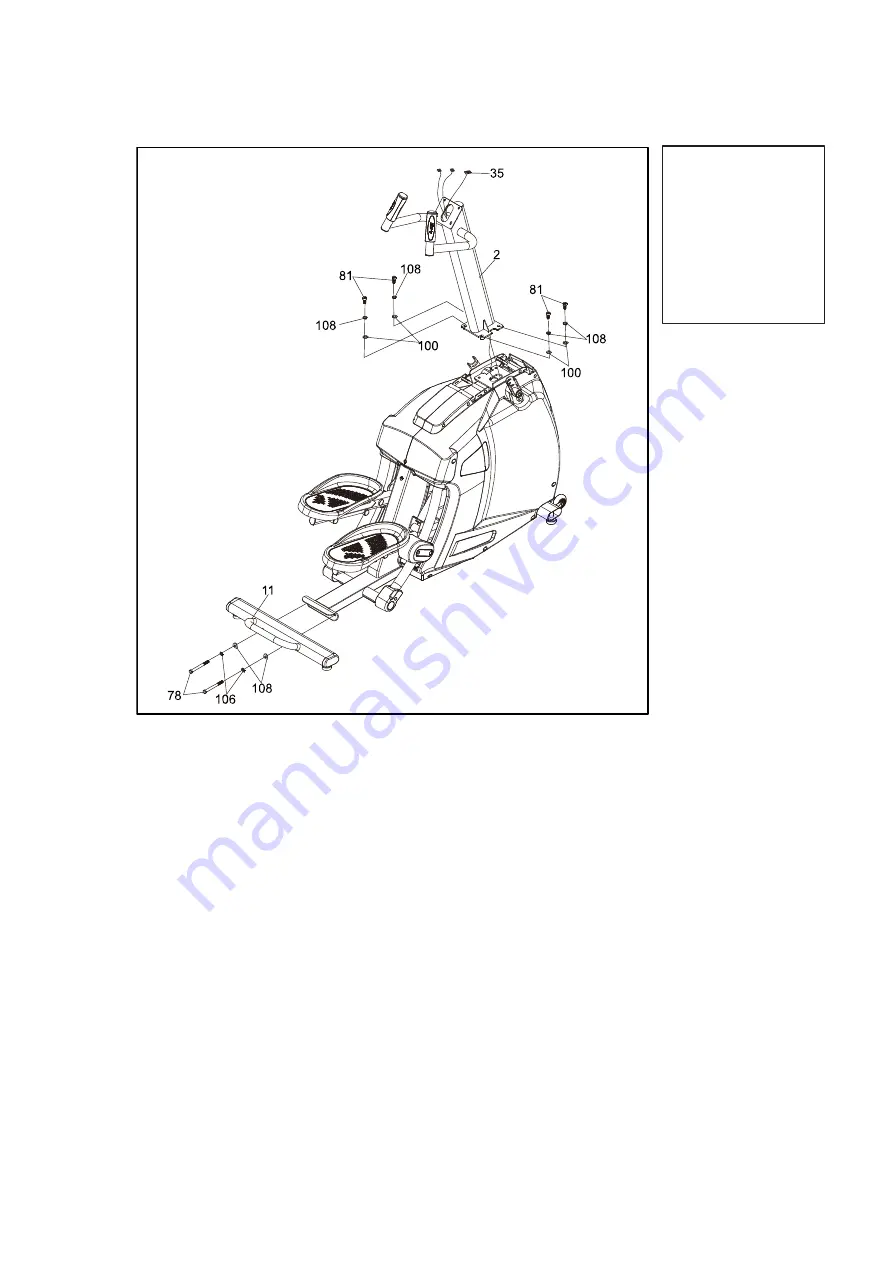
Attach Rear Stabilizer 

(11)

 to the mounting plate on the main frame and 

secure with two 3/8" × 3-3/4"_Hex Head Bolts

 (78)

, 3/8” Split Washers 

(108)

 and 3/8" Curved Washers 

(106)

 by using the 13/14mm Wrench 

(116)

2.


Run the computer cable (

35

) from the main body through the console 

mast tube (

2

). There is a long tie-wrap that is pre-installed in the console 

mast tube. Tie the end of the computer cable to the tie-wrap at the 
bottom of the tube and then use the other end of the tie-wrap to pull 
the computer cable through the tube. Bolt the console mast tube onto 
the main body with the four 3/8" × 3/4" Bolts 

(81)

, Split Washers 

(108)


and Flat Washers 

(100)

.  


Summary of Contents for SC200

Page 1: ...equire any assistance with assembly or technical support please call us first for assistance at 866 697 6531 Thank you for your Sole purchase ATTENTION OWNER S MANUAL SC200 Climber Trainer Please carefully read this entire manual before operating your new climber ...

Page 2: ... 12 General Maintenance 18 Manufacturer s Limited Warranty 19 ATTENTION THIS FITNESS CLIMBER IS INTENDED FOR RESIDENTIAL USE ONLY AND IS WARRANTED FOR THE APPLICATION ANY OTHER APPLICATION VOIDS THIS WARRANTY IN ITS ENTIRETY Before returning yourSole productto any retailer or if yourequire any assistance with assemblyortechnical supportplease call usfirst for assistance at 866 697 6531 Thank youfo...

Page 3: ...d surfaces Do not operate where aerosol spray products are being used or where oxygen is being administered Sparks from the motor may ignite a highly gaseous environment Never drop or insert any object into any openings Do not use outdoors To disconnect turn all controls to the off position and then remove the plug from the outlet Do not attempt to use your climber for any purpose other than for t...

Page 4: ...t 866 MYSOLE1 1 866 697 6531 Please take a moment at this time to record below the name of the dealer their telephone number and the date of purchase for easy contact in the future We appreciate your confidence in SOLE and we will always remember that you are the reason that we are in business Please complete and mail your registration card today and enjoy your new fitness climber Yours in Health ...

Page 5: ...ng the results of any operational change you request from the computer Understand that changes in resistance and incline do not occur immediately Set your desired resistance level on the computer console and release the adjustment key The computer will obey the command gradually NEVER use your climber during an electrical storm Surges may occur in your household power supply that could damage clim...

Page 6: ... 4 pcs 78 3 8 3 3 4 Hex Head Bolt 2 pcs 106 3 8 Curved Washer 2 pcs 108 3 8 Split Washer 6 pcs 81 3 8 X3 4 Socket Head Cap Bolt 4 pcs 83 M5 10mm Phillips Head Screw 8 pcs 85 4mm 15mm Sheet Metal Screw 3 pcs 113 5 16 Curved Washer 4 pcs 74 5 16 1 3 4 _ Hex Head Bolt 6pcs 90 5 16 Nyloc Nut 6 pcs ...

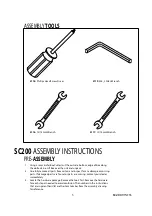
Page 7: ...inspect for any damage or missing parts If damaged parts are found or parts are missing contact your dealer immediately 3 Locate the hardware package Remove the tools first Remove the hardware for each step as needed to avoid confusion The numbers in the instructions that are in parenthesis are the item number from the assembly drawing for reference 118 Phillips Head Screw Driver 119 M8_L Allen Wr...

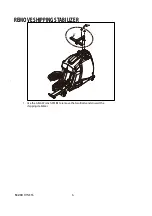
Page 8: ...SC200 FITNESS 6 REMOVE SHIPPING STABILIZER 1 Use the Allen Wrench 119 to remove the two Bolts and discard the shipping stabilizer ...

Page 9: ... Bolts 78 3 8 Split Washers 108 and 3 8 Curved Washers 106 by using the 13 14mm Wrench 116 2 Run the computer cable 35 from the main body through the console mast tube 2 There is a long tie wrap that is pre installed in the console mast tube Tie the end of the computer cable to the tie wrap at the bottom of the tube and then use the other end of the tie wrap to pull the computer cable through the ...

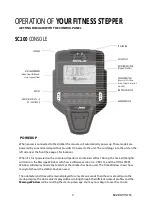
Page 10: ...5 to the mounting plates on Left Lower Swing Arms 9 and secure with three 5 16 1 3 4 Hex Head Bolts 74 two 5 16 Curved Washers 113 and three 5 16 Nyloc Nuts 90 by using the 12 14mm Wrench 117 and 13 14mm Wrench 116 Repeat for the right side 3 Install Left Swing Arm Cover 64 on Left Lower Swing Arm and secure with two M5 10mm Phillips Head Screws 83 Repeat for the right side cover 4 Take off the ti...

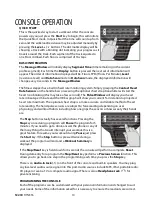
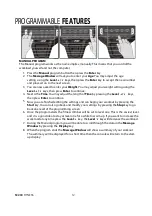
Page 11: ... VER 1 0 and the TOTAL STEPS Window will display how many total steps the climber has been used The Time Window shows how many total hours the climber has been used The odometer and time will remain displayed for only a few seconds then the console will go to the startup display The dot matrix display will be scrolling through the different workout profiles and the MessageWindow will be scrolling ...

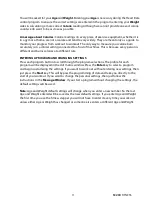
Page 12: ...ur current in relation to projected heart rate maximum The optional chest strap is a more accurate and reliable method of heart rate reading The hand pulse sensors are subject to false readings depending on user physiology and workout habits including how one grips the sensors or how sweaty their hands are The Stop button actually has several functions Pressing the Stop key once during a program w...

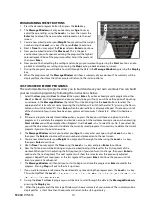
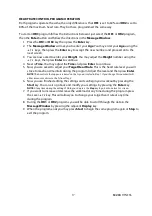
Page 13: ...NG A PROGRAM AND CHANGING SETTINGS Press each program button to scroll through the program selections The profile for each program will be displayed in the dot matrix window Press the Enter key to select a program and begin customizing the settings If you want to work out without entering new settings then just press the Start key This will bypass the programming of data and take you directly to t...

Page 14: ...el keys then press Enter to continue 5 Now you are finished editing the settings and can begin your workout by pressing the Start key You can also go back and modify your settings by pressing the Stop key to go back one level of the programming screen 6 Once the program starts the fitness climber will be set to level one This is the easiest level and it is a good idea to stay at level one for a wh...

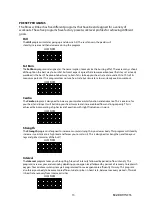
Page 15: ...esigned to increase your cardiovascular function and endurance This is exercise for your heart and lungs It will build up your heart muscle and increase blood flow and lung capacity This is achieved by incorporating a higher level of exertion with slight fluctuations in work SC200 WORK Strength The Strength program is designed to increase muscular strength in your lower body This program will stea...

Page 16: ...characters of your name have been pro grammed maximum 7 characters When finished press Stop 2 If there is a program already stored in User when you press the key you will have an option to run the program as it is or delete the program and build a new one At the welcome message screen when pressing Start or Enter you will be prompted Run Program Use the Level to select Yes or No If you select No y...

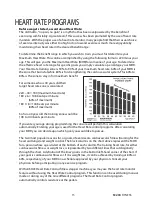
Page 17: ...er minute 60 of maximum 180 X 8 144 beats per minute 80 of maximum So for a 40 year old the training zone would be 108 to 144 beats per minute If you enter your age during programming the console will perform this calculation automatically Entering your age is used for the Heart Rate control programs After calculating your MHR you can decide upon which goal you would like to pursue The two most po...

Page 18: ...ception of Effort 6 Minimal 7 Very very light 8 Very very light 9 Very light 10 Very light 11 Fairly light 12 Comfortable 13 Somewhat hard 14 Somewhat hard 15 Hard 16 Hard 17 Very hard 18 Very hard 19 Very very hard 20 Maximal You can get an approximate heart rate level for each rating by simply adding a zero to each rating For example a rating of 12 will result in an approximate heart rate of 120...

Page 19: ...ed to adjust your Target Heart Rate This is the heart rate level you will strive to reach and maintain during the program Adjust the level and then press Enter NOTE The heart rate that appears is based on the you accepted in Step 1 If you change this number it will either increase or decrease the from Step 2 6 Now you are finished editing the settings and can begin your workout by pressing the Sta...

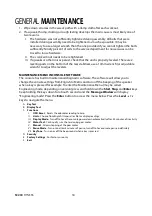
Page 20: ...t in maintenance diagnostic software The software will allow you to change the console settings from English to Metric and turn off the beeping of the speaker when a key is pressed for example To enter the Maintenance Menu may be called Engineering mode depending on version press and hold down the Start Stop and Enter keys Keep holding the keys down for about 5 seconds and the Message Window will ...

Page 21: ...companies use of parts other than original SOLE parts or external causes such as corrosion discoloration of paint or plastic alterations modifications abuse misuse accident improper maintenance inadequate power supply or acts of God 4 Products with original serial numbers that have been removed or altered 5 Products that have been sold transferred bartered or given to a third party 6 Products that...

Page 22: ...FITNESS 20 Before returning your Sole productto any retailer orif you require any assistance with assemblyortechnical supportplease call usfirst for assistance at 866 697 6531 Thank you for your Solepurchase ...

Page 23: ......

Reviews: