Installation
and
Operation
Manual
(Rev
A)
PVI
50
‐
100KW
Series
Inverters
DOCR
‐
070233
Page
32
of
92
5
Commissioning
the
Inverter
Before
commissioning,
ensure
that
the
inverter
is
properly
secured
to
the
mounting
structure
and
that
all
power
and
grounding
connections
are
made
to
ensure
that
the
inverter
is
ready
to
power
up.
NOTE:
Make
sure
all
tools,
parts,
etc.
are
removed
from
the
inverter
cabinet,
DC
and
AC
disconnect
switches,
and
around
the
vicinity
of
the
inverter
before
turning
on.
WARNING:
Make
a
final
check
of
all
AC
and
DC
power
and
grounding
wiring
at
the
inverter
and
within
the
system
before
turning
the
inverter
on.
NOTE:
With
the
PV
modules
connected
and
inverter
disconnect
switches
still
off,
perform
a
final
check
of
the
PV
voltage
and
polarity
using
a
digital
volt
meter
by
probing
the
positive
(+)
and
negative
(
‐
)
PV
connections.
NOTE:
Verify
clockwise
AC
phase
rotation
for
L1,
L2,
L3
using
a
phase
rotation
meter.
5.1
Turning
on
the
Inverter
WARNING:
The
inverter
may
only
be
turned
on
by
trained
and
qualified
personnel
only.
Before
attempting
to
operate
the
inverter,
please
read
the
entire
manual.
1.
Turn
on
the
dedicated
three
‐
phase
interconnection
circuit
breaker
or
disconnect
switch
at
the
system’s
point
of
interconnection.
2.
Turn
on
the
inverter’s
AC
disconnect
switch.
3.
Turn
on
the
inverter’s
DC
disconnect
switch.
4.
Watch
the
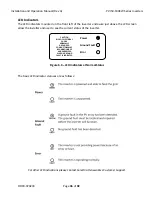
LED
indicators
for
initialization
(green
and
red
LEDs
on),
then
a
slow
blinking
green
LED
followed
by
a
faster
blinking
green
LED.
Watch
the
LCD
display
for
prompts
and
system
status.
5.
Listen
for
contactor
closing
(inverter
on
‐
line).
6.
Listen
for
slight
60
Hz
hum
(transformer
on
‐
line).
7.
Following
the
blinking
green
LED
and
high
frequency
switching
sound
you
should
see
a
solid
green
LED.
This
confirms
that
the
inverter
is
operating
normally.
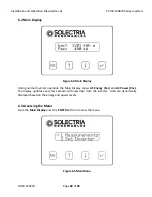
The
LCD
display
will
show
the
AC
Power
(PAC)
and
Energy
(EAC).

