10
CHOOSING A LOCATION
AUTOMATIC DEFROST
CONTINUOUS MODE—GARDEN HOSE INSTALLATION AND SETUP
A Dehumidifier operating in a basement will have little or no effect in drying out an adjacent
enclosed storage area, such as a closet, unless there is adequate circulation of air in and out of
the area.
Do not use outdoors.
This dehumidifier is intended for indoor use only. Place the dehumidifier on a smooth, level
floor surface that is strong enough to support the unit with a full bucket of water.
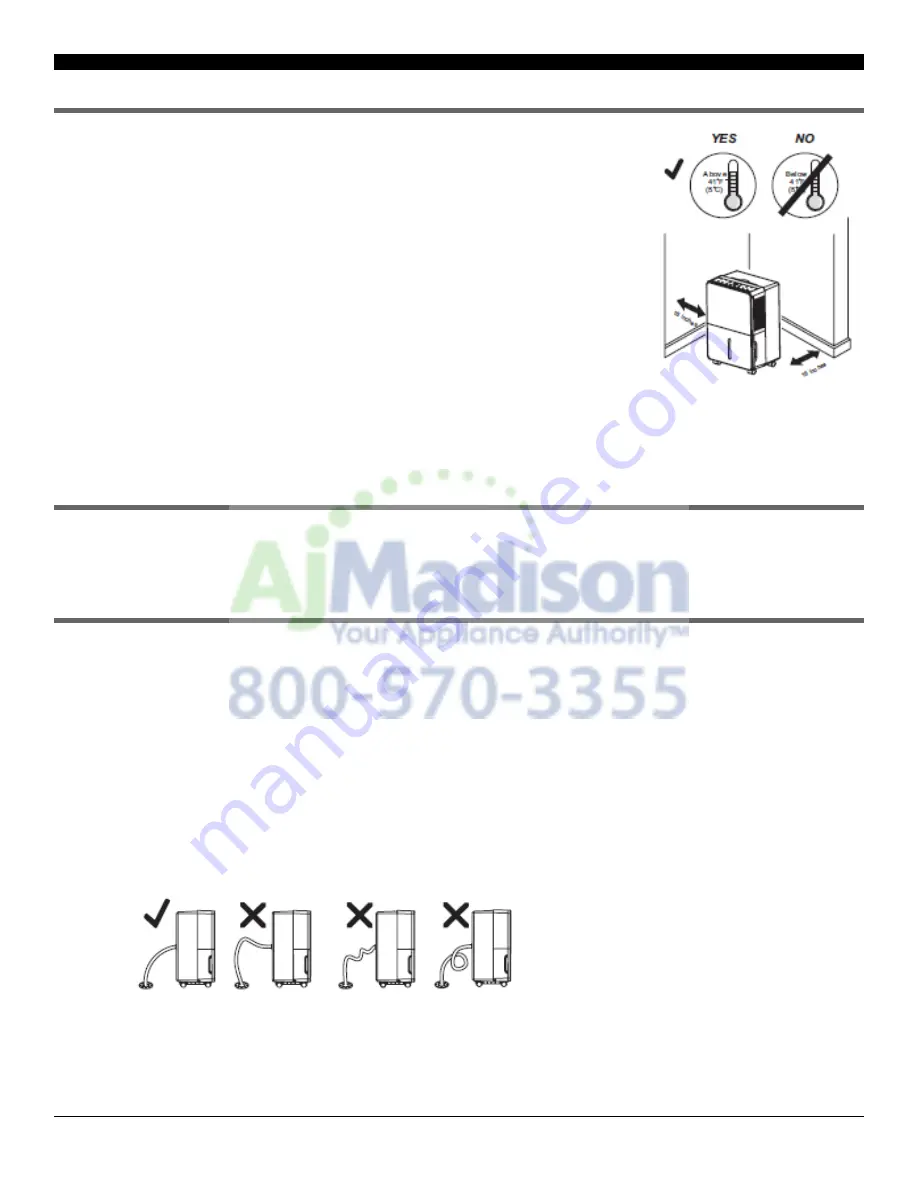
Allow at least 12”-18” of air flow on all sides.
Place the dehumidifier in an area where the temperature will not fall below 41°F. The coils
can become covered with frost at temperatures below 41°F, which may reduce performance.
Use the dehumidifier in cooking, laundry, bathing and dishwashing areas that have exces-
sive moisture. NOTE: Place the dehumidifier away from a clothes dryer.
Use the dehumidifier to prevent moisture damage anywhere books or valuables are stored.
Use the dehumidifier in a basement to help prevent moisture damage.
The dehumidifier must be operated in an enclosed area to be most effective.
Close all doors, windows and other outside openings to the room.
When frost builds up on the evaporator coils, the compressor will cycle off and the fan will continue to run until the frost disappears.
When the coils are completely defrosted, the compressor or fan (depending on the model) will automatically restart and
dehumidification will resume.
Water can be automatically emptied by attaching a hose to the continuous drainage port on the back of the dehumidifier. This will
allow the unit to run continuously (depending on the selected humidity level) without having to empty the water bucket. To drain,
simply attach a standard garden hose (not included). The thread standard for garden hoses in the US and its territories is known as
GHT or "garden hose thread" which has an outer diameter of 1 1/16 inches (1.0625 inches or 27.0 mm) and a pitch of 11.5 TPI.
Place dehumidifier on a level surface.
Unscrew the cap on the back of the unit to access the garden hose nozzle
Thread a garden hose (not supplied) onto the accessible nozzle, lead to a floor drain and cut to length.
Make sure that there are no kinks or knots in the garden hose. (See Picture Below)
Turn on the unit and press the MODE button until set to CONTINUOUS.
Garden Hose Installation Reference Guide
IMPORTANT NOTES:
Placing the dehumidifier on an uneven surface or improper hose installation may result in
water filling up the bucket and causing the unit to shut off. Empty bucket if shut-off occurs,
then check dehumidifier location and hose for proper setup. The bucket must be in place and
securely seated for the dehumidifier to operate.


