Levelogger Series Quick Start Guide
Note:
When the ‘Start’ icon is selected, a window will pop-up as an alert
that the previous data will be erased.
Tip
The ‘future start’ and
‘future stop’ options are
ideal for synchronizing
the data collection of
multiple Leveloggers.
Rainlogger
Programming
The Rainfall Calibration
Constant ‘value’ of
the tipping bucket rain
gauge used with the
Rainlogger is required
when programming the
Rainlogger. Consult the
Levelogger User Guide
for more information
on programming the
Rainlogger.
Starting and Stopping the Levelogger
1. If desired, enter a Future Start and/or Future Stop Time.
2. When the ‘Start’ icon is selected, all settings are applied to the
Levelogger and it will start logging at the specified time.
3. To start logging immediately, do not fill in the Future Start
field, and click the ‘Start Now’ icon.
Tip
If a number of
Leveloggers are
to be programmed
with identical inputs,
clicking the ‘Save
Default Settings’ icon
will create a template.
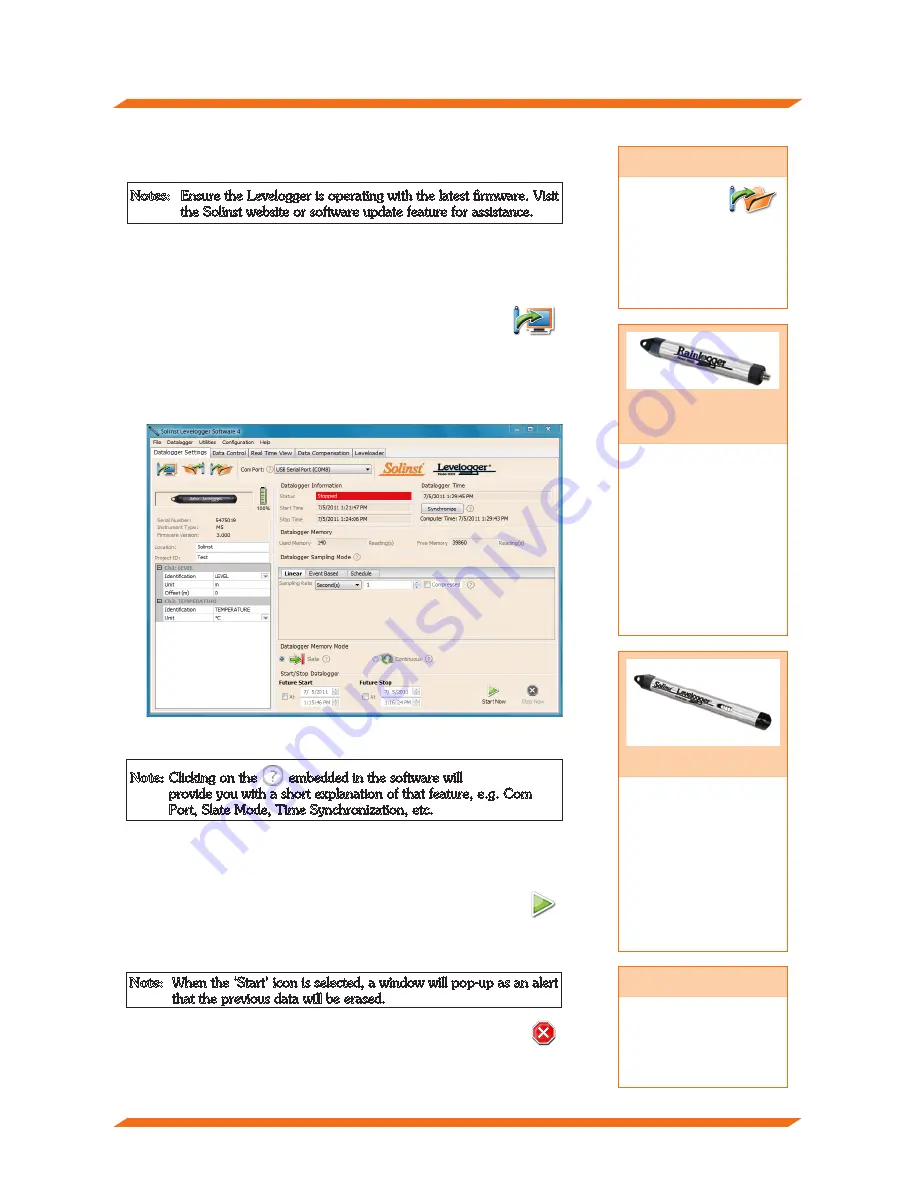
Datalogger Settings Window
Programming the Levelogger
Note:
Clicking on the
embedded in the software will
provide you with a short explanation of that feature, e.g. Com
Port, Slate Mode, Time Synchronization, etc.
Notes:
Ensure the Levelogger is operating with the latest firmware. Visit
the Solinst website or software update feature for assistance.
1. Connect the Levelogger to the communications device and start the
software.
2. Select the appropriate COM or USB port for the connected
communications device from the centre drop-down menu.
3. Click the ‘Retrieve Settings from Levelogger’ icon. This will
retrieve and display the current programmed settings for the
connected Levelogger.
4. You can now customize the Levelogger including your Project
ID, Location, Sampling Mode and Rate, and Future Stop
and Start times.
4. To stop the Levelogger immediately, click the ‘Stop Now’ icon.
LTC Calibration
Before deploying your
LTC Levelogger Junior,
be sure to calibrate the
instrument. To begin
calibration, open the
‘Conductivity Cal’ tab
and follow the steps
provided. Consult the
Levelogger User Guide
for more information.
- 3 -


