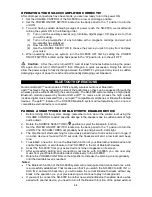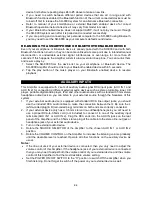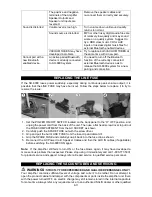
E-5
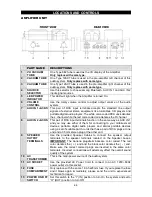
LOCATIONS AND CONTROLS
AMPLIFIER UNIT
PART NAME
DESCRIPTIONS
1
VU VACUUM
TUBE
One Type 6E2 tube is used as the VU display of the Amplifier.
Only replace with same type.
2
VACUUM TUBE
One Type 12AX7 tube is used in the pre-amplifier left channel of this
audio system.
Only replace with same type
.
3
VACUUM TUBE
One Type 12AX7 tube is used in the pre-amplifier right channel of this
audio system.
Only replace with same type
.
4
SOURCE
SELECTOR
Use this selector to choose among Bluetooth, AUX IN 1 and AUX IN 2
input signal sources.
5
LED POWER
INDICATOR
This LED will light when the Amplifier is turned On.
6
VOLUME
CONTROL
Use the rotary volume control to adjust output volume of the audio
system.
7
AUX IN 1 JACKS
This pair of RCA input terminals accepts the standard line output
signals of external stereo equipment like turntables, CD players and
portable digital audio players. The white color-coded RCA Jack denotes
the L channel while the red color-coded one denotes the R channel.
8
AUX IN 2 JACKS
This pair of RCA input terminals function in the same way as AUX IN 1
and you may use either of them for connecting to your mobile smart
devices, portable digital audio players and similar portable devices
using a set of suitable patch cords that has a pair of RCA plugs at one
end and a 3.5mm stereo plug at the other end.
9
SPEAKER
OUTPUT
TERMINALS
Use the provided Speaker Cables to connect the speaker output
terminals to the speaker terminals located on the Speaker boxes.
IMPORTANT:
The banana plugs/terminals are color coded. The red
color denotes the ( + ) end and the black color denotes the ( - ) end.
Make sure the correct colored plugs are inserted in the same color
terminals. Incorrect connections will adversely affect the overall sound
quality of the system.
10
AC
TRANSFORMER
This is the main power source of the audio system.
11
AC SOCKET
Use the provided AC Power Cord to connect to an AC 120V~60Hz
power outlet via this socket.
12
FUSE
COMPARTMENT
Only replace with the same 1.6A 5x20mm fuse. If you replace the fuse
and it blows again immediately, please send the unit to experienced
technician for repair.
13
POWER ON/OFF
SWITCH
Set this switch to the “I” (IN) position to turn On the system and set to
“O” (OUT) position to turn Off.

