38. Pull the plug after every use. Only then, the appliance is fully
switched off.
39. Keep the appliance clean. Always switch the appliance off
and pull the plug from the power socket and the connection
adapter from the appliance socket before cleaning and storing
the appliance. Please refer to the notes given in the section
“Cleaning and maintenance“ on page 90 of this manual.
40. Always fully unwind the power cord before connecting the
connection adapter to the appliance socket and the power plug
to the power socket.
81
80
s
BEFORE FIRST USE
–
Before using your Solis Sous-Vide Cooker Pro for the first time, please remove all
advertisement stickers.
–
Clean the stainless steel water basin with a soft, moist cloth.
–
Also wipe the lid with a soft, moist cloth.
–
Place the Sous-Vide Cooker Pro on an even, dry and heat and moisture resistant
work top and allow sufficient air circulation around the appliance.
–
Vacuum seal the food you wish to cook in Solis bags with a vacuum sealer.
–
Check the bag for a perfect seal to ensure the vacuum is kept.
–
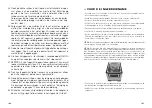
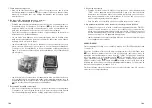
Fill the water basin at least to the MIN marking with fresh tap water. Use a water
jug to do that, never place the Sous-Vide Cooker Pro in a sink and never hold it
under the water faucet.
CAUTION:
The appliance will not start if the water level does not reach the MIN
marking. The display will state the error code “E001”.
NOTE:
Please do not over fill the water basin and remember that the water level
will rise once the food filled vacuum bags are placed in the water. We recommend
checking the water level beforehand by placing the vacuum sealed food bags in
the water with the grid before starting the appliance. The food in the bag should
be completely submerged in water. Then, remove the food bags with the grid and
proceed as described under “Operation”.
–
Make sure that the appliance bottom, the socket for the connection adapter and
the outside of the appliance are completely dry.
–
Fully unwrap the power cord and plug the connection adapter into the appliance
socket on the chassis backside.

