background image

7

Geolocation (via GPS)

Quick


Start


Guide

Function: 

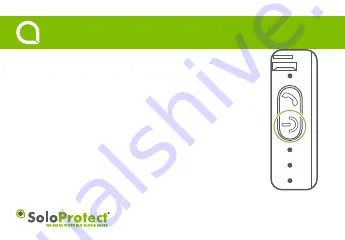
In conjunction with ‘Device Check’, use to update your location. 

How to use: 

Perform a quick press of the highlighted power button to initiate a ‘Device Check’ 

(Please note, holding the button down will turn the device off).

Geolocation:

 A flashing blue LED indicates a location fix has been successful. A solid blue LED 

indicates a location fix has not been successful.

• Please note, all LEDs will go out after a period of inactivity.

Summary of Contents for Go

Page 1: ...Quick Start Guide ...

Page 2: ...e SoloProtect Go charger lead into the indicated Micro USB socket behind removable section and indicated by the USB charge symbol The maximum battery life is 72 hours if fully charged Minimum two to three hours charging required to reach full charge 1 Charging Quick Start Guide ...

Page 3: ...for a minimum of three seconds The device will emit a beep and a single vibration Once on SoloProtect Go will automatically perform a Device Check Off Press the highlighted Power button for a minimum of five seconds The device will emit two vibrations and beep 2 Turning On Off Quick Start Guide ...

Page 4: ...An absence of a Red LED on display indicates the device is not suffering from low battery Mobile Signal The Green LED indicates network connection SIM card read and data upload The LED s should be solid initially then flash for a short time If the Green LED remains solid throughout the device SIM card read has been unsuccessful and or that the device has no signal Geolocation A flashing blue LED indi...

Page 5: ... give three short vibrations to indicate the Amber Alert button press was accepted When your Amber Alert is connected you will feel a single vibration After which you are free to begin your message You have 20 seconds to leave your Amber Alert before SoloProtect Go will automatically complete and disconnect the call The device will give two short vibrations to indicate the Amber Alert has finished ...

Page 6: ...e Red Alert button press was accepted The device will then emit two vibrations once the call is connected Every ten seconds the device will vibrate twice in combination with the red LED flashing twice to indicate the alarm is in process To cancel a Red Alert first advise the Alarm Receiving Centre you are safe before pressing the Power button for a minimum of three seconds Check with your employer r...

Page 7: ...ixty seconds all LEDs will flash and the device will emit alarm tones and vibrate continuously This indicates detection but an alarm is not raised at this point The pre alarm phase is cancelled by a user pressing the Power button on the SoloProtect Go to indicate they are not incapacitated The device will give two long vibrations to indicate the pre alarm phase is cancelled If the Power button is n...

Page 8: ...quick press of the highlighted power button to initiate a Device Check Please note holding the button down will turn the device off Geolocation A flashing blue LED indicates a location fix has been successful A solid blue LED indicates a location fix has not been successful Please note all LEDs will go out after a period of inactivity ...

Page 9: ...use the Device Check function Keep your SoloProtect Go clean and avoid unnecessary knocks or drops SoloProtect Go is water resistant but you should avoid water immersion as that will break the device Please charge your SoloProtect Go every 24 hours if possible ...

Page 10: ...Tel 0114 399 6000 Option 4 info SoloProtect com www SoloProtect com WE MAKE WORKING ALONE SAFER ...

Reviews: