background image

4

5

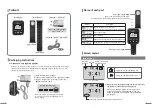
[Main Body]

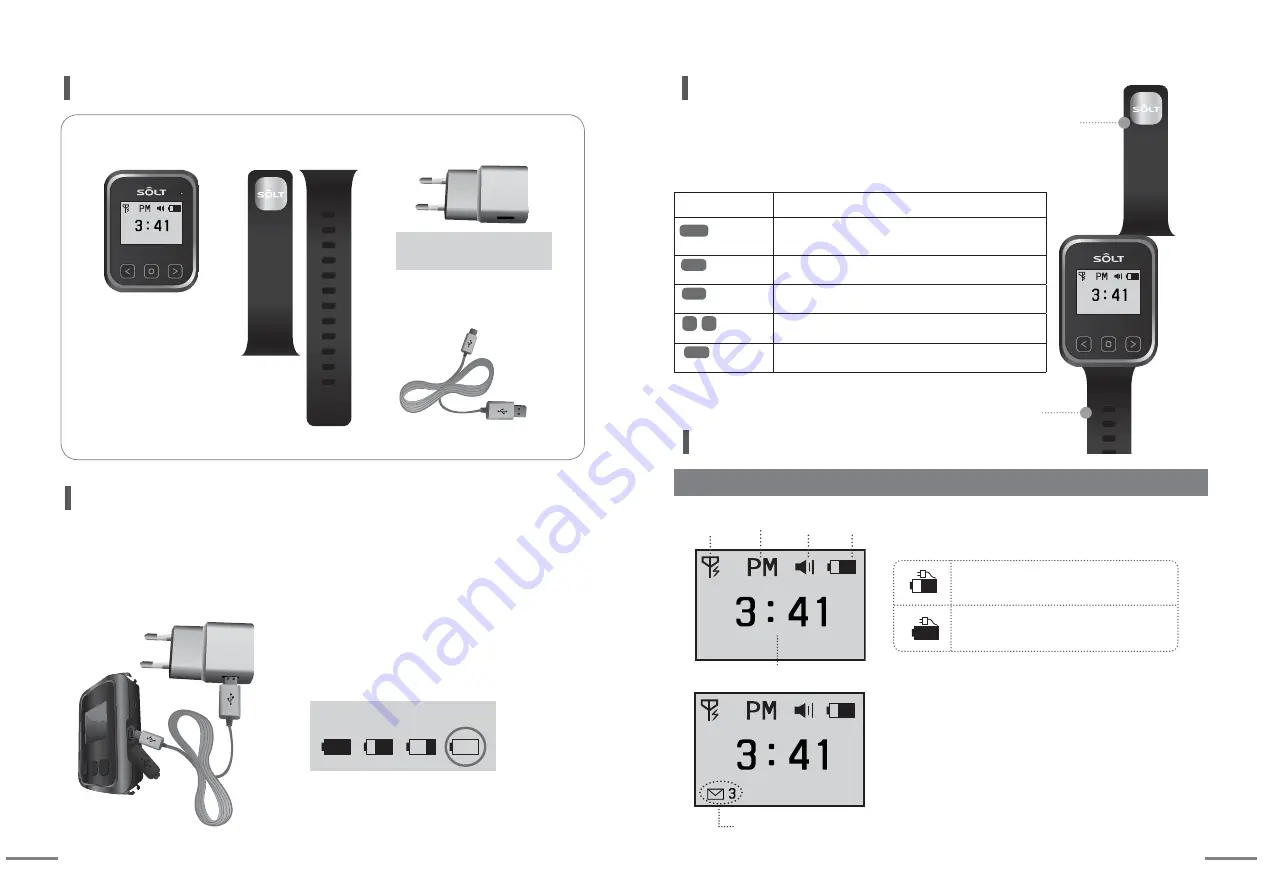
[Adapter - DC5V 1A]

[Wrist Band]

Lower Band

Contents

PRGH

VHW

SZU

[Charging cables - micro USB]

Buttons

Description

         Press it more 

than 2 seconds

 Entering into Mode / Exit to idle screen
 Conversion of numbers, English letters and special characters

         Press it more 

than 2 seconds

 Move to upper mode

         Press it more 

than 2 seconds

 Power ON/OFF

          Press it

once shortly 

 Mode Shift, Digit Location Shift, Shift to receiving screen

     Press it 

once shortly 

 Mode Selection, Setting Value Selection and Change

<

<

MODE

PRGH

VHW

SZU

Wrist type upper band

(How to combine main body and band : 

Push the band to the left fitting into the groove of main body.)

Wrist type lower band

Name of each part

Upper Band

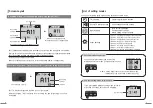
① Open the USB cover of pager.
② Connect micro USB jack to the connector of pager.   
③ Plug the cord into the outlet after connecting 
    adaptor and USB cable.

When the battery icon indicates as marked 
in a circle, use it after recharging for more 
than 2 hours.

※ Please use only supplied adaptor.


   Defect of the product caused by the use of other products will be repaired with charge.  
   Limited accessary warranty. Malfunctioning of supplied adapter during its use is not
   covered by manufactures' warranty.

Recharging Instructions

Battery charging level. 

Unchecked call Icon, Number of Unchecked Calls

Screen Layout

Idle screen

※ When there are unchecked calling numbers in idle screen, 
    the number of unchecked calls is displayed.

Current Time

When you press SET button at receiving screen, 
unchecked call icon is disappeared. When you 
check all received call numbers, only current time 
is displayed.

Charging in progress battery icon

Charging completed battery icon

Reception
available

AM/PM

Sound
Vibration

Remaining 
battery

SET

SET

PWR

Input : 100-240V~50/60Hz

Onput : DC5V 1A

Summary of Contents for SP7-100

Page 1: ...ng Solt wireless calling system products Please read this user s guide carefully before using and follow the instructions Specification and instructions are subject to change without notice User s Gui...

Page 2: ...s marked in a circle use it after recharging for more than 2 hours If foreign object enters the unit please contact service center This may cause damage to the internal parts In case of thunderstorm o...

Page 3: ...the cord into the outlet after connecting adaptor and USB cable When the battery icon indicates as marked in a circle use it after recharging for more than 2 hours Please use only supplied adaptor De...

Page 4: ...disappeared OK Icon Screen Layout You can set following listed modes using set button of main body Setting mode screen Idle screen You can enter into setting mode by pressing MODE button for more tha...

Page 5: ...idle screen You can enter into Setting Mode by pressing MODE button for more than 2 seconds at idle screen You can set sound or vibration when receiving calls Sound Vibration Setting When you press MO...

Page 6: ...SET button for more than 2 seconds it returns to previous stage Character Change When character inversion is made by pressing SET button you can select other characters using arrow keys Character Inv...

Page 7: ...k one more time If you want whole deletion move to YES and press SET button After beep sound is made whole deletion is completed and returns to previous stage Number of registered calling bells become...

Page 8: ...gs Other Settings Other Settings 2 Adjusting the contrast of LCD screen Move to mode using arrow keys and enter into change mode by pressing SET button Set desired value using arrow keys default setti...

Page 9: ...Mode by pressing MODE button for more than 2 seconds at idle screen Other Settings It is a function that sets repeated numbers of sound or vibration for calls Number of call alarm repetition When you...

Page 10: ...ton for more than 2 seconds at idle screen Pager screen that transmits data SET Button Transmission Start Being Transmitted Transmission Completion Pager screen that receives data Data can be transmit...

Page 11: ...d and returns to previous stage When you press MODE button for more than 2 seconds idle screen is displayed When pressing SET button for more than 2 seconds it returns to previous stage Pager does not...

Page 12: ...Move to mode using arrow keys and enter into change mode by pressing SET button After moving to using arrow keys enter into setting mode by pressing SET button You can enter into Setting Mode by press...

Page 13: ......

Reviews: