background image

37

Copyright © 2005 - 2014 Somfy SAS. All rights reserved.

EN

Non contractual images

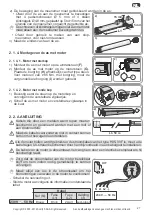
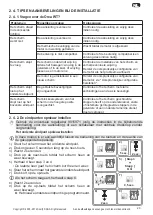
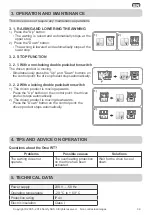
2. 4. TIPS AND ADVICE ON INSTALLATION

2. 4. 1. Questions about the Orea WT?

Problems

Possible causes

Solutions

The awning 
rotates in the 
wrong direction.

The wiring is incorrect.

Check the wiring and modify as required.

The awning does 
not operate.

The wiring is incorrect.

Check the wiring and modify as required.

The overheating protection on 
the drive has been activated.

Wait for the drive to cool down.

The control point is  
not compatible.

Check the compatibility and replace the 
control point as required.

The awning stops 
too soon.

The awning is encountering 
friction when it moves: rubbing 
on the guide rails and cassette, 
interference between the 
winding tube and the drive, etc.

Check the installation of the awning and 
adjust any rubbing points.
_ {   {
   

The drive has been installed in 
a new awning.

Restore the drive to its original 
   
¡  { ¡

The awning does 
not stop at the 
lower end limit.

£{ 
are unsuitable.

Check that the awning is secured to the 
winding tube with rigid links.

The awning does 
not stop at the 
upper end limit.

The system for stopping the 
awning in the upper position  
is unsuitable.

}{ {  {   {
   {
removable stops incorporated into the 
guide rails or an end slat that acts as  
a stop.

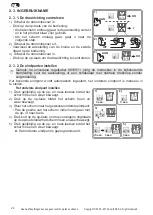
2. 4. 2. Re-setting the end limits

1

 Use universal adjusting cable 9015971 (follow the instructions in the corresponding 
manual for connection), or use a non-locking double push-button switch.

Re-setting the lower end limit

_ { {   {   {   {
reaction by the end product.

1) 

Place the awning at its lower end limit.

2) 

) {¡ƒ¡   G

3) 

Wait for 2 seconds.

4) 

Press the "Down" button until the awning moves back 
and forth.

5) 

Repeat steps 3 and 4 four times.

+

The last back and forth movement is brief.

6) 

Place the awning in the desired lower end limit 
position.

7) 

š {¡]¡  

_ {   €

8) 

Wait for 2 seconds.

9) 

Press the "Up" button until the awning moves back 
and forth.


|

The new lower end limit position is programmed.

2)

3)

5)

7)

9)

1)

4)

6)

8)

0.5 s

5 s

[Step 3 

+

Step 4]

x 4

2 s

2 s

Summary of Contents for HOME MOTION Orea WT Series

Page 1: ...Orea WT Ref 5012608D l5 g Dm FR Notice DE Anleitung IT Manuale NL Handleiding EN Instructions ES Gu a PT Instru es EL DA Brugsanvisning FI K ytt opas SV Bruksanvisning NO Veiledning...

Page 2: ......
Page 3: ...de s curit qui emp che tout contact dans la zone de 1 2 RESPONSABILIT Avant d installer et d utiliser la motorisation lire attentivement cette notice Outre les instructions d crites dans cette notice...

Page 4: ...gal 47 mm 1 Orea 60 WT S assurer que le diam tre int rieur du tube est sup rieur ou gal 60 mm Monter les accessoires n cessaires l int gration de la motorisation dans le tube d enroulement Soit uniqu...

Page 5: ...on t te ronde Q amovible 8 Glissser l ensemble tube motorisation joues amovibles dans le caisson 2 2 C BLAGE Les c bles traversant une paroi m tallique doivent tre prot g s et isol s par un manchon ou...

Page 6: ...courant Appuyer sur le bouton Mont e pour contr ler le sens de rotation 2 3 2 1 Y G x verrouillage r gl e Appuyer sur les boutons Mont e et Descente jusqu au va et vient du store 8 Appuyer sur le bout...

Page 7: ...ore et corriger les ventuels frottements Si le probl me persiste remettre la La motorisation a t install e dans un nouveau store Remettre la motorisation en Le store ne de course basse pas adapt es d...

Page 8: ...tionner le store a mi hauteur Pour mettre en uvre cette fonction Appuyer sur les boutons Mont e et Descente jusqu au va et vient du store 8 Appuyer sur les boutons Mont e ou Descente jusqu au va et vi...

Page 9: ...es boutons Mont e Descente du point de commande le produit motoris s arr te automatiquement 3 2 2 Avec un interrupteur double poussoir verrouillage Le produit motoris monte Appuyer sur le bouton Mont...

Page 10: ...contractuelles Par la pr sente Somfy d clare que la motorisation couverte par ces instructions marqu e pour tre aliment e en 8 G Z 9 8 8 9 8 B habilit e tablir la d claration comprenant le lieu et la...

Page 11: ...ugang gew hrt installiert werden Die Markise muss mit einer ohne Werkzeugeinsatz nicht abzunehmenden Sicherheitsvorrichtung versehen sein die jeden Kontakt mit bewegten Teilen des Antriebs verhindert...

Page 12: ...stens 47 mm betr gt 1 Orea 60 WT Stellen Sie sicher dass der Innendurchmesser der Welle mindestens 60 mm betr gt 1 Montieren Sie die erforderlichen Ausr stungsteile um den Antrieb in die Welle einzuse...

Page 13: ...gen Sie das Lager auf dem Antriebskopf befestigen Sie anschlie end die abnehmbare Kappe 2 Schieben Sie die Baugruppe Welle Antrieb abnehmbare Kappen in die Kassette 2 2 VERKABELUNG Errichten Pr fen In...

Page 14: ...9015971 f r den Anschluss die Anweisungen der zugeh rigen Anleitung befolgen oder einen Doppeltaster ohne Verriegelung Die obere Endlage wird automatisch eingestellt die Einstellung der unteren Endlag...

Page 15: ...rieb auf die Werkseinstellung zur ck 2 4 2 Neueinstellung der Endlagen 1 Verwenden Sie das Universal Einstellkabel 9015971 f r den Anschluss die Anweisungen der zugeh rigen Anleitung befolgen oder ein...

Page 16: ...Auf Taste bis die Markise mit einer Auf Abbewegung best tigt Zur Reduzierung der Schlie kraft dr cken Sie die Ab Taste bis die Markise mit einer Auf Abbewegung best tigt a Eine kurze Pause zwischen Au...

Page 17: ...b Taste der Bedieneinheit Das motorisierte Produkt wird automatisch gestoppt 3 2 2 Bei einem Doppeltaster und Verriegelung 1 Das motorisierte Produkt f hrt nach oben Dr cken Sie die Auf Taste der Bedi...

Page 18: ...m den vorliegenden Anweisungen vorgesehen ist den wesentlichen Anforderungen der Richtlinie 2006 42 EG ber Maschinen und der Richtlinie 2004 108 EG ber die elektromagnetische Vertr glichkeit entsprich...

Page 19: ...tata di un dispositivo di sicurezza che impedisce qualsiasi contatto nella zona di tranciatura o di schiacciamento dispositivo di sicurezza impossibile da smontare senza attrezzi 1 2 RESPONSABILIT Pri...

Page 20: ...il diametro interno del tubo sia superiore o uguale a 47 mm 1 Orea 60 WT Verificare che il diametro interno del tubo sia superiore o uguale a 60 mm 1 Montare gli accessori necessari all integrazione...

Page 21: ...tonda 1 Fissare il supporto alla testa del motore poi la parte laterale amovibile 2 Far scorrere il gruppo tubo motorizzazione parti laterali amovibili nel cassonetto 2 2 CABLAGGIO I cavi che attrave...

Page 22: ...ioni descritte sul relativo manuale per il collegamento o un interruttore a doppio pulsante senza interblocco Il finecorsa superiore si regola automaticamente mentre il finecorsa inferiore deve essere...

Page 23: ...Gli strumenti di fissaggio utilizzati non sono adatti Controllare che la tenda sia fissata al tubo di avvolgimento con collegamenti rigidi La tenda non si arresta in posizione di finecorsa superiore...

Page 24: ...2 Premere i tasti Salita o Discesa fino al movimento della tenda e regolare il livello di sensibilit di rilevamento degli ostacoli a Un movimento breve indica un livello di sensibilit medio b Un movim...

Page 25: ...lita e Discesa del punto di comando il prodotto motorizzato si arresta automaticamente 3 2 2 Con un interruttore a doppio pulsante con interblocco 1 Il prodotto motorizzato sale Premere il tasto Salit...

Page 26: ...ai requisiti essenziali della Direttiva Macchine 2006 42 CE e della Direttiva CEM 2004 108 CE Una dichiarazione di conformit CE disponibile all indirizzo Internet www somfy com ce Questa dichiarazione...

Page 27: ...m dat elk contact in de beknellingszone verhindert niet te demonteren zonder gereedschap 1 2 AANSPRAKELIJKHEID Lees deze handleiding zorgvuldig door alvorens de motor te installeren en in gebruik te n...

Page 28: ...e motor geschikt is voor gebruik met het scherm en de toebehoren 2 1 1 Voorbereiding van de motor 1 Orea 50 WT Controleer of de binnendiameter van de as minstens 47 mm is 1 Orea 60 WT Controleer of de...

Page 29: ...eerst de steun op de motorkop en vervolgens de verstelbare zijplaatjes 2 Schuif de as met motor en verstelbare zijplaatjes in de kast 2 2 AANSLUITING Kabels die door een metalen wand lopen moeten besc...

Page 30: ...5971 volg de instructies in de bijbehorende handleiding voor de aansluiting of een schakelaar met dubbele drukknop zonder vergrendeling Het bovenste eindpunt wordt automatisch ingesteld het onderste e...

Page 31: ...rm met starre verbindingen aan de as is bevestigd Het scherm stopt niet op het bovenste eindpunt Het blokkeersysteem van het scherm in de hoogste positie is ongeschikt Controleer of het scherm geschro...

Page 32: ...beweegt 2 Druk op de op of neer toetsen totdat het scherm heen en weer beweegt om het niveau van de obstakeldetectie aan te passen a Kort heen en weer bewegen van het scherm geeft aan dat de obstakeld...

Page 33: ...ruk tegelijkertijd op de op en neer toets van de bediening de toepassing stopt automatisch 3 2 2 Met een schakelaar met twee drukknoppen met vergrendeling 1 De toepassing gaat omhoog Druk op de op toe...

Page 34: ...g van 230 V 50 Hz en volgens de aanwijzingen in deze handleiding in overeenstemming is met de essenti le eisen van Machinerichtlijn 2006 42 EG en EMC richtlijn 2004 108 EG van de motor en de naam en h...

Page 35: ...h a safety device that prevents any contact in the shear or crush zone a guard that cannot be removed without tools 1 2 LIABILITY _ the instructions provided in this guide please also comply with the...

Page 36: ...Make sure that the inner diameter of the tube is at least 47 mm 1 Orea 60 WT Make sure that the inner diameter of the tube is at least 60 mm 1 Fit the accessories necessary to incorporate the drive in...

Page 37: ...support G Depending on the type of support position the retaining ring H Q U BG X ring a lockable retaining ring I must be used 2 1 4 2 Round head drive 1 Fit the support to the drive head and then th...

Page 38: ...usting cable 9015971 follow the instructions in the corresponding manual for connection or use a non locking double push button switch The upper end limit is set automatically while the lower end limi...

Page 39: ...tore the drive to its original The awning does not stop at the lower end limit are unsuitable Check that the awning is secured to the winding tube with rigid links The awning does not stop at the uppe...

Page 40: ...p and Down buttons until the awning moves back and forth 2 Press the Up or Down buttons until the awning moves back and forth to adjust the obstacle detection level a A brief back and forth movement i...

Page 41: ...d Down buttons on the control point the driven product stops automatically 3 2 2 With a locking double push button switch 1 The driven product is moving upwards Press the Up button on the control poin...

Page 42: ...contractual images 8 G Z in these instructions is in compliance with the essential requirements of Machinery Directive 2006 42 EC and EMC Directive 2004 108 EC to produce the declaration including th...

Page 43: ...a persiana est equipada con un dispositivo de seguridad que impide el contacto con la zona de compresi n o cizallamiento dispositivo de protecci n que no puede desmontarse sin una herramienta 1 2 RESP...

Page 44: ...60 WT Aseg rese de que el di metro interior del tubo sea igual o superior a 60 mm 1 Monte los accesorios necesarios para la integraci n de la motorizaci n en el tubo de enrollamiento la rueda motriz A...

Page 45: ...illo I 2 1 4 2 Motorizaci n con cabeza redonda 1 Fije el soporte sobre la cabeza del motor seguido de la cara desmontable 2 Deslice el conjunto tubo motorizaci n caras desmontables en el caj n 2 2 CAB...

Page 46: ...cable de ajuste universal 9015971 siga las instrucciones indicadas en la gu a correspondiente para la conexi n o utilice un interruptor de doble pulsador sin bloqueo debe ajustarse 1 Pulse los botone...

Page 47: ...ueva persiana motorizaci n consulte la secci n Vuelta a la La persiana no se de carrera inferior son adecuadas tubo de enrollamiento con uniones r gidas La persiana no se de carrera superior El sistem...

Page 48: ...ajada de la persiana 2 Pulse los botones Subida o Bajada hasta el movimiento de subida bajada de la persiana para ajustar el nivel de detecci n de obst culos a Un movimiento de subida bajada corto ind...

Page 49: ...os botones Subida y Bajada del punto de mando el producto motorizado se detendr autom ticamente 3 2 2 Con un interruptor de doble pulsador con bloqueo 1 El producto motorizado est subiendo Pulse el bo...

Page 50: ...ciones marcada para su alimentaci n de 230 V 50 Hz y utilizada conforme a lo indicado en estas instrucciones cumple los requisitos esenciales de la Directiva sobre M quinas 2006 42 CE y la Directiva s...

Reviews: