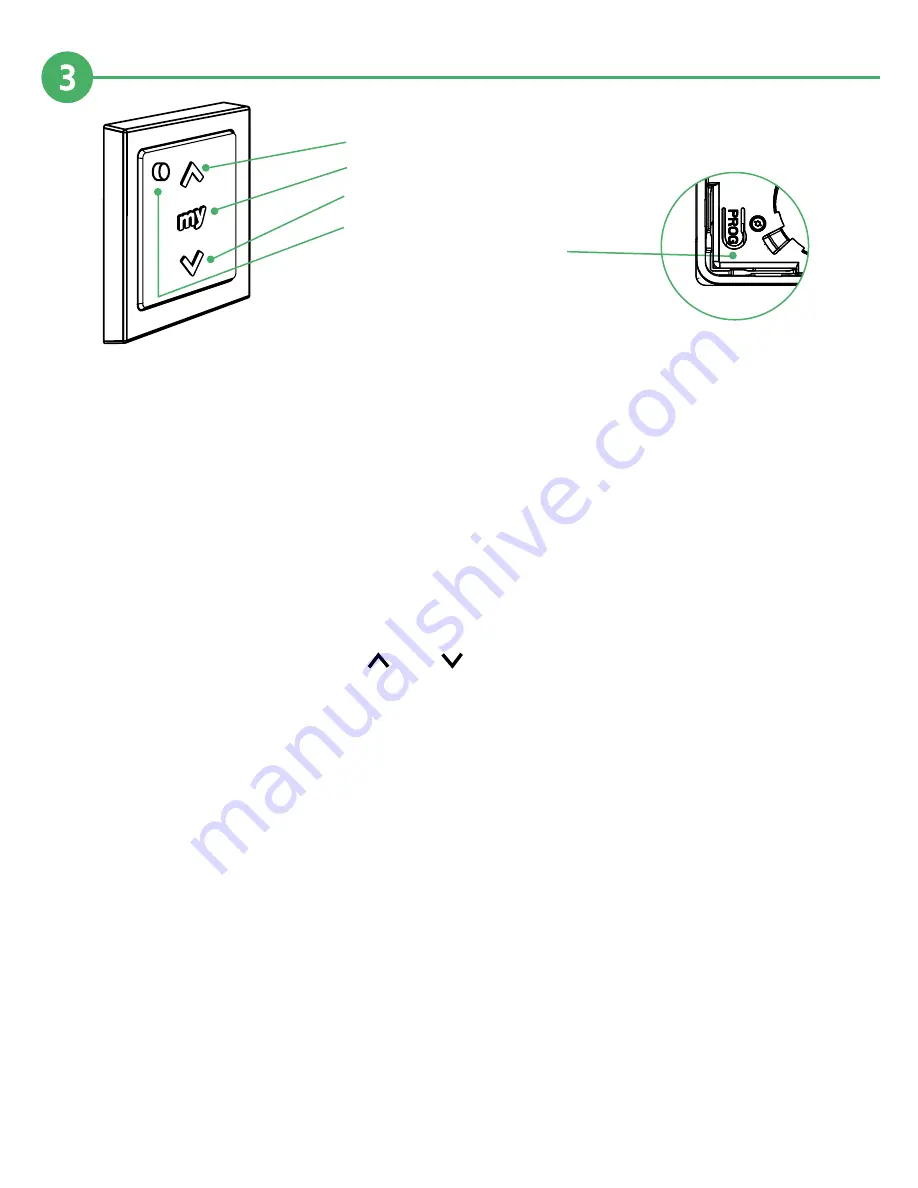
Operation for Smoove 1
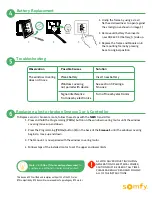
A. Button (raise, switch on, open, tilt)
B.
“my”
button (stop, go to favorite position)
C. Button (lower, switch off, close, tilt)
D. Channel selection indicator
E. Programming (PROG) button
(On backside of faceplate)
Pairing a Smoove 1 to a window covering
• Press and hold the
Programming (PROG)
button on the window covering motor until the window
covering moves up and down.
Note: You have 2 minutes to successfully complete RTS programming
or it will default back to factory setting, and you will have to start process over again.
• Press the
Programming (PROG)
button (E) on the back of the Smoove 1 until the window covering
begins to move up and down.
• The Smoove 1 is now paired with the window covering motor.
Daily Use
• On the Smoove 1, press the (A) or (C) to open or close the window covering.
• To stop the window covering at a specific position, press the “my” button (B).
Creating Preset Positions
To create a preset position:
• Adjust the window covering to the desired position.
• Press “my” on the Smoove 1 until the window covering moves up and down.
The preset is now activated.
To delete a preset position
• Press the “my” button. The window covering moves to a preset position.
• Press the “my” button again until the window covering moves up and down.
The preset position has been deleted.
Daily use of preset positions
• Briefly press the “my”
button. The window covering will move to the preset position.
Continued On Next Page


