output connections
Stereo 70 volt audio systems allow for speakers to be daisy chained
together. in a typical system with one zone of audio you simply run a
wire from the amplifier to the closest speaker then wire from there to
next speaker and so on.
Note: Sonance strongly recommends the use of 14 gauge or larger
direct burial grade wire
.
Terminating The wire
attach the supplied spade connectors to the ends of your speaker
cables. once the connectors are installed then connect the spades
to the output connectors on the amplifier. once your connections
are finished place the supplied plastic cover over the connectors to
prevent a short circuit or shock hazard.
Caution: The amplifier should not be connected to AC power until all
connections are completed. High power 70 volt amplifiers present a
serious shock hazard. Do not connect speaker wires to the amplifier
until all other connections are completed.
Satellite and Subwoofer Stereo wiring examples
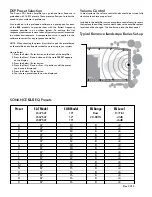
DSp preset Selection
The crown cDi Series amplifier you purchase from Sonance is
preloaded with 16 EQ presets. These presets allow you to tailor the
sound to your customer’s preference.
also included in the preloaded software is equalization for each
of the
SLS
products to provide them with the flattest frequency
response possible in an outdoor system. To achieve this flat
response measurements were taken of typical systems all measured
in outdoor environments. a compensation curve is applied in the
software to correct for any response anomalies.
NOTE: When choosing the preset it is critical to pick the preset based
on the satellite and subwoofer model you are using in your system.
How to Select
1. press the Select / enter button on the front of the amplifier.
2. press the next / Down button until the word preSeT appears
on the display.
3. press the Select / enter button
4. press the next / Down or prev / Up buttons until the preset
you desire is displayed
5. press the Select / enter button
6. Your chosen preset should now be displayed
Volume control
in most systems the volume control knobs should be turned fully
clockwise to achieve proper level.
included in the amplifier carton are volume control security covers
that replace the existing level-control knobs so the amplifier output
level cannot be changed. The knobs snap into the front panel.
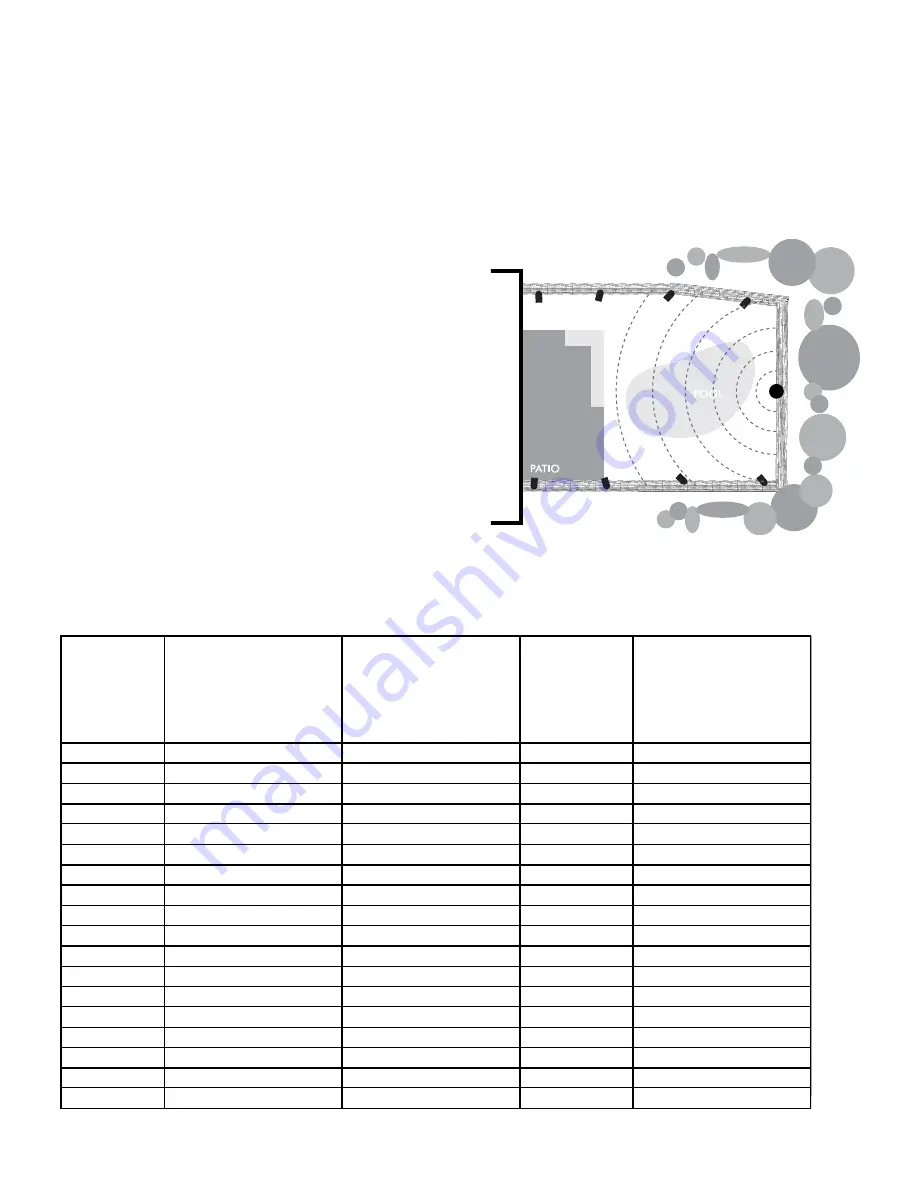
Typical
S
onance
L
andscape
S
eries Set-up
Sonance
SLS
eQ presets
SAT Model
Preset
SUB Model
EQ Range
EQ Level
LS47SAT
LS67SAT
LS87SAT
10”
12”
15”
Bass
20-80Hz
0=Flat
+3dB
+6dB
Dec. 2012
A
47
10
B
+0
B
47
10
B
+3
C
47
10
B
+6
D
47
12
B
+0
E
47
12
B
+3
F
47
12
B
+6
G
67
10
B
+0
H
67
10
B
+3
I
67
10
B
+6
J
67
12
B
+0
K
67
12
B
+3
L
67
12
B
+6
M
67
15
B
+0
N
67
15
B
+3
O
67
15
B
+6
P
87
15
B
+0
Q
87
15
B
+3
R
87
15
B
+6
SLS Wiring Diagram 70V
Expandable
Configuration: 4 SATs to 1 SUB or up to 8 SATs to 1 SUB
Crown CDi Series Amplifier
LS47SATs & LS10SUB or LS67SATs & LS12SUB
Left
Left
Right
Right
Left
Left
Right
Right
Note: The subwoofer can
be connected at any point
in the daisy chain.
Wiring Diagram 70V
Crown CDi Series Amplifier
Expandable
Configuration: 4 SATs to 1 SUB
LS87SATs & LS15SUB
Right
Left
Left
Right
Left and Right
Note: The subwoofer can
be connected at any point
in the daisy chain.


