13
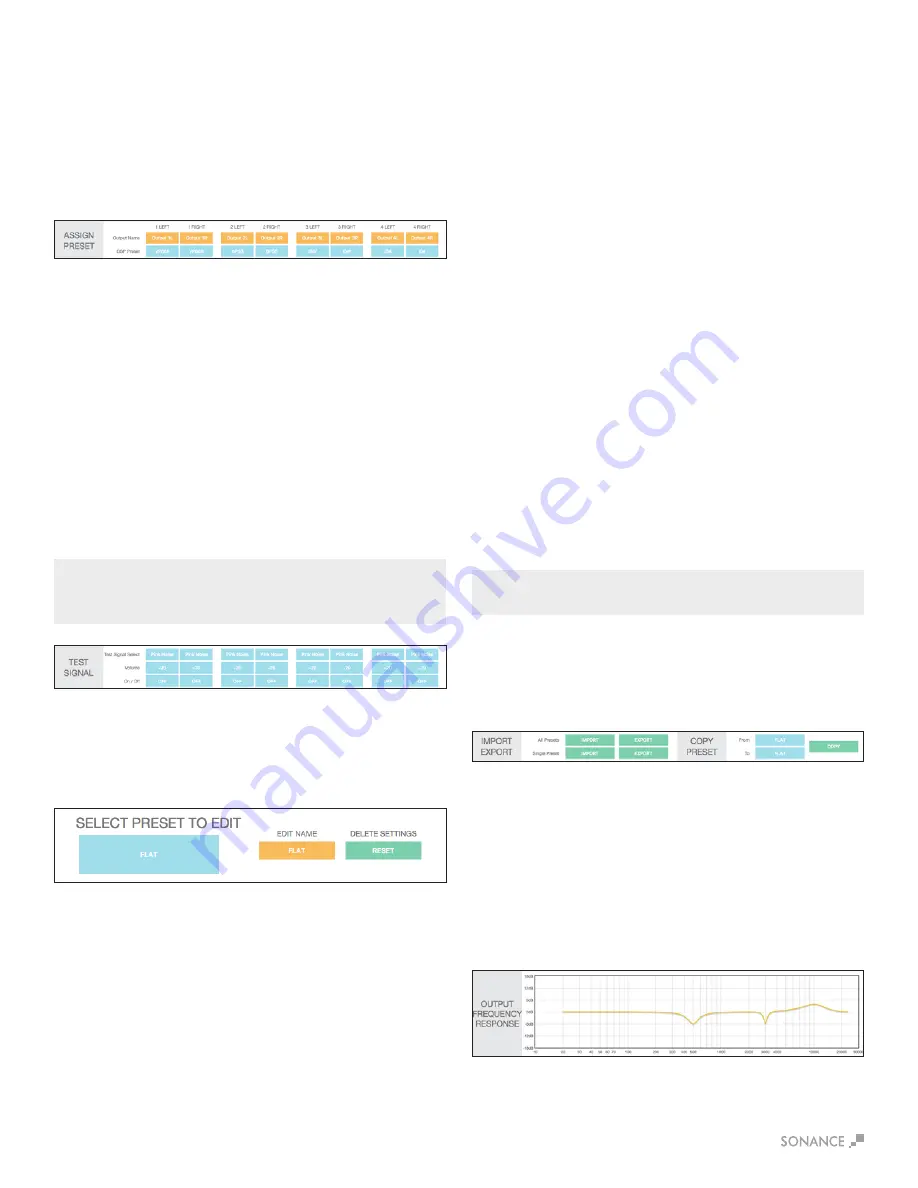
Test Signal
The SonARC software includes a built in pink noise generator.
The pink noise signal can be used in conjunction with a real time
analyzer to measure speakers.
Test Signal Select
You have the option of pink noise or test signals fed into line level
inputs. Use the blue pull down menu to select between pink noise
or line level inputs as a source for the test signal.
Volume
Select your desired volume.
On/Off
Toggle between on and off. The pink noise signal should not be left
on for more than 10 minutes to minimize the risk of damaging
the speakers.
DSP Preset Editor
Select Preset or Edit
This section allows you to edit any of the 50 existing presets.
Select the preset you want to edit from the drop down menu.
Edit Name
Edit the name of your preset with up to 15 characters.
Delete Settings
The Reset button deletes the selected preset.
Assign Preset
Output Name
These can be named Output 1L & Output 1R or room names such
as Kitchen L and Kitchen R. These are a duplicate of the output
name on the IN/OUT settings page.
DSP Preset
Select your DSP preset with the blue pull down menu. This will auto
populate in the IN/OUT settings page.
Import Export
All Presets
The green IMPORT EXPORT buttons allow you to save all 50
presets in one file. This option can be useful when setting up
multiple amplifiers.
Single Preset
The green IMPORT EXPORT buttons allow you to import or export
presets individually.
Import Single Preset
1. Import speaker preset to a location on your computer. This can
be accomplished by saving a DSP preset downloaded from
Sonance website.
2. Select the location you would like to store the new preset using
the SELECT PRESET TO EDIT pull down menu. You can save
the new preset in any of the open preset locations or you can
overwrite an existing preset you do not need.
3. Press the green IMPORT button.
4. From the pop-up menu choose local or internet.
5. You will be directed to My Computer (Windows) or Finder (MAC).
6. Find & select the new preset you would like to import (eqs).
7. You will be directed to a screen that says upload successful.
8. Press “Click Here To Go Back”.
9. The preset will now be saved in the location you selected.
NOTE: PRESETS DOWNLOADED FROM INTERNET CAN TAKE UP TO 15
SECONDS TO DOWNLOAD.
Copy Preset
From/To the blue pull down menus allow you to pull a preset from
one location and assign it to another location. Press green copy
button to activate.
Export Single Preset
1. Use the blue pull down menu SELECT PRESET to edit
located above the IMPORT EXPORT green buttons.
2. Select the preset you choose to export from the pull
down menu.
3. Press the green EXPORT button. Depending on your
web browser, the exported file will be saved in your
downloads folder or you will be prompted where you
would like to save the file.
Output Frequency Response
This graph reflects the changes made below.
The EQ image shows EQ4 ON at 500Hz, the Q is set to 3 with a
-6dB gain, creating a gradual dip in the lower midrange.
EQ9 shows ON at 3000Hz, the Q is set to 10 with a -6dB gain,
creating a sharp dip in the midrange.
EQ10 shows ON at 10000Hz, the Q is set to 1 with a +4dB gain,
creating a very gradual slope in the high frequencies.
NOTE: THE PINK NOISE GENERATOR IS AFTER THE AUDIO SENSORY
CIRCUIT SO THE AMP WILL GO TO SLEEP DEPENDING ON THE AUTO ON
MODE SELECTED. IF THE PINK NOISE STOPS, POWER CYCLE THE AMP.


