Page 2
What You Need to Provide
•
A firewall or security appliance protecting your LAN
•
PC or Macintosh computer to act as an offline management station for initial configuration of
the Content Security Manager
•
Web browser for accessing the Content Security Manager’s Web-based management
interface. The Web browser must support Java and HTTP uploads. Internet Explorer 5.0 or
higher or Netscape Navigator 4.7 or higher are recommended.
Important Information You Need
LAN
LAN IP address range:
LAN netmask:
DNS server:
Firewall or Security Appliance
Firewall or router gateway IP address:
Firewall or security appliance management IP address:
mySonicWALL.com Account
This is sensitive information. Store this information carefully.
Username:
Password:
Content Security Manager Management Account
This is sensitive information. Store this information carefully.
Username: (default:
admin
)
Password: (default:
password
)
Content Security Manager Configuration Steps
Getting started with your Content Security Manager comprises the following steps:
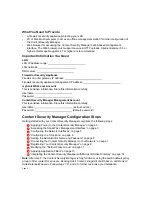
“Applying Power to the Content Security Manager” on page 3
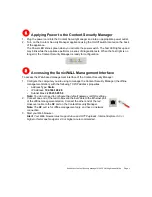
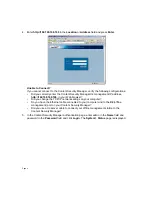
“Accessing the SonicWALL Management Interface” on page 3
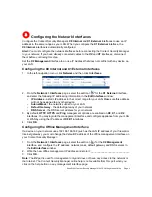
“Configuring the Network Interfaces” on page 5
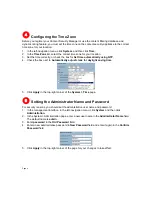
“Configuring the Time Zone” on page 6
“Setting the Administrator Name and Password” on page 6
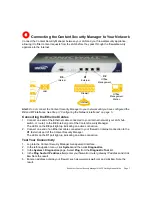
“Connecting the Content Security Manager to Your Network” on page 7
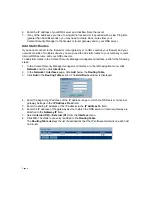
“Registering Your Content Security Manager” on page 9
“Modifying the *Default Policy Group” on page 11
“Applying Application Filters” on page 13
“Integrating the Content Security Manager with Microsoft Active Directory” on page 14
Note
:
After step 6, the Content Security Manager is fully functional, using the built-in default policy
group to filter content for all users, blocking Adult Content, Drugs/Alcohol/Tobacco, and Racism/
Hate/Violence/Weapons. Follow steps 7, 8, and 9 to further customize your installation
.
1
2
3
4
5
6
7
8
9
10


