SonicWALL Installation Guide Page 19
2 Performing the Initial Configuration
Installing the SonicWALL
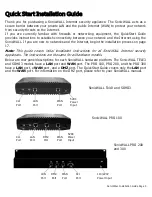
Start by placing the SonicWALL on a hard, flat surface near your cable modem, DSL modem,
or Internet router.
N
ote
: The hardware photos are used for descriptive purposes only. Refer to your model for
specific locations.
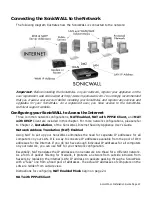
Connecting to Your Network
1.
Apply Power to the SonicWALL
- If you are installing the SonicWALL TELE3, SOHO3,
or PRO 100, attach the power supply to the power input on the SonicWALL and plug the
other end into a power outlet.
If you are installing a SonicWALL PRO 200 or a PRO 300, attach the power cable to the
power input on the SonicWALL and the other end into an AC power outlet. Use the power
switch to turn on the SonicWALL.
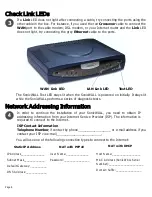
The
Test
LED stays on while the SonicWALL performs a series of diagnostic tests.
2.
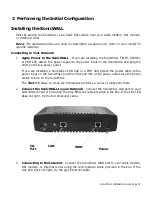
Connect the SonicWALL to your Network
- Connect the SonicWALL LAN port to your
LAN network card or hub using the grey Ethernet cable provided in the box. If the Link LED
does not light, try the red Crossover cable.
3.
Connecting to the Internet
- Connect the SonicWALL WAN port to your cable modem,
DSL modem, or Internet router using the red crossover cable provided in the box. If the
Link LED does not light, try the grey Ethernet cable.
WAN
LAN
Power
CLI
Port
Summary of Contents for GX 250
Page 1: ...SONICWALL Installation Guide...
Page 51: ...Page 50...

