Page 18
Verifying Your Connection
After the card has been set up on your PC, you can view your connection type and verify
that the WWAN PC Card is transferring data.
Note:
In order for the connection testing to be valid, it is important that you first disable
all other network connections, such as a Wi-Fi or LAN connection, before
continuing. Leave only your PC card connection enabled.
1.
If the VZAccess Manager program is running, skip to the next step. Otherwise,
navigate to
Start > Programs > Verizon > VZAccess Manager
to start the
VZAccess Manager program.
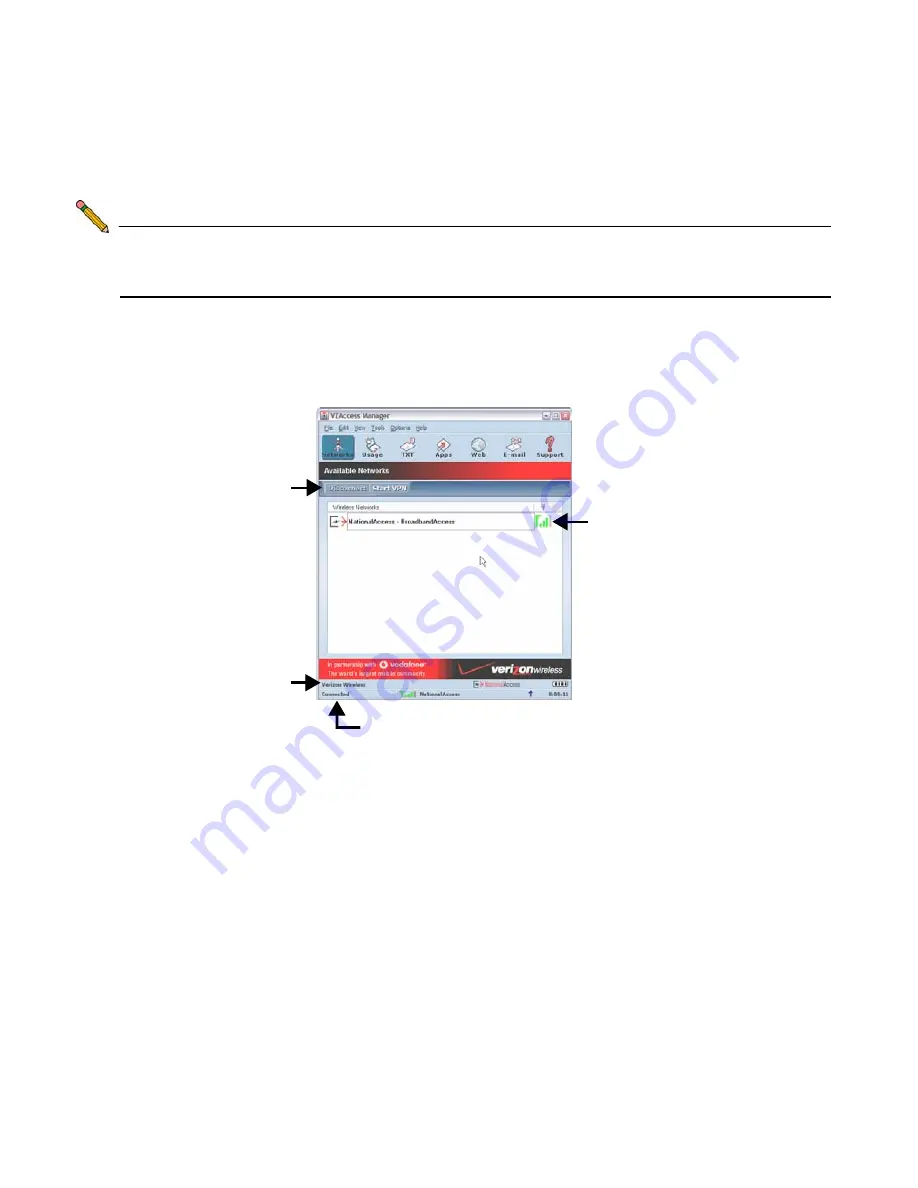
The WWAN PC card will take a few minutes to connect to the network. When the
connection is ready, the signal indicator will light up green with bars to indicate
connection strength.
2.
Click the
Connect
button to enable the network connection.
3.
If a disclaimer displays, click the
Continue
button. When the connection attempt is
successful, the bottom-left corner of the VZAccess Manager will read
Connected
.
4.
In the Windows interface, select
Start > Run
.
5.
Enter “cmd” in the
Open
field and click the
OK
button.
6.
At the prompt, type the command “ipconfig” and press
Enter
on the keyboard. Your
network device status will display.
Connect/Disconnect
Button -
Click here to
connect or disconnect
from the current
network.
Status
- Shows
“connected” when
connected to the
Verizon network.
Network Connection
Shows “Verizon
Wireless” when
connected to the
Verizon network.
Signal
- Displays the
signal strength of your
current connection.


