background image

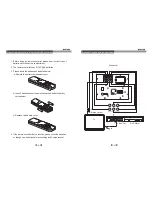
A. Switch On/Off the Product

1. Before turning on the system, please connect it according to the 

    System Connection Instruction.

2. Connect AC power supply with this product.

(Caution: Power source must be consistent with this product.)

B. VOLUME 

1. Press the 

sound output.

Volume is increased to maximum accordingly.   

VOL + button on the remote controller to maximize the 

2. Press the 

sound output.

Volume is decreased to minimum accordingly.   

VOL - button on the remote controller to minimize the 

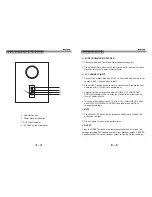
C. SUB WOOFER SPEAKER

1. Press SW + button on the remote controller to maximize the Sub 

woofer Speaker output.

2. Press SW - button on the remote controller to minimize the Sub 

woofer Speaker output.

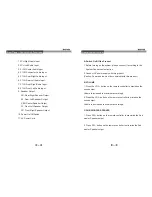
1. 2CH Right Audio Input.

2. 2CH Left Audio Input.

3. 5.1CH Center Audio Input.

4. 5.1CH Subwoofer Audio Input.

5. 5.1CH Rear Right Audio Input.

6. 5.1CH Rear Left Audio Input.

7. 5.1CH Front Right Audio Input.

8. 5.1CH Front Left Audio Input.

9.  Speaker Output.

      SR: Rear Right Speaker Output.

      SL: Rear Left Speaker Output.

      CEN: Center Speaker Output.

      FL: Front Left Speaker Output.

      FR: Front Right Speaker Output. 

10. Power On/Off Switch.

11. AC Power Cord.

Rear Panel - Controls And Functions

Operating Instruction

6

11

Summary of Contents for CSA51-AU

Page 1: ...MODEL CSA51 AU 5 1 Computer Speaker MD111122 01...

Page 2: ...E THAT MAY BE OF SUFFICIENT MAGNITUDE TO CONSTITUTE A RISK OF ELECTRIC SHOCK TO PERSONS THE EXCLAMATION POINT WITHIN AN EQUILATERAL TRIANGLE IS INTENDED TO ALERT THE USER TO THE PRESENCE OF IMPORTANT...

Page 3: ...eceptacles and the point where they exit from the appliance 7 Water and Moisture The appliance should not be used near water for example near a bathtub washbowl kitchen sink laundry tub in a wet basem...

Page 4: ...acement of the obsolete outlet 15 Unplug this apparatus during lightning storms or when unused for long periods of time 9 Heat Keep the appliance away from heat sources such as 1 NO OUTPUT 1 Check whe...

Page 5: ...output settings including VOLUME SW FRONT CEN SURR if necessary now to enjoy the wonderful and tremendous Home Theater effects 4 To change the options from 2 1 CH to 5 1CH select INPUT button as AUX...

Page 6: ...remote controller to maximize the Center Speaker output 2 Press CEN button on the remote controller to minimize the Center Speaker output F SURROUND SPEAKER 1 Press SURR button on the remote controll...

Page 7: ...SUB WOOFER SPEAKER 1 Press SW button on the remote controller to maximize the Sub woofer Speaker output 2 Press SW button on the remote controller to minimize the Sub woofer Speaker output 1 2CH Right...

Page 8: ...e Output Down 13 SW Sw Output Up 14 VOLUME Main Volume Up 6 SW Sw Output Down 7 VOLUME Main Volume Down 8 MUTE mute button 10 RESET Location retrieval 9 MODE mode button 1 INPUT Input Switch 12 SURR S...

Page 9: ...eo Output Optional Woofer Rear L Rear R Front L Front R Center Optical Audio Out Rear R Center Woofer Rear L Front L Coaxial Front R Video Out Scart out Video S Video U V Y Manufactured under license...

Reviews: