background image

HOW AND WHEN TO CHANGE BATTERIES 


1. 

Insert Batteries:


2. When to change the batteries: 


OPERATING INSTRUCTIONS 


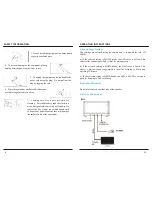
A. Connecting to AC power 

To use the 

Zeno

, connect the external AC power adopter.  

1.


Connect the AC adaptor coax power plug to the DC jack on the rare 

panel. Plug the AC power cord into the wall socket.  

2.


Switch the Power to ON using the ON/OFF switch on the rare panel.  

LED  #1  will  illuminates  in  Red  and  the 

Zeno

  will  be  in  Standby 

mode.  

3.


Press the


Standby button on the front panel or the Power button on 

the  remote  control.  LED  #1  will  change  from  Red  to  Blue  and   

LED #2 will be Yellow, and LED #3 will be off. 

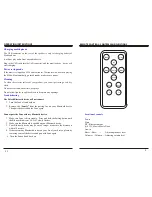
B. LED STATUS INDICATOR  

indicate when a source is activated. 


1.


LED #1 (left) shows the operating mode  

RED 

:  Standby 

Blue 

:  Bluetooth selected 

Purple 

:  AUX IN selected 


2.


LED #2 (center) shows the iQS 3D mode 

Yellow 

:  Movie Mode (maximum 3D width) 

Green 

:  Music Mode (reduced 3D width) 

Off 

:  News Mode(normal stereo, 3D off) 


3.


LED #3 (right) indicates Bluetooth function 

Steady Blue 

:  Bluetooth Connected 

Flashing Blue 

:  Bluetooth pairing 

Off 

:  Disconnected 


Insert one CR2025 Lithium button cell battery into the battery compartment.

Make sure the battery is inserted with the “+” side facing down.   

Notice

: Do not throw the remote control down on the ground or tread on it. 

Remove the battery from the remote control when it’s not in use for an 

extended period or during Shipment. 

The remote control has an operating range of up to 7 meters and effective

left or right operating angle of 30 degrees away from the system. If the

remote


does not work within these specifications, make sure that nothing

is blocking the line of sight between the remote and the remote sensor. If

the line of sight is clear yet the remote does not function properly, change

the battery.


The  LED  indicators,  located  at  the  centre  of SoniQ will  illuminate  to 

Zeno

Summary of Contents for iQS Zeno

Page 1: ...5 Speaker iQS 3D Surround with Bluetooth wireless MODEL Zeno 1 15...

Page 2: ...Getting Started 2 3 Safety Instructions 3 4 4 Remote Control Buttons and functions 5 5 Front and Back Panel Control and Function 6 7 6 How and When to Change Batteries 8 7 Operating Instructions 9 13...

Page 3: ...STM surround processing The superior surround technology is accomplished using a proprietary analog signal processing chip operating with a special algorithm based on Natural Audio Processing which pr...

Page 4: ...igures indicated are nominal values for production units There may be some deviations from these values in individual units SAFETY INFORMATION The lightning flash with arrowhead symbol inside an equil...

Page 5: ...ialog 2 Speaker Placement Do not place objects on either side of the speaker 3 System Connections 3 Do not install the equipment in a dusty damp or poorly ventilated place 4 To prevent damage to the e...

Page 6: ...shes 2 Make sure the Bluetooth is enabled on your Bluetooth device 3 Your Bluetooth device may be out of range make sure the distance is within 10 meters 4 If there are many Bluetooth devices on your...

Page 7: ...u can connect the Zeno with your other audio device such as a portable digital music player This requires an audio cable with a 3 5mm plug to connect with the AUX input on the Zeno For audio devices w...

Page 8: ...Some devices may ask you to accept the connection 6 Your Bluetooth device indicates when pairing is complete and you will hear a tone from the Zeno speaker The LED 3 turns to Blue and remain steady O...

Page 9: ...Yellow Movie Mode maximum 3D width Green Music Mode reduced 3D width Off News Mode normal stereo 3D off 3 LED 3 right indicates Bluetooth function Steady Blue Bluetooth Connected Flashing Blue Bluetoo...

Page 10: ...evice may not cause harmful interference and 2 this device must accept any interference received including interference that may cause undesired operation NOTE 1 Any changes or modifications to this u...

Reviews: