background image

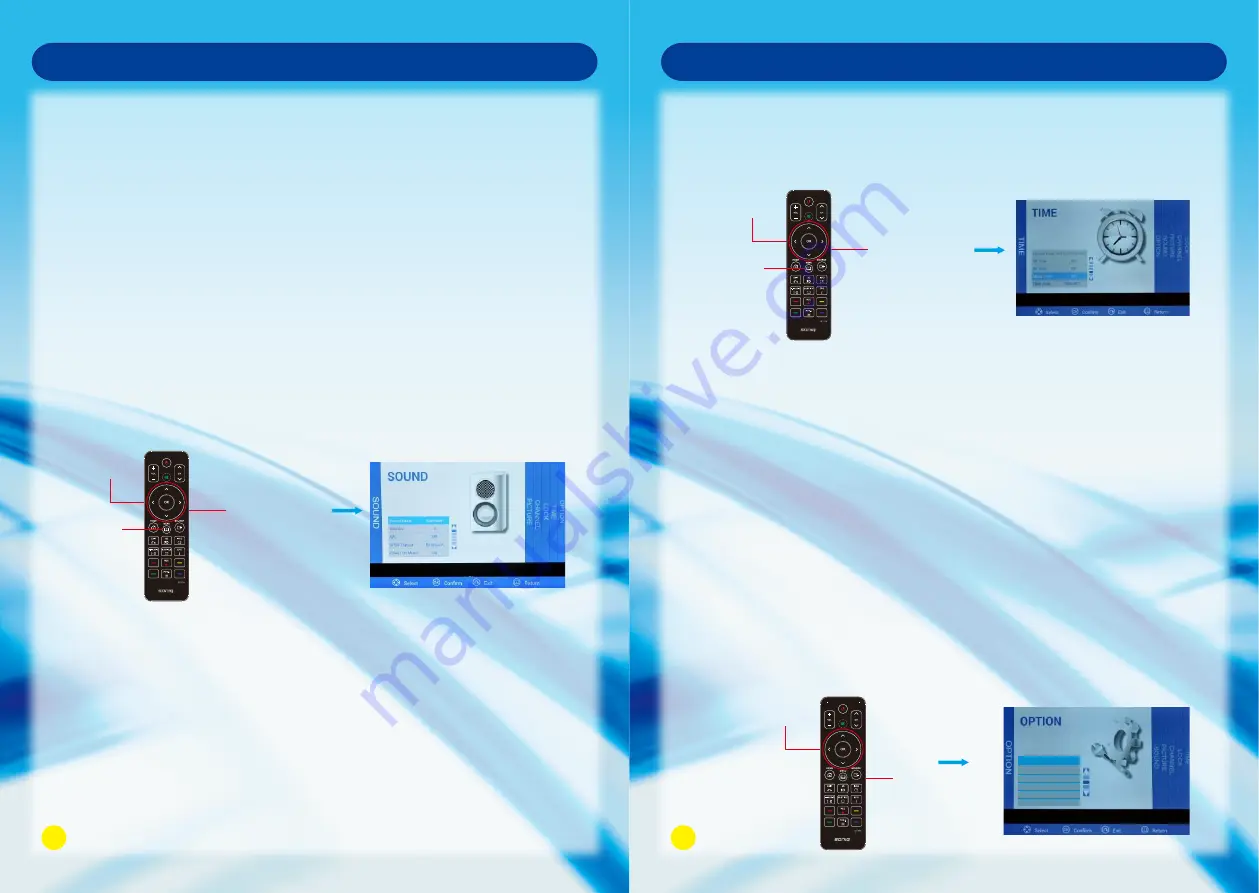
Sound Menu

Press MENU Button to display the main menu.

Press Left and Right to enter the SOUND page, it will highlight the first option, then  

press OK Button to enter the sub-menu.

1. Sound Mode:

Press OK and then press Left and Right to adjust Sound Mode. 

You can change the value of Treble and Bass under user mode.

2. Balance:

Press Up and Down to select Balance, then press OK Button to enter sub-menu,

press Left and Right adjust.

3. Auto Volume (AVC):

Press Up and Down to select Auto Volume, then press OK and Left and Right to   

select On or Off.

4. SPDIF Output:

Press Up and Down to select SPDIF Mode, then press OK and  Left and Right  

Button to select PCM, Off or Bitstream.

5. Power On Music:

Press Left and Right Button to set On or Off.

Option Menu

Press MENU Button to display the main menu.

Press Left and Right to enter OPTION page, it will highlight the first option.

1. OSD Time Out:

Press OK and then press Left and Right Button to set the OSD Time Out.

6. Restore Default:

Operate this item to resume all the initial settings.

Time Menu

Press MENU Button to display the main menu.

Use Left and Right to enter TIME page, it will highlight the first option.

1. Current Time:

Can not be selected, but it can automatically obtain the network time.

2. Off Time:

Press Up and Down to select Off Time, then press OK Button to enter the sub-menu,

press OK and adjust it into On or Off.

3. On Time:

Press Up and Down to select On Time, then press OK Button to enter the sub-menu,

press OK to proceed with the On and Off time settings.

4. Sleep Timer:

Press Up and Down Button to select Sleep Timer, then press OK to confirm, press

Left and Right to adjust.

5. Time Zone:

You can choose different location by operating this item.

2. PVR Settings: 

Press OK button to display the related functions included in this item.

3. MFC: 

Press Up and Down Button to select MFC, then press OK Button to enter the

sub-menu, then press Left and Right Button to select the mode among High, Off, 

Low or Middle.

27

28

OSD Menu Operation

OSD Menu Operation

4. Audio:

 It is the same with Audio Button on the remote control. When press this button or select

 this item, you can select sound output mode.


   It is the same with Subtitle Button on the remote control. When press this button or 

   select this item, there displays your preferred subtitle in DTV mode.

5. Subtitle:

PVR Settings

MFC   

Audio
Subtitle

Restore Default

OSD Time Out                 Off

OK Button

MENU

Button

Navigation Button

OK Button

MENU

Button

Navigation Button

OK Button

MENU

Button

Summary of Contents for S43V15A

Page 1: ...rating 2 Retain Instructions The safety and operating instructions should be retained for future reference 3 Warnings All warnings on the appliance and in the operating instructions should be adhered...

Page 2: ...oduct or its stand or push suddenly Always pay special attention when children are near product to avoid harm Minimun Distances 10cm 20cm 10cm 5cm CAUTION Do not place the main unit on an unstable car...

Page 3: ...tton Turn on or off the sound Displays your preferred subtitle in DTV mode SUBTITLE Button EPG Button Open or close EPG menu in DTV mode Power Button Indicator Light Mute Button Audio Button Subtitle...

Page 4: ...hese buttons to sequentially select channels When the OSD menu is on press these buttons to move the selection focus up or down to change settings CH Main Unit Control 8 Connection and Setup Terminals...

Page 5: ...card reader you can use up to 4 partitions or USB memory devices 10 If the USB memory device does not work properly disconnect and reconnect it How fast a USB memory device is detected differs from d...

Page 6: ...r most home networks the TV will connect automatically without any adjustments For detailed information contact your internet provider or refer to router manual Remark Network speed requirement is ver...

Page 7: ...ot responsible for any malfunction of the TV and or the internet connection feature due to communication errors malfunctions associated with your broadband internet connection or other connected equip...

Page 8: ...operations are as follows 1 Make sure the Wi Fi hotspot on TV is enabled 2 Select settings to input the SSID and password Choose Save to complete the settings 3 Use mobile phone and notebook to searc...

Page 9: ...here is not enough space on the TV you can download the application nto the SD card for running Smart TV Function Application Uninstall Move Environment Selection 1 Find the application that you want...

Page 10: ...ntered by keyboard on the TV screen external keyboard you can view the website on the TV Label Address Account Add to Cancel OK Google http www google co in Local Bookmarks Bookmark this page Smart TV...

Page 11: ...rrent playing song Smart TV Function Video Playback Enter this function by HOME Media then select your favourite video for playing Press OK to play the video or Exit to exit 1 3 5 7 9 11 2 4 6 8 10 12...

Page 12: ...l be highlighted upon displaying this menu Press OK Button to enter 2 Press to select country press OK Button to enter the next step 3 Use button to select your location then press OK button to enter...

Page 13: ...ntrast Brightness Sharpness Saturation can be adjusted only under User mode press MENU to return to the main menu 2 Noise Reduction Press OK Button to adjust among Strong Weak Middle and Off 3 Color T...

Page 14: ...first option 1 Current Time Can not be selected but it can automatically obtain the network time 2 Off Time Press Up and Down to select Off Time then press OK Button to enter the sub menu press OK and...

Page 15: ...d the stored files or the USB storage device may be damaged 2 Please use only USB storage devices that are formatted as a FAT32 file system otherwise it may not be recognized 3 Every USB only supplies...

Page 16: ...top the recording 2 Confirm Confirm OSD Menu Operation Play the recorded program 1 MENU OPTION MENU PVR SETTINGS FILE MANAGER 2 Select the recorded program that you want to play press OK button or red...

Page 17: ...perly connected Change channels to confirm if the symptom is still present If PC VGA is selected as the input signal source use the Auto Sync Function in the Set Up Menu In VGA Mode to let the display...

Reviews: