


4
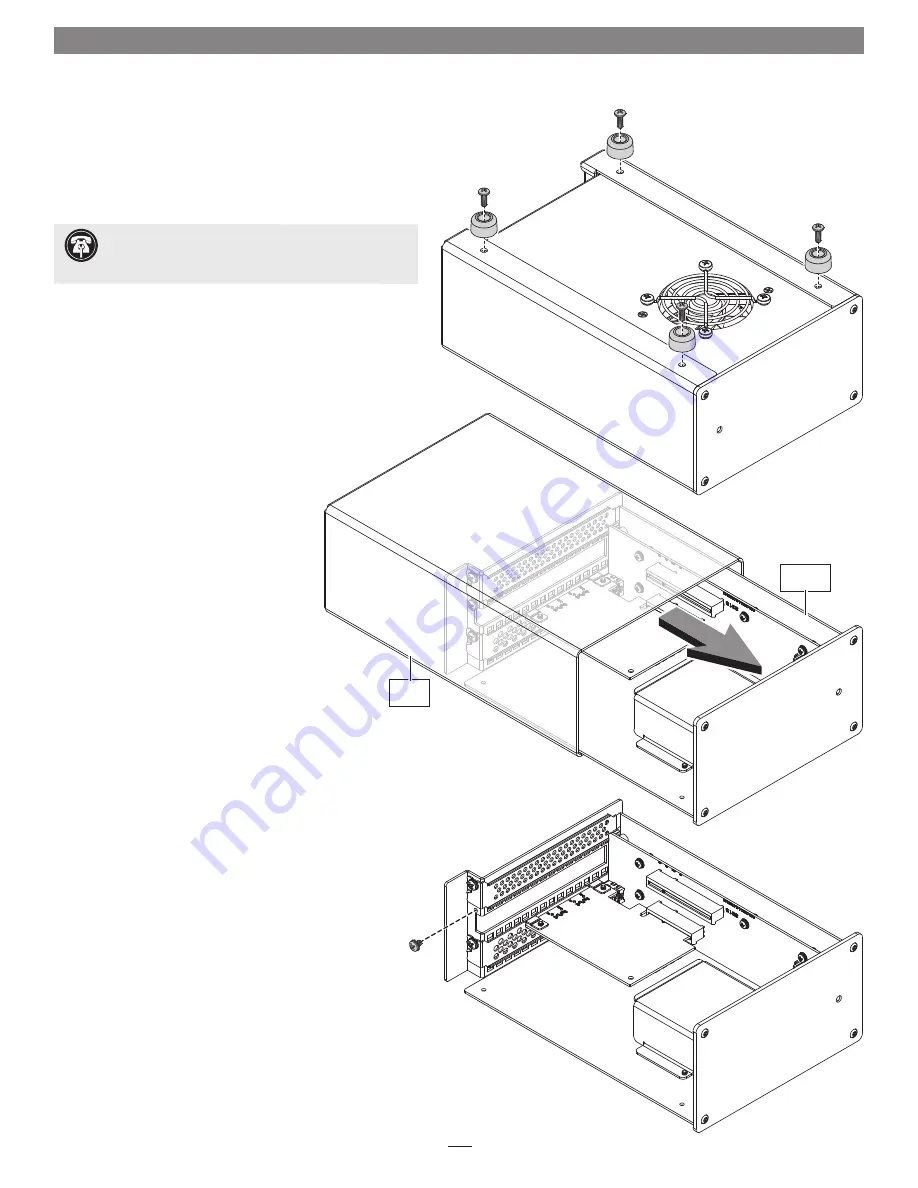
Chapter 3 – PCIe Card Installation Steps
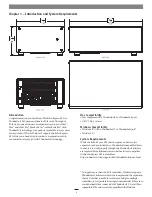
Figure 1
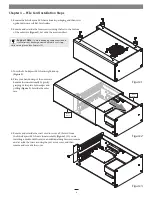
1.
Remove the Echo Express SE I chassis from its packaging, and then set it
upside-down on a soft, flat, level surface.
2.
Remove and set aside the four screws securing the feet to the bottom
of the outer case
(Figure 1)
. Set aside the screws and feet.
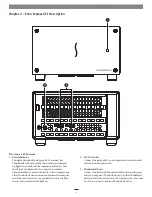
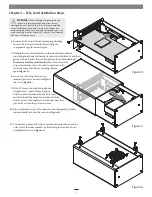
3.
Turn the Echo Express SE I chassis right-side-up
(Figure 2)
.
4.
Place your hand on top of the outer case.
Remove the inner assembly by gently
grasping its faceplate by the edges and
pulling
(Figure 2)
. Set aside the outer
case.
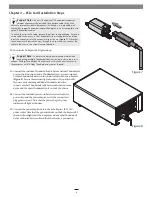
5.
Remove and set aside the screw used to secure a PCIe card from
the Echo Express SE I chassis’ inner assembly
(Figure 3)
. If you are
installing a double-width card, or an additional daughter card, remove
and set aside the screw securing the port access cover, and then
remove and set aside the cover.
Support Note:
To avoid damaging components due to
static electricity discharge, wear an antistatic wrist strap
while working inside Echo Express SE I.
Figure 2
Figure 3
Inner
Assembly
Outer
Case
Summary of Contents for Echo Express SE I
Page 1: ...User s Guide for Echo Express SE I Thunderbolt 2 to PCIe Card Expansion Chassis For Windows ...
Page 2: ......
Page 4: ...This page left intentionally blank ...
Page 15: ......
Page 16: ......


