Drive Installation and Enclosure Setup
4
1.
Remove the Fusion R400Q from its packaging, and place it on a
flat, level surface.
2.
If you intend to place the Fusion enclosure on a desktop or other
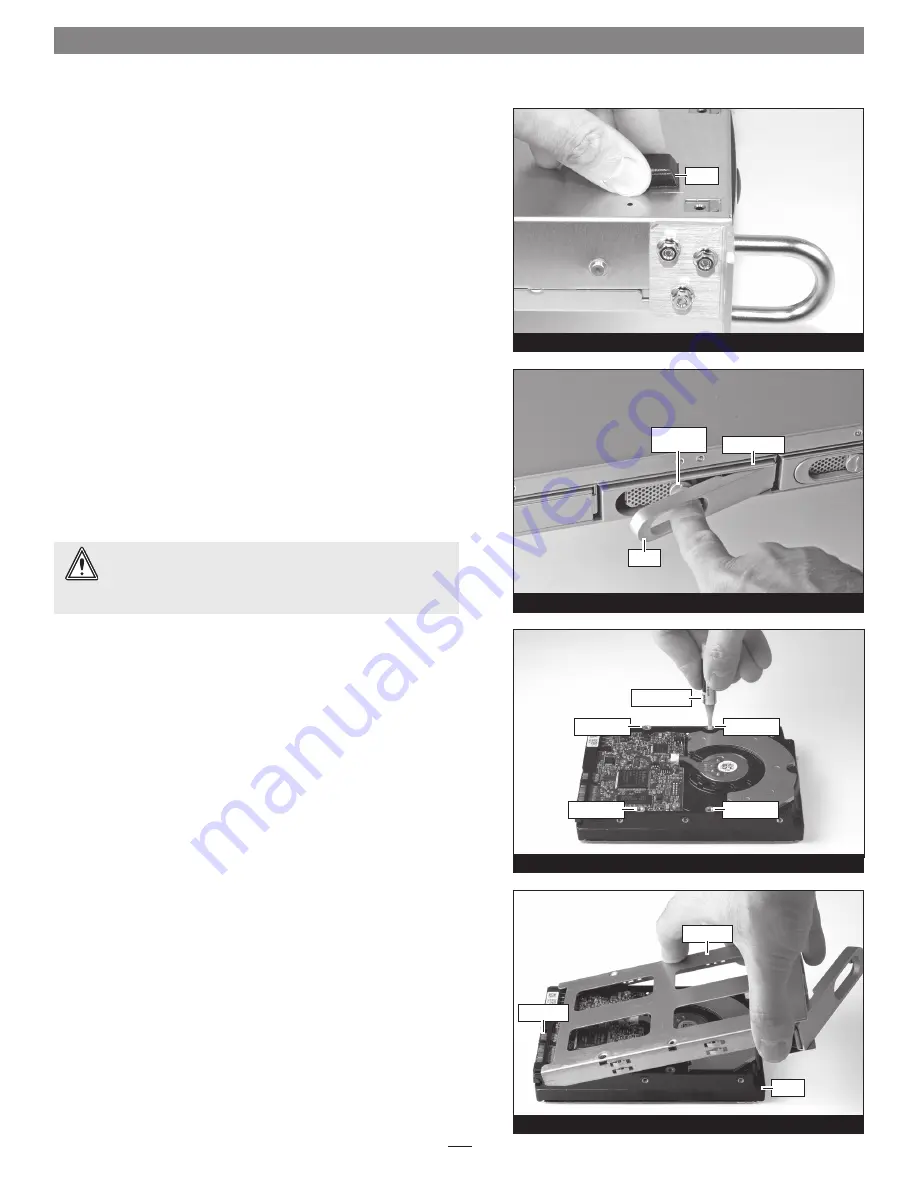
flat surface, attach the included adhesive-backed feet to the
bottom of the enclosure
(Figure 3)
.
3.
If you intend to use the Fusion enclosure in a rack, install the
Sonnet rack slide set (or equivalent), sold separately:
•
FUS-RSS-P
for 17–21.5" deep racks
•
FUS-RSS-S
for 23–26.5" deep racks
•
FUS-RSS
for 27–30.5" deep racks
•
FUS-RSS-L
for 29–32.5" deep racks
4.
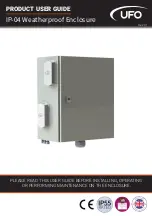
Push a lever release button in until the lever pops out, and then
pull the lever toward you to slide out and remove the drive tray
(Figure 4)
.
5.
Remove a SATA drive from its packaging and set it in on a flat,
level surface with the label side down. Open the supplied tube
of threadlocker and apply a single drop to each of the four screw
holes on the bottom of the drive
(Figure 5)
.
6.
Turn the drive tray upside down and lay it on top of the drive,
with the back of the tray facing toward the drive’s connectors
(Figure 6)
.
Figure 3
foot
WARNING:
When handling computer products, take care to
prevent components from being damaged by static electricity;
avoid working in carpeted areas. Handle hard drives only by their
edges and avoid touching connector traces and component pins.
Figure 5
screw hole
screw hole
screw hole
screw hole
threadlocker
Figure 6
drive
drive tray
connectors
Figure 4
drive module
lever
lever release
button


