Quick Start Guide for Tempo HD (Windows Version)
5
5.
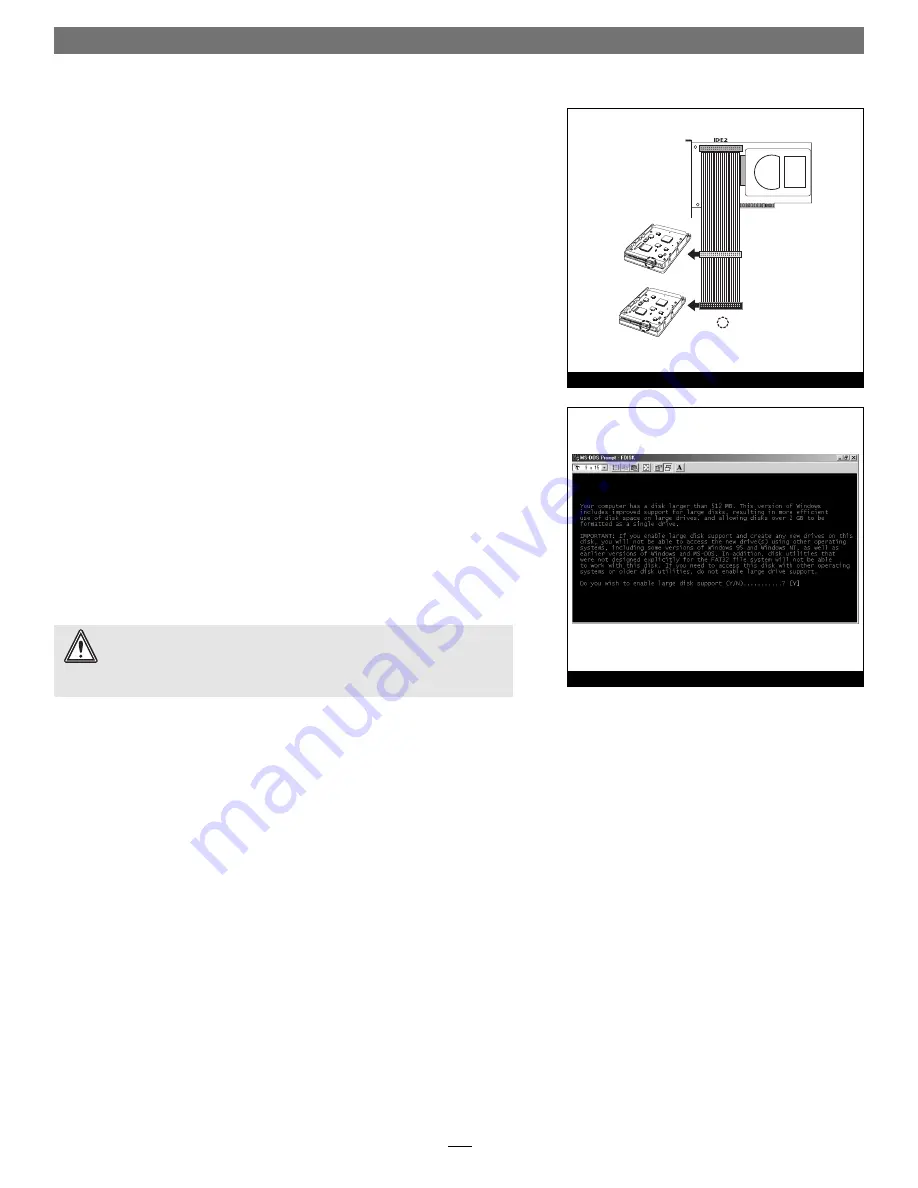
Connect the drive(s) to the Ultra ATA cable (sold separately) as follows:
• When connecting
one drive
, plug in the Ultra ATA cable’s master (black)
connector to it.
Verify the connector is plugged in securely (Figure 4)
.
• When connecting
two drives
, connect the Ultra ATA cable’s master (black)
connector to the drive with jumpers set in the master setting; connect the
slave (gray) connector to the drive with jumpers configured in the slave
setting.
Verify the connectors are plugged in securely (Figure 4)
.
6.
Locate the 4-pin power connector plugged into your computer’s existing
hard drive. You should find at least one extra power connector near the exist-
ing drive; if you have installed only one new drive, plug the extra power con-
nector into it. If you have installed two new drives, or there are no additional
power connectors, you must use a power cable Y-adapter (sold separately).
Verify the connectors are plugged in securely
.
7.
Route the Ultra ATA cable to the Tempo HD card; avoid heat sinks and make
sure the cable will not get crushed or pinched by any part of the case when
you reassemble your computer.
8.
Attach the Ultra ATA cable’s host (blue) connector to the Tempo HD card.
Verify the connector is plugged in securely (Figure 4)
.
9.
Check the cable connections; make sure the cable is properly connected to
the Tempo HD and the hard drives.
10.
Close your computer and carefully replace its cover; be
very
careful not to
crimp the cables.
Drive Formatting—Windows 98SE and Windows Me
Formatting prepares a hard drive for use by dividing the data area into tracks and
sectors, enabling your computer to store and retrieve data from the drive. This
section describes the process of formatting hard drives connected to the Tempo
HD, using FDISK on systems running Windows 98SE or Windows Me. The fol-
lowing instructions detail the procedure to create a simple volume (single parti-
tion); if you need to format a drive with multiple partitions, refer to Windows
Help for details. As an alternative, you may choose to format and partition your
hard drive(s) with any software that was included with the drive, following the
included instructions.
1.
Turn on your computer and start Windows.
2.
From the taskbar, click on Start > Programs > MS-DOS Prompt.
3.
At the C:\WINDOWS > prompt, type
FDISK
.
4.
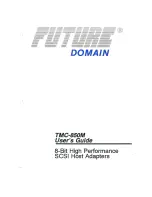
A message will appear stating, “Your computer has a disk larger than 512
MB;” press Enter
(Figure 5)
.
5.
From the
FDISK Options
screen, press 5, and then press Enter.
Tempo HD Integrated
Hard Drive/PCI Card
Ultra ATA cable
slave
single (or master*)
- jumpers
*jumpers
must
be set to the master setting when two drives connected
Figure 4
WARNING:
Hard drives attached to the Tempo HD will not appear under
My Computer, and can’t be used until they have been formatted; this
also applies to drives with data on them, previously used in other computers.
Please be aware that
formatting a drive erases any data present
.
Figure 5
Summary of Contents for TEMPO HD
Page 2: ......


