5
Quick Start Guide for Tempo Serial ATA
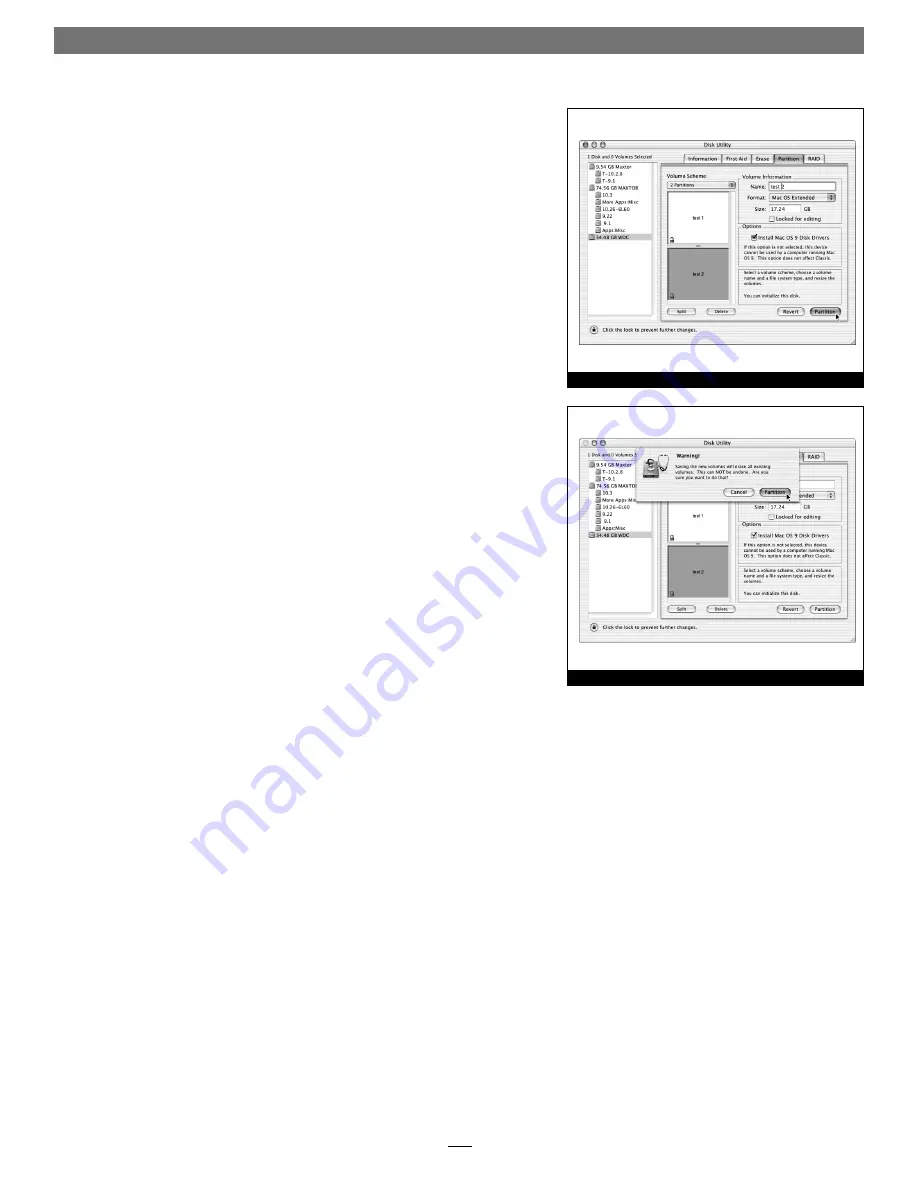
Figure 7
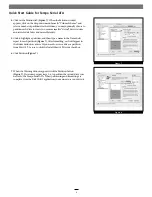
4.
Click on the Partition tab
(Figure 7)
. When the Partition window
appears, click on the drop down menu beneath “Volume Scheme:” and
select a number of partitions for the volume; you may optionally choose to
partition each drive to create two or more smaller “virtual” drives to store
and retrieve data faster and more effi ciently.
5.
Click to highlight a partition, and then type a name in the Name fi eld;
repeat for each partition
(Figure 7)
. After formatting, each will appear in
the Finder window as a drive. If you need to access a drive or partition
from Mac OS 9, be sure to click the Install Mac OS 9 Drivers checkbox.
6.
Click Partition
(Figure 7)
.
7.
When the Warning window appears, click the Partition button
(Figure 7)
. If necessary, repeat steps 3–6 to partition the second drive con-
nected to the Tempo Serial ATA. When partitioning and formatting are
complete, close the Disk Utility application; you can now use your drive(s).
Figure 8


